Save an infinite number of images under different lighting conditions with just ONE render? Make lighting animations from a single render? No extra render time? This is Multilight!
Maxwell Multilight is an oldie but a goodie and has proven to be a favorite feature of many. Multilight removes the need to re-render images when light changes are required. It allows you to change intensities of individual lights and multiple scene emitters during and after the rendering process (including Physical Sky and HDR Environment Lighting).
In this post we go through a Multilight breakdown and show a few examples of projects done by our talented customers that were created with Multilight.
It’s also worth noting that with the release of V3, Maxwell users can now take advantage of the Fast Multilight Preview, which enables the GPU to perform the slider adjustments interactively and instantly in the main render view (instead of in the small Preview window that was available in V2). Now you can get even more up close and personal with your projects – and fast.

The Fast Multilight Preview is disabled by default and has to be enabled manually in the Maxwell Preferences panel. To enable it, simply open Maxwell, and in the File>Preferences panel, enable the Fast Multilight Preview checkbox. Then enjoy! 🙂
Multilight How-to
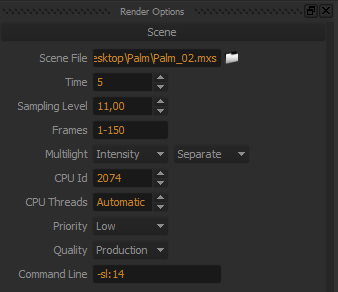
- Enable the Multilight feature in Render Options to get an independent slider to control each emitter, giving you precise control over your lighting mix. Launch your render.
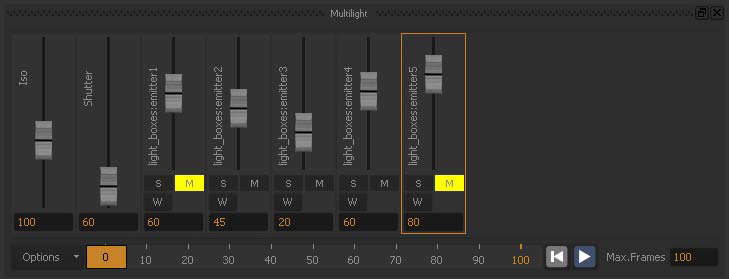
- You do not have to re-launch the render when a lamp needs some lighting adjustment. Instead you can just adjust its intensity (or intensity and color in the Color Multilight mode) by moving the slider up and down, to achieve the exact lighting mood you want – in real time.
- The slider units refer to the actual emitter units you used in your scene (Watts, Lumens, etc.).
- Emitters are separated per material, not per object, meaning that one hundred ceiling bulbs using the same emitter material will be controlled together with one single slider.
- Multilight doesn’t increase render time! As each emitter contribution is stored separately inside your MXI file (each emitter in a separate buffer), the more separate emitter materials you have in your scene, the larger the MXI file and the more RAM needed, but there is no impact on render time.
- Color Multilight enables you to edit the color of emitters in real time.
- The adjustments can be keyframed and animated like in some of the examples below. A sequence of images can be saved which can then be merged into a video using video editing software. Learn more.
- Make adjustments during the render or even after the render has stopped. As the lighting information is being stored separately inside the MXI file, as long as you preserve the MXI file, you will be able to open that MXI file in Maxwell, re-adjust the lights as far you wish, and save the new adjusted image. For example you can export a day and night time image from the same render, simply by muting the Physical Sky slider.
- Export images of individual lights. Multilight can even export your render as individual emitters (one independent tiff, tga, jpg… per each emitter) for post production purposes, or saving only the composed render. To do this, simply choose between the Separated or Composite mode in the Render Options (Multilight section) before starting the render.
- Apply changes back to the scene. After adjusting the light intensities using Multilight, you can revert those new values back to the scene, preserving those new values for future renders.
Curse Studio – Jewelry & Product Design
Here is why Dominik Dammelhart of Curse Studio is a Multilight fan:
Animations: With Multilight you can render out an animation without really having an animation prepared. Just by turning up the lights one after another gives you a really nice video without actually having done much.
Easy: Even if you are not a good lighting artist or if you are completely new to lighting anyway it’s very easy with this feature to adjust the light afterwards to get the whole feeling of the picture right.
Time-saver: It definitely saves time and sometimes it will save you a lot of test rendering. You can just set up white lights in the scene and then adjust the mood later on and of course the intensity. So this tool makes it really easy to handle a lot of different lighting situations in a very quick and easy way.
Here is an extra Maxwell & Cinema 4D making-of with Multilight by Dominik:
Pedro Conti – Animated Selfie 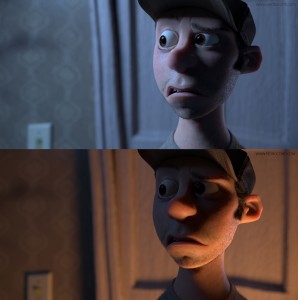
Pedro Conti also uses the Multilight feature and here you can see his awesome “selfie”!
Maxwell is the best render engine I’ve worked on. Going for Maxwell was the same feeling I had when I moved from polymodeling to sculpting softwares. Things just flow! 🙂
Multilight for look development: The feature is really helpful because you can see in real time the shaders behaving in different lights.
Marcin Jastrzębski – ArchiViz – House O
Marcin of Nebula-Grafika did a great project and made good use of Multilight for it. Read on 🙂
- Why do you use the Multilight feature? How does it help in your workflow?
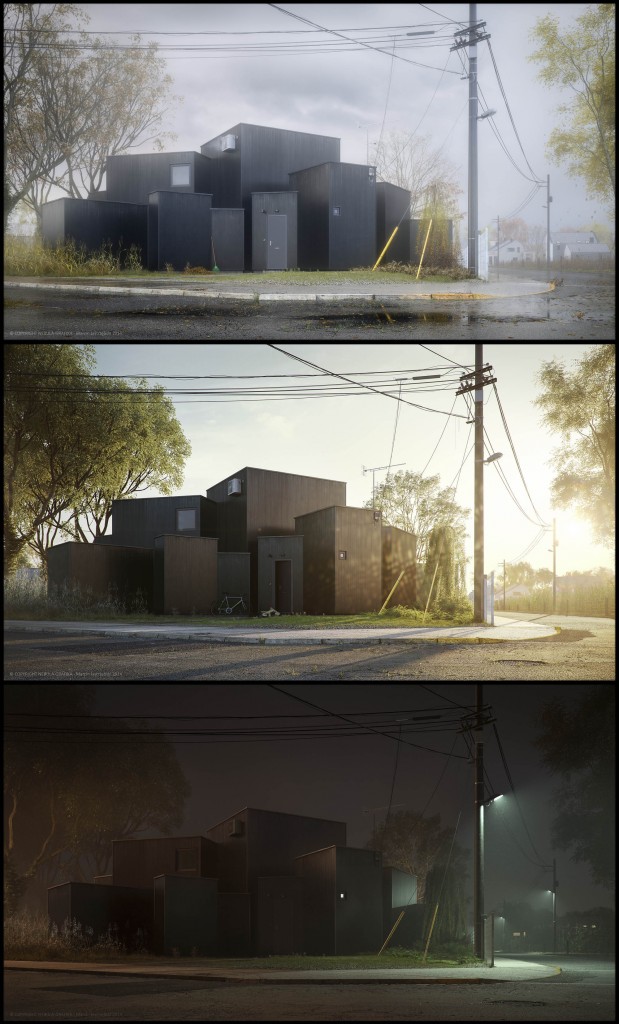
I like predicting and realising the desired effect in my work. I also like improvising and discovering new opportunities in particular moments. In case of light setup which is a crucial issue in my work, the Multilight feature allows me to precisely define the final effect, while at the same time allows room for creative improvisation.
- Do you often have projects that require the use of Multilight?
I think that every night scene for example requires Multilight but I use this feature for almost every type of project. It makes my work very comfortable because I can make a lot of light variations from one render to find the best settings or make ready for use a few final renders with different light mood. Sometimes I return to a finished render after a long time to make additional light variation if I need.
- Does it save you time and how?
As I mentioned before, in testing a light balance and color I don’t have to make a render again during introducing modifications.
Another advantage is the fact that with the use of Multilight I can correct possible light and camera settings errors in my final render if I miss something.
- Is it more comfortable adjusting the intensities with Multilight?
Yes. Slider system works very smoothly and precisely what together with excellent unbiased algorithms cause that the light can be mixed. Their mutual influence gives us amazing effects which we can controll.
- Does Color Multilight make easier adjusting the mood in a scene?
Of course. Even if we have wide experience in light editing we aren’t able to fully predict the final effect. We always somehow aim at it in hundred steps. By using Multilight, we can check out more possibilities, quickly and precisely improvise in real time.
You can watch his Multilight tutorial for a deeper insight into how he used this feature.
Pasquale Scionti – Interior Design
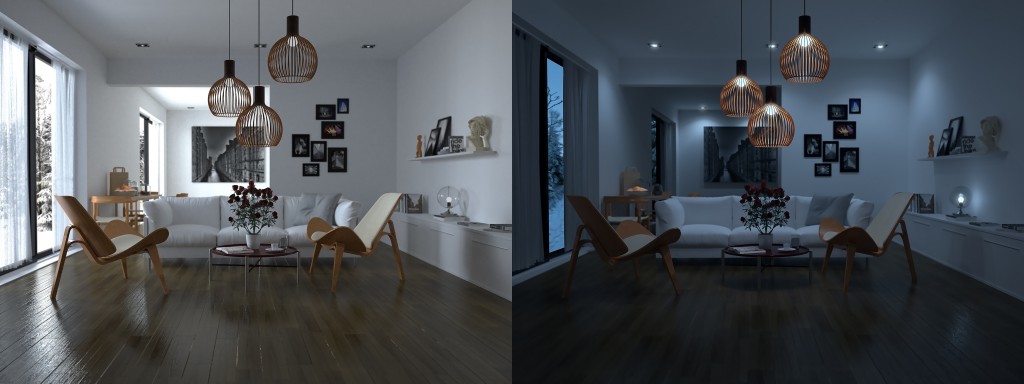
With the Multilight feature you can mix infinite variations of color lights to give the final project great realism. Two moods with only one interior render!
Day & Night Living Room by Pasquale of Scionti Design:
Victor Hernandez – Archviz Timelapse Multilight
One render, two images, two different moods! This is Victor´s entry for the SketchUp 3D challenge. Beautiful! Watch the timelapse video he did.
Rendertaxi – Interior Design with Multiple Lights
Rendertaxi created this video as a tribute to their first office in Barcelona. Enjoy the variety of lights added to one render with Multilight!
Here you can see the Gallery of even more Multilight projects!

