Hello again,
We are back with some beginner tips by Madrid-based artist and Maxwell Xpert David de las Casas of 3dcs studio. David will share with us some tips from his workflow for newcomers in the Maxwell community. Leave us your own tips in the comments! 🙂
 The Artist
David started working in the world of fine arts over twenty years ago. Later on he decided to swap the brushes for technology and become a 3D artist. Over the years, he has taken a passion for modelling and has been completely dedicated to the 3D world. David’s specialties are: modelling, texturing & lighting. He works in various sectors – animation, film, ArchViz, games and advertising. We leave the floor to David now! Muchas gracias 🙂
WORKFLOW
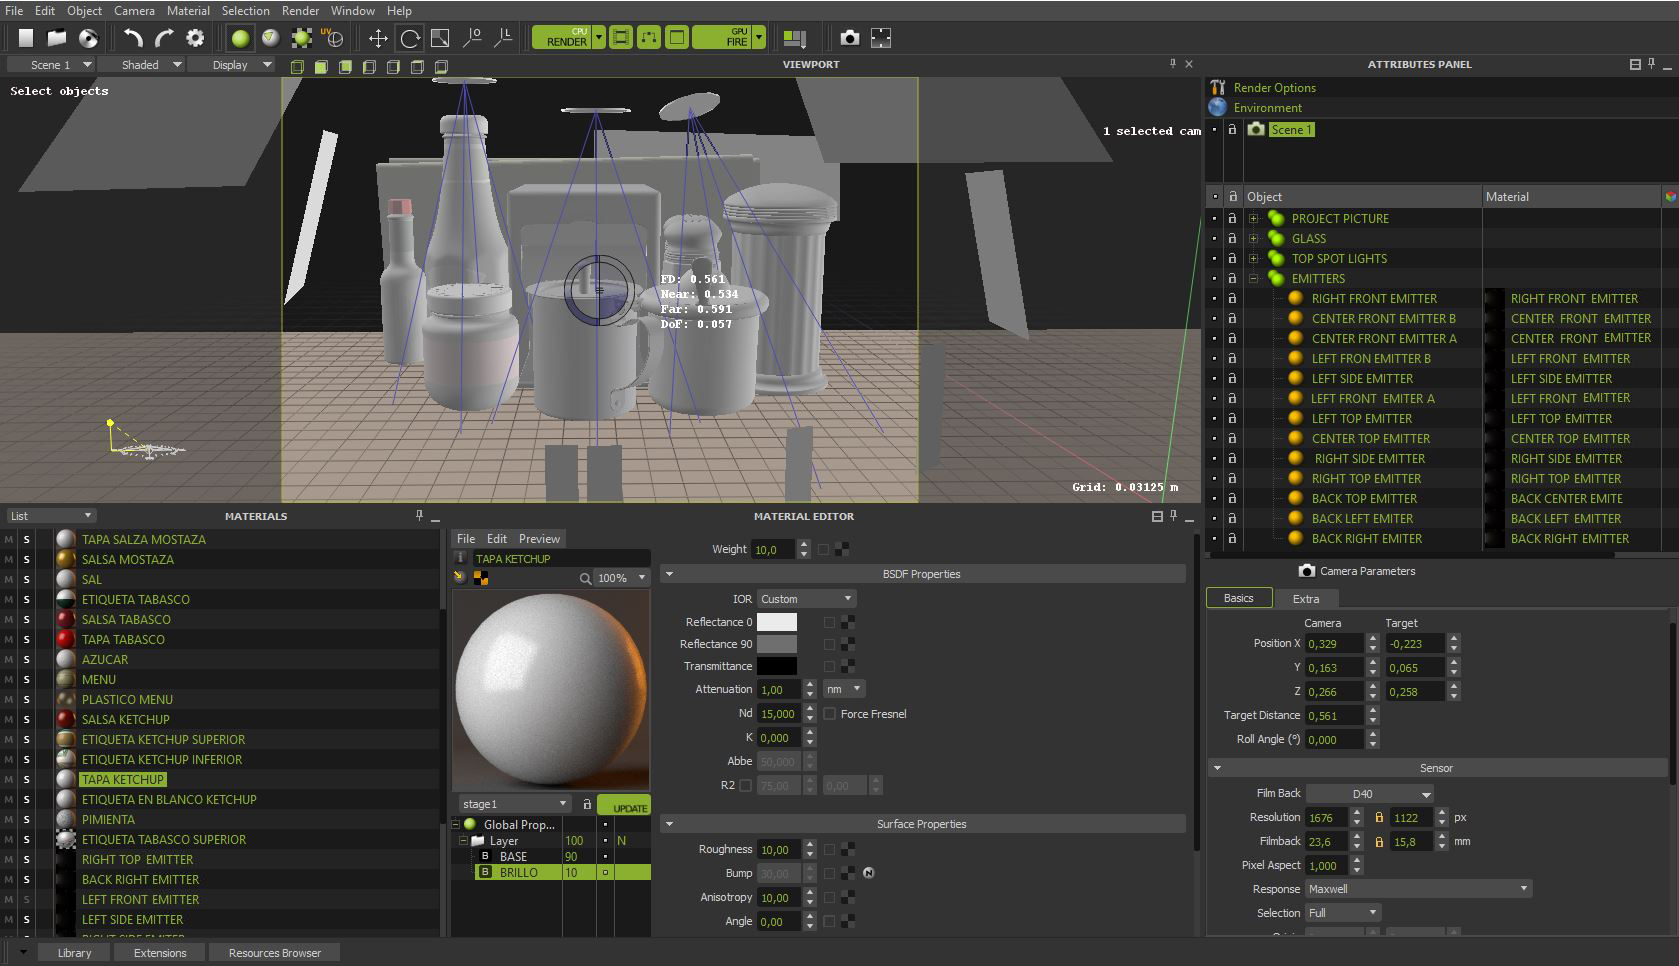
When I model in 3D and then render in Maxwell, perhaps I do things a little differently from other users, as I prefer to work on the scene or the project inside Maxwell | Studio. The plugins (Maxwell | SketchUp and | Maxwell | 3ds Max) I only use for testing purposes.
The final work I do with Studio because I have absolute control over all parameters of my 3D object, its textures and lighting, and also because I feel very comfortable with the Studio interface.
Polygons
Balanced 3D modeling, with the right number of polygons depending on the scene to be displayed is very important. The objects to be shown in the foreground must be well defined. On the contrary, the objects that are going to be shown in the background, should not be defined them too much in my opinion, so that the rendering is less difficult and time-consuming. If we are going to place the camera at different points in our scene, the polygonal objects must be evenly balanced. It will consume less resources by rendering 20 thousand polygons than 20 million.
Materials
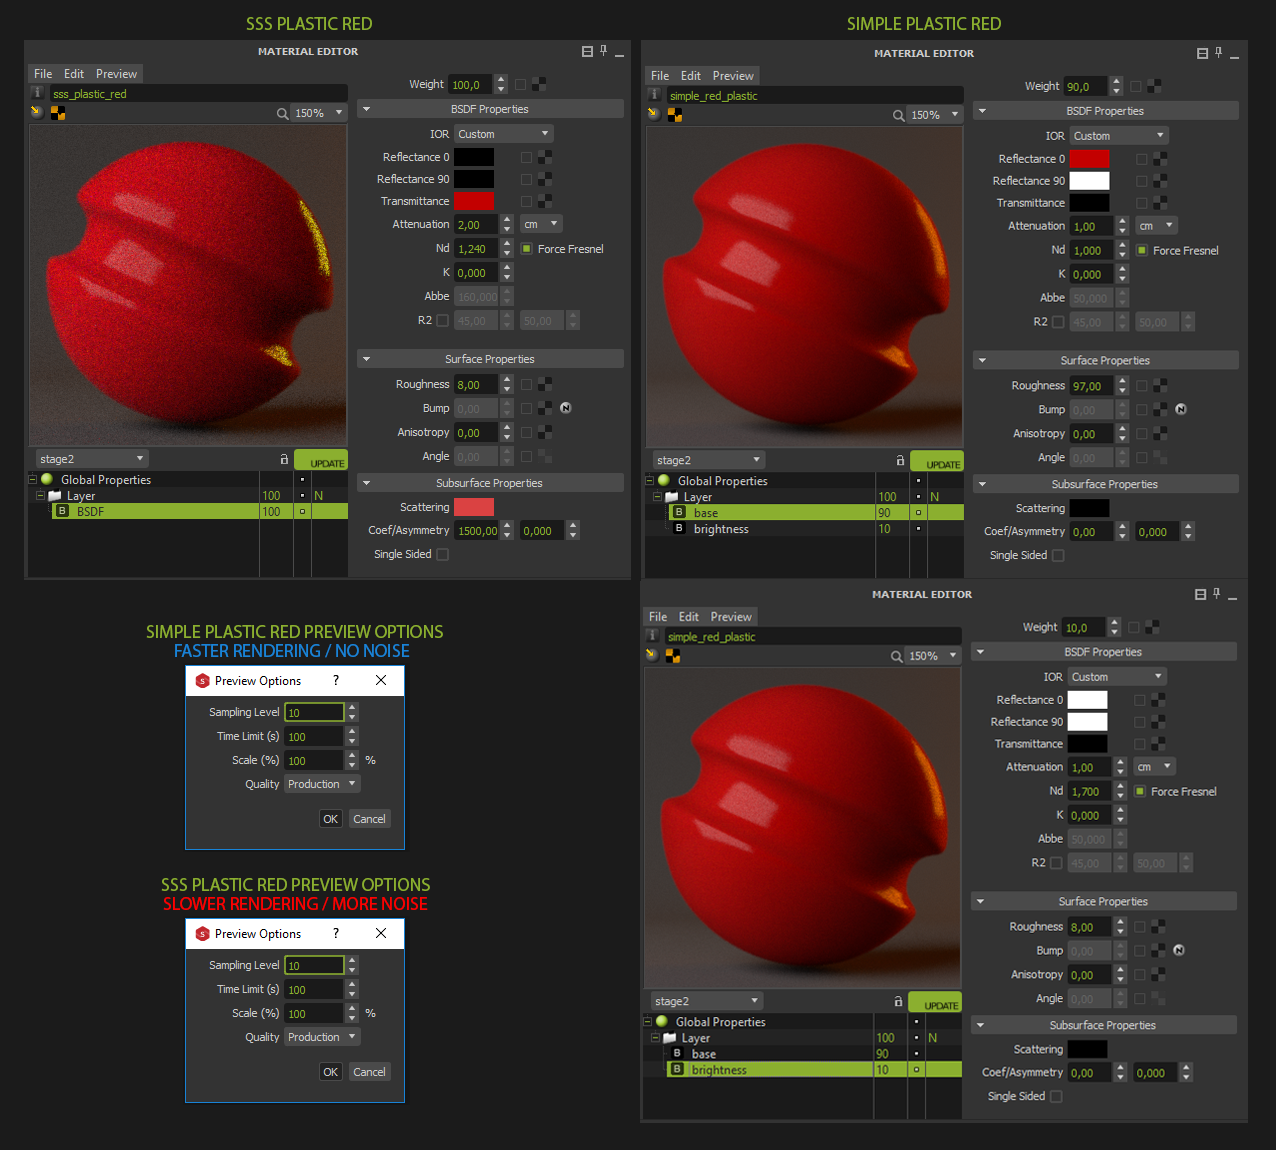
Be meticulous choosing materials and configuring these in the scene. I like simple materials, no more than two layers. I avoid as much as possible SSS materials and the excessive use of displacement unless necessary. A good bump map, well done and adapted to the object can be enough relieve an object.
In general, avoid using too sophisticated materials unless necessary. You will have shorter render times and a faster scene without compromising the quality of your work.
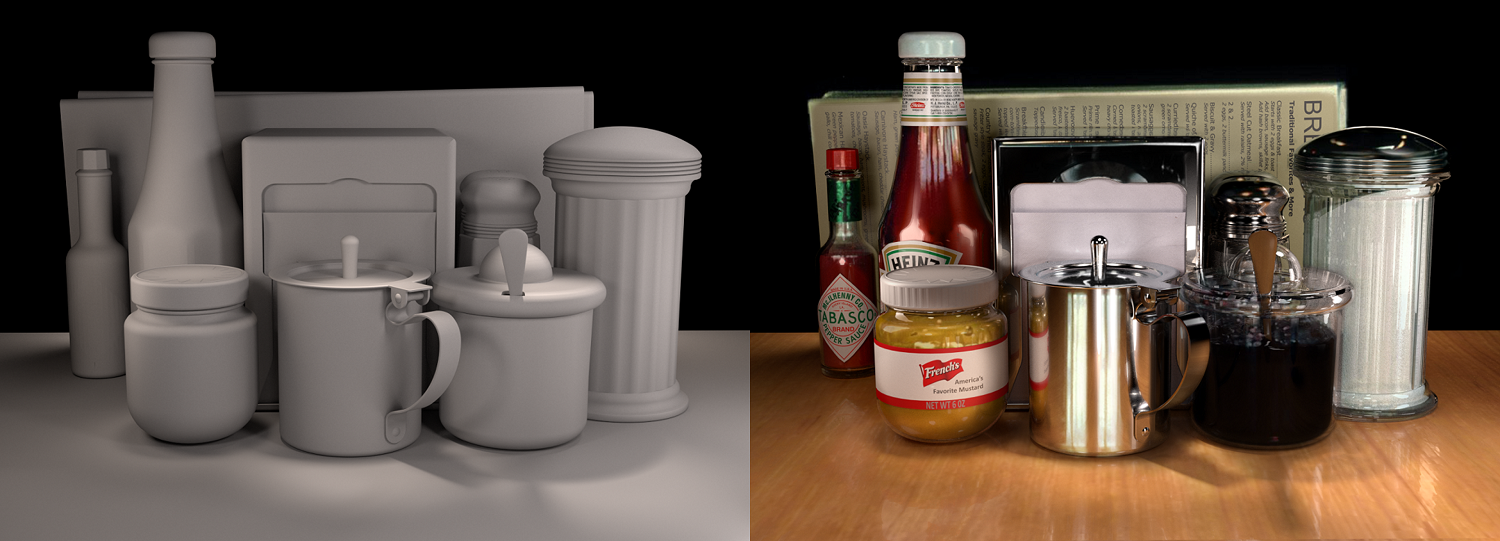
For example, I would only use an SSS material if I have a 3D final product whose polygonal load is not high and there are not too many objects and materials in it. For instance a jar of honey or a bottle of orange juice for an advertisement. In that specific scene I would use SSS materials, because the rendering is not going to be complicated. However, if the orange juice and the jar of honey are in an interior design kitchen scene, and the idea is to show the kitchen design with its furniture, appliances, tiles, pavement, etc. in detail; then it would not make sense to use a SSS material for the honey or orange juice. These objects are not the protagonists of the scene and we can use other simpler materials for them and in this way we will not unnecessarily have excessively long render times.
Here is an example of a plastic SSS and the same plastic created with a faster rendering material.
 Lighting
Do a detailed study of light! For me the correct lighting of the scene is the key for success of a good render and this is in what I focus on most. We can make some small mistakes with the choice of materials, we can not achieve the right balance of the number of polygons that make up our 3D object, but we can never fail with the lighting.
If you use Maxwell to render the scene, this is because the lighting is essential for your project and so you should make good use of Maxwell’s tools to give us hyperrealistic lighting.
Here are 3 basic lighting tips:
- Do not use three-dimensional objects with too many polygons as emitters
- Place scenes as emitters in strategic places of the scene to create environments, subtract noise and shorten render times … obviously hide these emitters from the camera if you do not want them to be seen, for that Maxwell offers a good setting.
- Correct camera setup: ISO, Shutter and Fstop.
Postproduction
If Maxwell offers us plugins for Photoshop, After Effects and Nuke, why not use them? With the post-production we will be able to polish those details that will make our scene even better if possible.
Work Organization
And last but not least (I would say that this is essential) – organization. It helps to know beforehand what we would like our scene to display. Collect information about the object to be designed, study the materials of that object and how the light should behave when it affects these materials. Observe the real world and how light behaves in it.
Maxwell gives us the opportunity to represent light as life itself does, so in our day-to-day life we have the best tutorial to see how materials and light interact.
And finally, organize perfectly the PC for the correct planning for materials, objects etc. Modeling is a meticulous job and you have to start by being disciplined, organized and observant.