Hi guys!
If you remember our very first post on the blog, then you would have seen the Maxwell Render Development team. Whilst some of our very talented colleagues have moved on, we have also welcomed some wonderful new additions! Not least of these has been Matteo Tibaldo, who for the last two months has been doing an internship with us. In this blogpost Matteo will tell you about his first projects with Maxwell. Grazie per tutto, Matteo 🙂
 My name is Matteo Tibaldo and I am a student of M.A.D.I. (Post Graduate Master Course in Digital Architecture) at University IUAV, Venice, Italy.
For the past two months I have been doing an Internship at Next Limit Technologies to learn Maxwell Render and its application in architectural visualization.
In this post I’m going to talk about my experience learning Maxwell, and I will share some tips and general rules that I found useful for creating photorealistic images in a short space of time. To illustrate this I will post some images produced during my learning curve, and I’ll explain how I made certain parts.

WORKFLOW
I usually work with 3ds Max for modeling, so I used it with the Maxwell plug-in. This workflow is pretty good, because you can control the modeling, the materials and the rendering settings in the same application.
RENDER SETTINGS
Actually there aren’t many settings to manage in Maxwell.
For most projects what you need to set is the render time, the sampling level (SL), where to save the output and, of course, the environment lighting settings.

LIGHTING
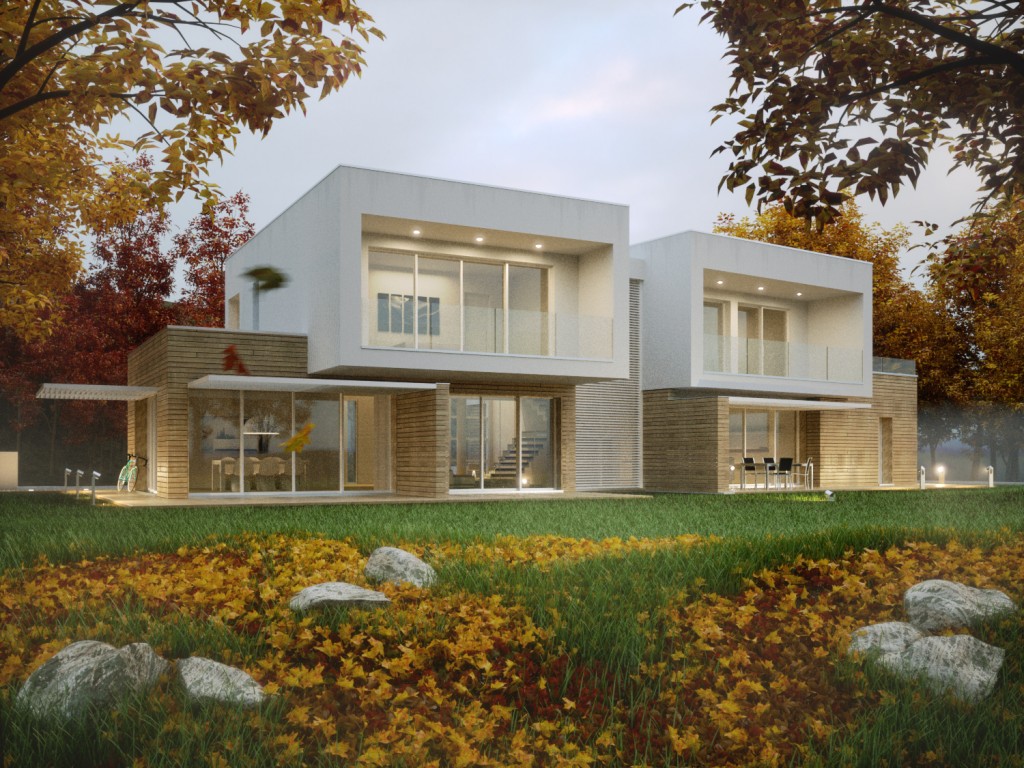
In terms of environment lighting, the easiest way to get a photorealistic image is to use Image Based Lighting.
You can use either an HDR or an EXR image. With this method it is easy to get realistic lighting and the reflective materials work better. I believe that the lighting is the most interesting part of the work, and it is also the biggest challenge to achieving a quality render.
MATERIALS
The easiest way to create a good material is to use the Material Assistants. There you only have to worry about the key parameters (pre-selected for you) to get the material you want. This saves you a lot of time in your workflow!


It is possible to switch to the classical layered material interface at any time, in order to have more control over all of the parameters and to customize the material. To create the sub-surface scattering material in the scene above I started with the Material Assistant and then I reset some parameters to create different translucency of the vases’ material.
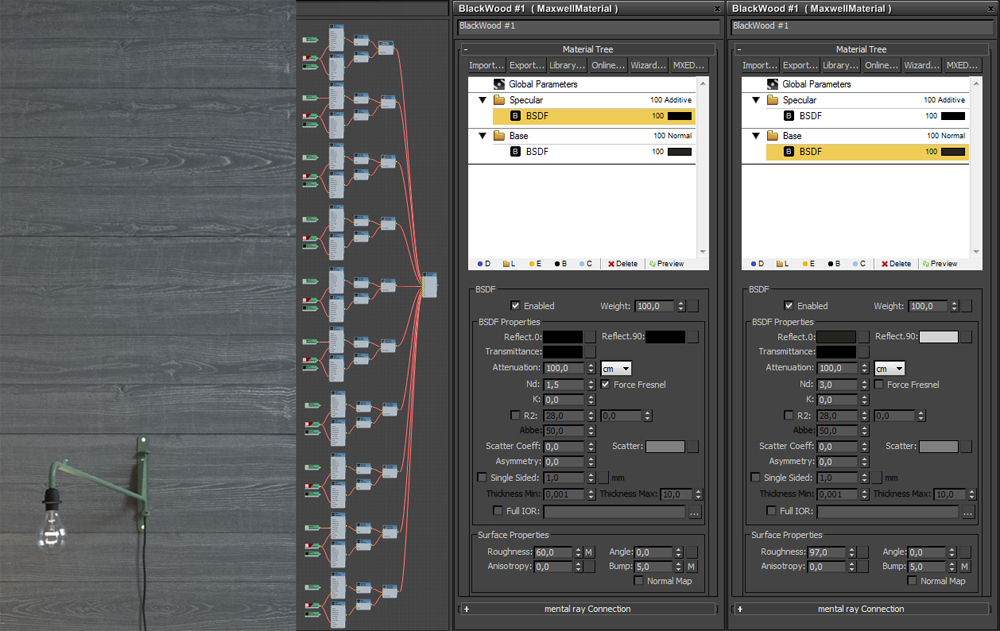
For the wood wall of the Interior scene, I created the tiles using CGSource’s Floor Generator script. This script generates tiles with different material ID’s, so I made a number of different textures for the wood’s reflections. Each texture was then plugged into 10 different Maxwell Render materials. These were plugged into a 3ds Max Multi/Sub-Object material, which was assigned to the wall object. Every material is very simple: a double layer with textures only for the roughness in the specular layer and for the bump in both layers.
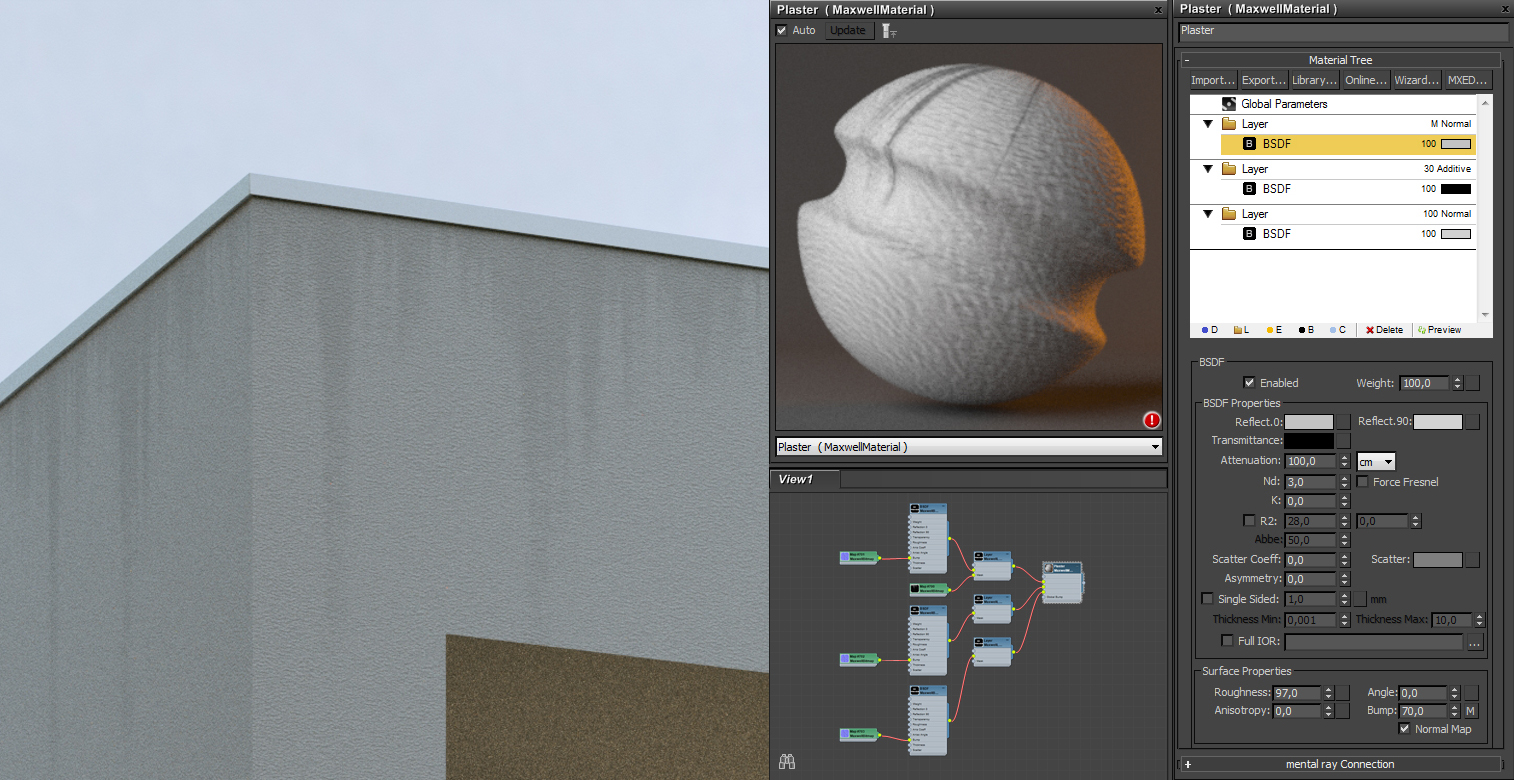
Architectural materials very often are not perfect and clean. Every building in the real world is subject to weather conditions and so the materials get dirty with moisture stains, mould etc. In the case shown above I found it useful to put the dirt’s BSDF in a different layer in normal mode and use an opacity mask.
EXTENSIONS
In Maxwell Render there are some really useful extensions that allow you to create grass, scattered objects, water, fog, smoke etc.
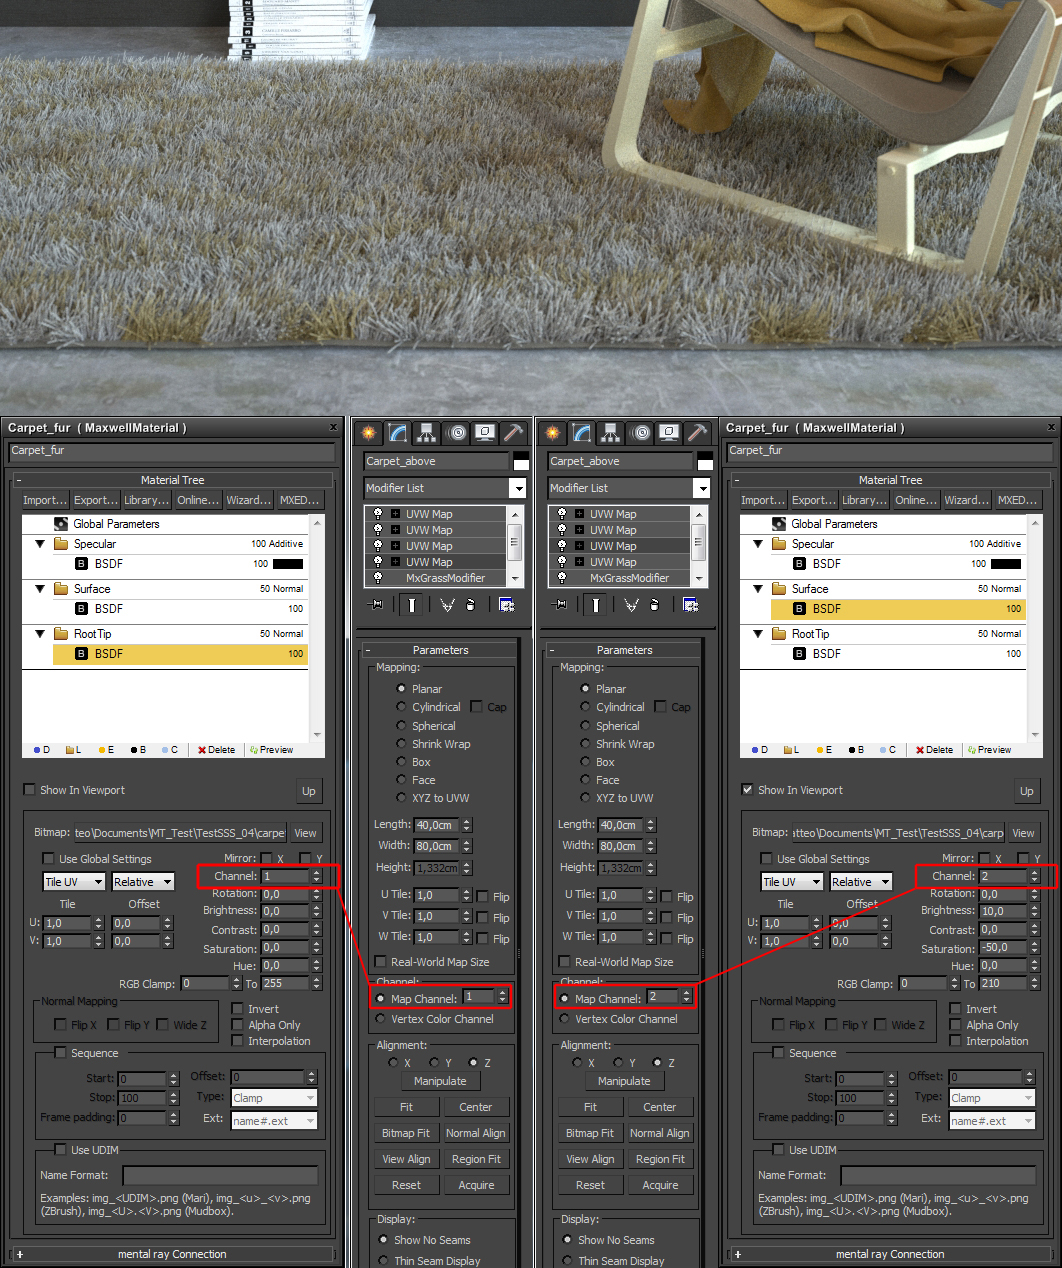
Maxwell Grass is useful not only to create grass. With this extension it is possible to generate other objects such as the furry carpet in this interior scene. You can play with maps in different channels to get variations in terms of density, length, bending, color etc. of the blade of grass/carpet.
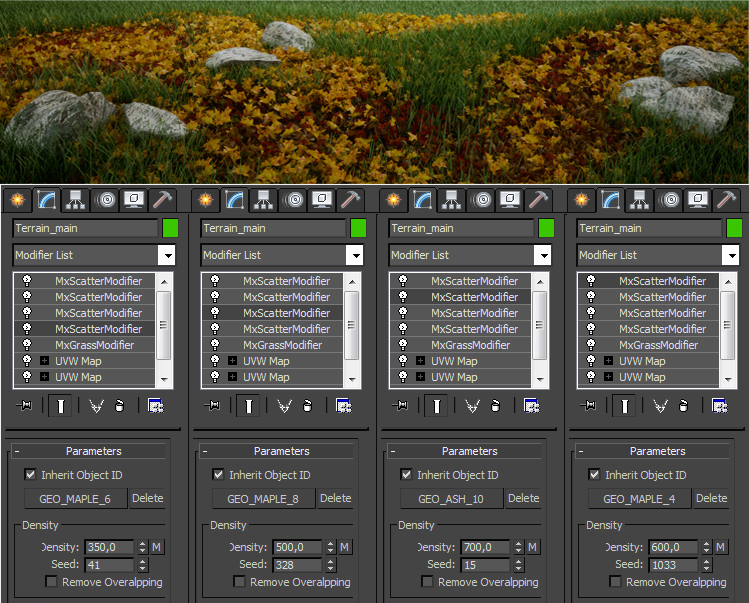
With Maxwell Scatter it is easy to distribute objects such as the foliage shown in the image above. In a similar way to the Grass feature, you can manage the distribution of the object with maps, or scatter diverse objects in the same area simply by adding a scatterer modifier for every object to distribute on the same mesh.
Maxwell Volumetrics helps you produce fog to add realistic or dramatic effects to the scene. You can also add this modifier to a particle system for instance to simulate smoke.
POSTPRODUCTION
When the rendering is finished, you can work on the output in a very simple way.
You can retouch the exposure and manage the color grading simply by choosing between many presets that simulate the main film response, work with light temperature, tint, burn etc.
With Simulens it is very simple and fast to add realistic effects such as glare, god rays, fog and vignetting without reprocessing the image.
But the most interesting feature is Multilight. With it you can easily manage the intensity and colour of every single light in the scene.
In the same rendering you can get a night or a day scene in very little time, simply by handling some sliders! In the scenes at the top of the page, starting from the raw scene in the top-left, I played with color grading and with different light conditions. That was fun 🙂
To sum things up:
- Set the render time, the sampling level (SL), where to save the output and, the environment lighting settings.
- Use Image Based Lighting for photorealistic renders.
- Use the Material Assistants for easy quality materials.
- Use the extensions (Maxwell grass, Maxwell Scatter, Volumetrics) to make your life easier.
- Use Simulens to quickly add realistic effects without reprocessing the image.
- Play with Multilight! Adjust the intensity and colour of every single light in the scene.