 Hello everyone!
This week on the blog we have a first – our very first Brazilian Xpert Trainer (now working in Portugal)! Michael Marcondes is a self-taught artist in the field of Computer Graphics, working nationally and internationally as a Creative Director, Technical Artist and Art Director for over 15 years. His expertise ranges from Virtual Photography, 3D Productions for TV and Cinema to Product Viz and High-End Training for the VFX Industry. Today he is the Head of Innovation and lead professor at the Motion Design Post Graduate program at ESAD, Portugal. He is also the founder of the employment technology initiatives, which in two years of existence has registered over 300 job offers in an innovative new platform inspired by the needs of his own students.
Well done, Michael! And thank you for the Xpert tips from your workflow, that you can all read below.
First steps with Maxwell Render – V1
I started my career before the ages of Maxwell Render, when the render ecosystem was quite different and inefficient. My passion through the years has always been the intricate details that make an image appealing and captivating for the computer graphics aliens, who had no idea how that was done, but had an extraordinary reference point – the reality. Photo-realism was then the main objective and the search for a tool that comfortably dealt with that was on.
In the pre-Kickstarter era, Next Limit Technologies asked the courageous artists out there to look at their research and become a backer in a pre-alpha version to help bring it to life, with an almost blind acquisition with an attractive price tag. Without a doubt I jumped in as I did many times in my career with innovative technologies. It was exciting to see the results coming in daily on the forums and at the same time really upsetting to realize the tremendous amount of processing power it required. The Maxwell Render team kept their part of the deal and continually brought better and faster tools each year. I feel fortunate to be an active part of that journey.
The current version is just another galaxy away from the origin point. It is just so much faster, refined and efficient that feels like alien technology!
Professional History
I am from Curitiba, Brazil. I lived most of my life there, then moved to the Island of Florianopolis in Brazil, a beautiful place! Today I live in Porto, Portugal. In Curitiba I was a freelancer, for more than 10 years, mostly working on TV commercials and digital illustrations. Through the years I made several international connections and started offering my services across the USA and Canada. It was a professional adventure I might say!
At the Island I directed a team of brilliant artists. It was a phenomenal experience, not only for the task itself, but for the caliber of the artists. You can find out all the little details of my journey on my LinkedIn, but one thing I want to say here is the respect we have for the developers that create the technologies we enjoy. Without you guys, we would have nothing to play with! Thanks!
The Maxwell Experience
When you come across innovation, there is some sort of discomfort mixed with excitement on the first encounter. It attacks our “zen mode” and our capacity to be content with reality. With Maxwell Render it was just like that, a slap in the face saying: Wake up! The future is here!
The entire dialog about render engines had changed forever. I guess the most fun I had at the time was translating photography straight to the render arena, with all the positive and negative aspects that come with it. This is what I like most about Maxwell, how faithful it is to photography and I feel you get the most out of it when you get closer to real life approaches.
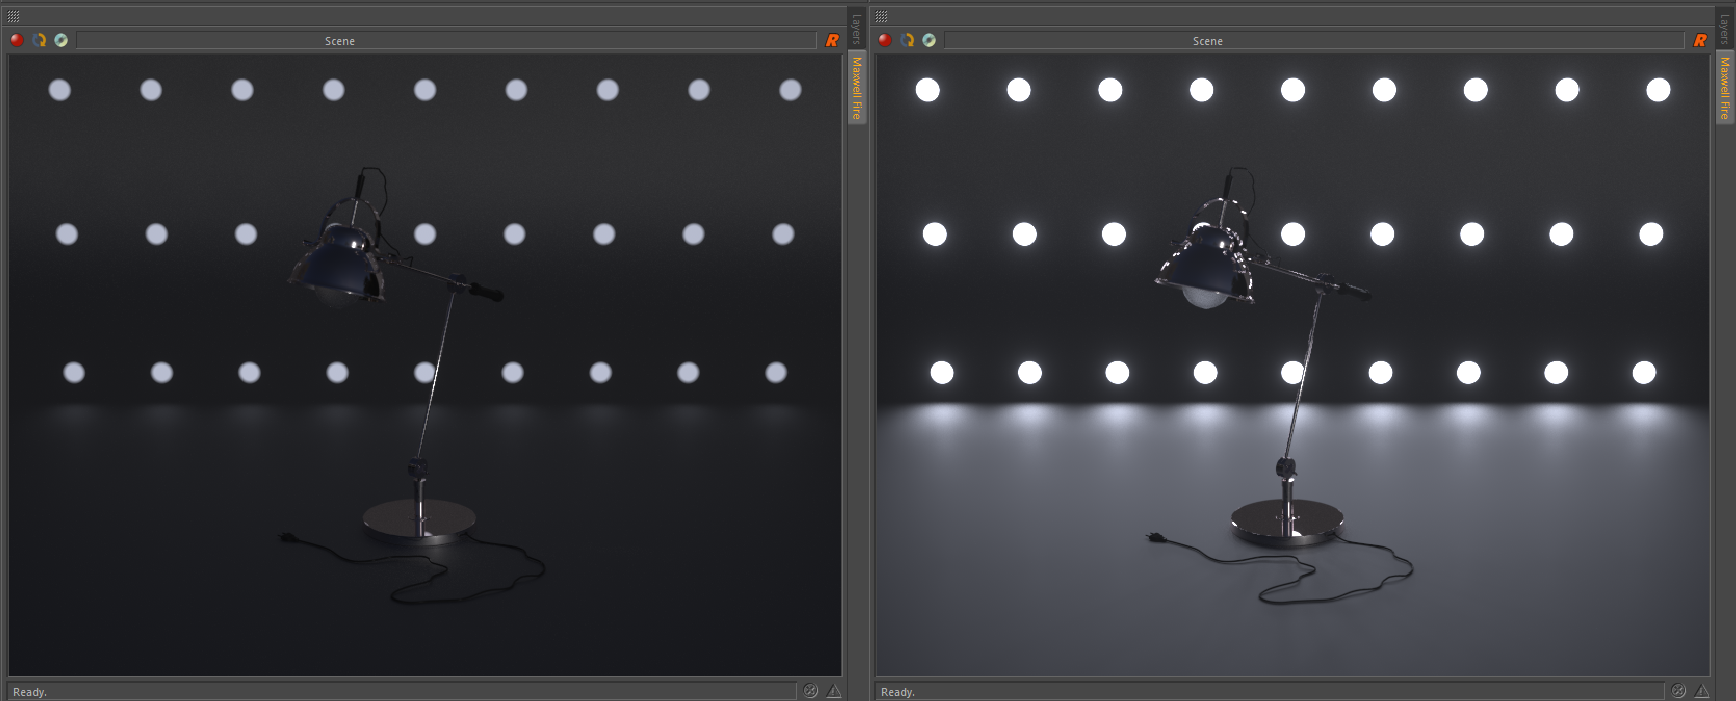
Lighting Tips
With time I came to realize that the most simple rule of keeping it real was as important as everything else. What this means in a Maxwell world is that your lights must follow certain rules.
It never looks right, for instance, when you choose a light temperature that we only see with low intensity lights in real life on a strong light source. Our minds do not accept that reality. It’s all a subtle, unconscious agreement with the image.
Let’s just look back to the masters of photography and understand how they did their work. I use blockers, real object lights, real cones and elements to draw interesting shadows all the time as if I was about to light a real shot. The great thing about the digital procedure is that we can make them invisible to us and just enjoy the fruits of it.
Instead of cranking up your light strength when it’s all dark, bring another light source on the side, on top, etc. Think analog to solve your digital problems.
Modeling Tips
Maxwell Render interprets the scene with such high fidelity to reality that anything that wouldn’t work in real life won’t work there either.
If you put objects inside each other, they will look weird and fake and you might fall into the noise trap, with low performance.
I know it sounds silly, but most of the time we model our scenes without thinking about real world rules, which is a huge mistake when you want to achieve photorealistic results. Scale, precision and order in your scene is the golden rule of realism, but I am not talking about textures here, I am talking about scene management and 3D modeling strategies for a good rendering experience. It is incredibly hard to be aware of all that while being creative, but you need to be conscious about the objective the whole time. That is the only path for extraordinary results.

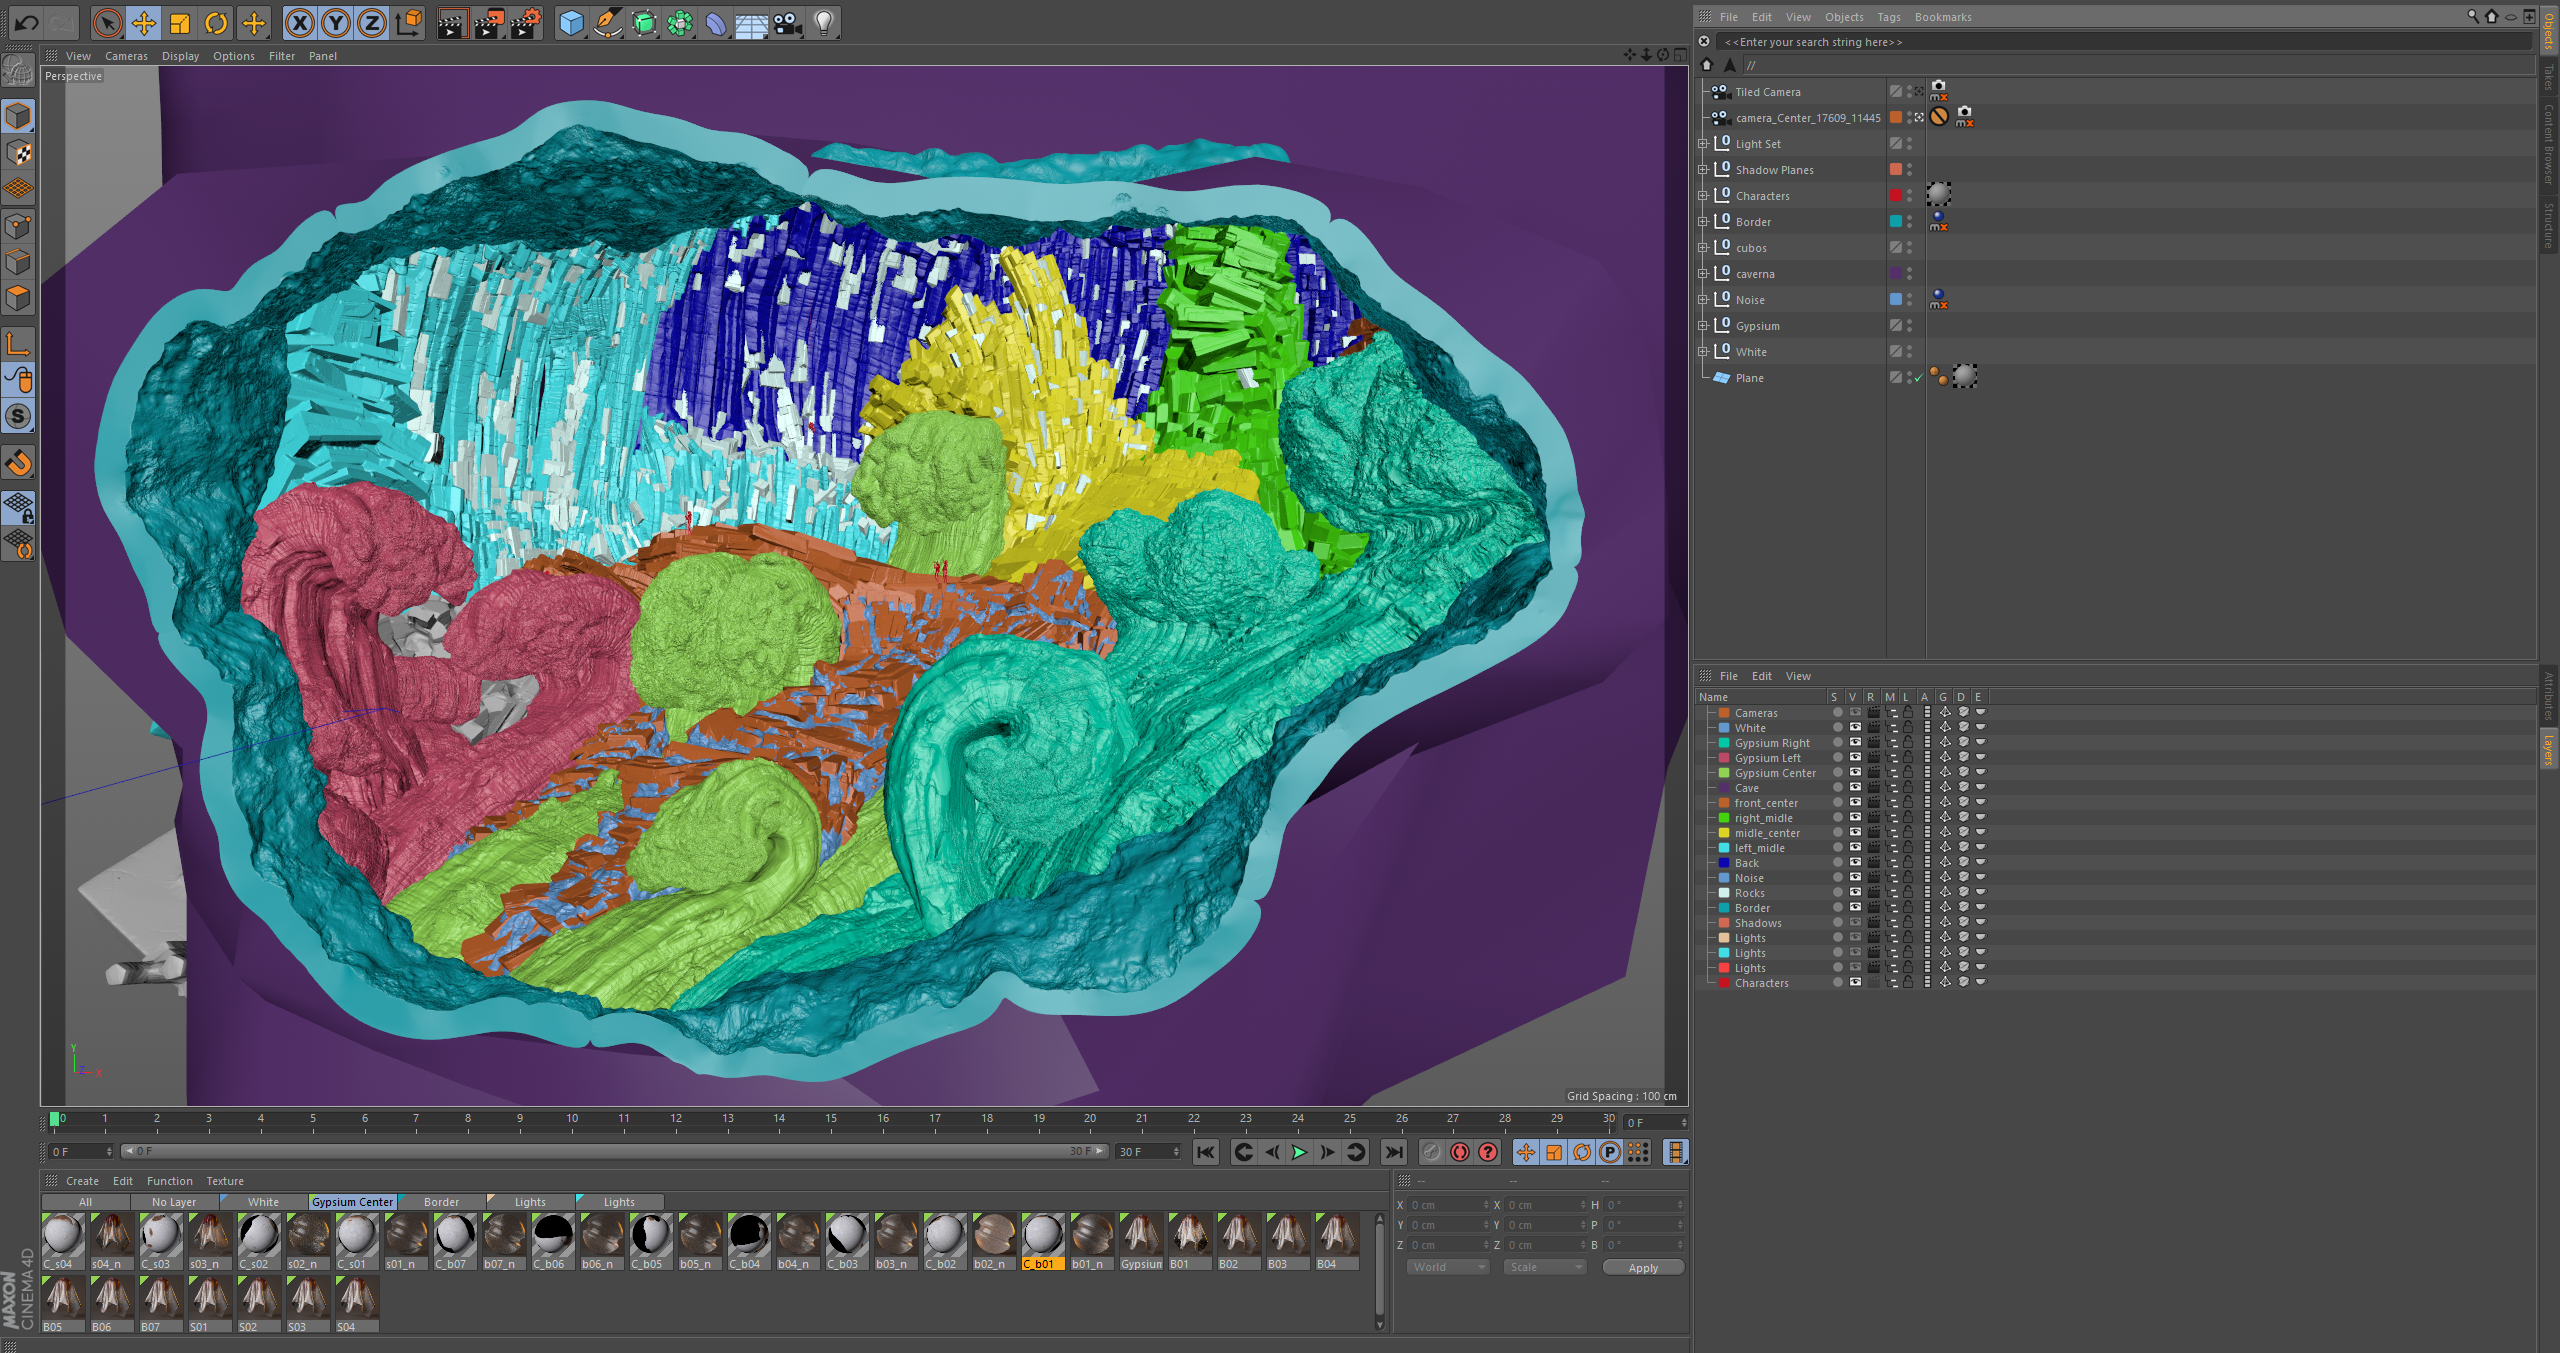
Memory Management
Voxelization is a very special moment in Maxwell Render, because it is when you know for a fact if it will make it or break it!
I had this huge shot with literally billions of stuff going on and incredibly complex ZBrush sculpting all over the place, with gazillions of instances for debris and such. My first thought was: let me just build some nice displacement maps and release some of the geometry pressure from this scene. To my surprise, it was the worst decision! One thing is rendering animation, when you have motion blur at your side and movement to distract the viewer but in this case, everything was perfectly sharp and visible on a still image with the size of a wall. The texture load was about 500GB of 4K and 8K textures plus the displacement maps per final image. So it quickly overwhelmed my 96GB of memory machine and our small renderfarm.
The only way out was releasing the memory needed to voxelize the shot and the way to achieve that was by bringing in real geometry instead of displacement maps. It was much lighter and much faster to calculate, even at a higher geometry density.
Another thing I noticed was the tremendous difference from a Linux infrastructure, it was overall 35% more efficient than anything else, specially in the way it handled memory. That became my system of choice for final renders. OpenSuse was the choice for the task and it was straightforward to set up everything.
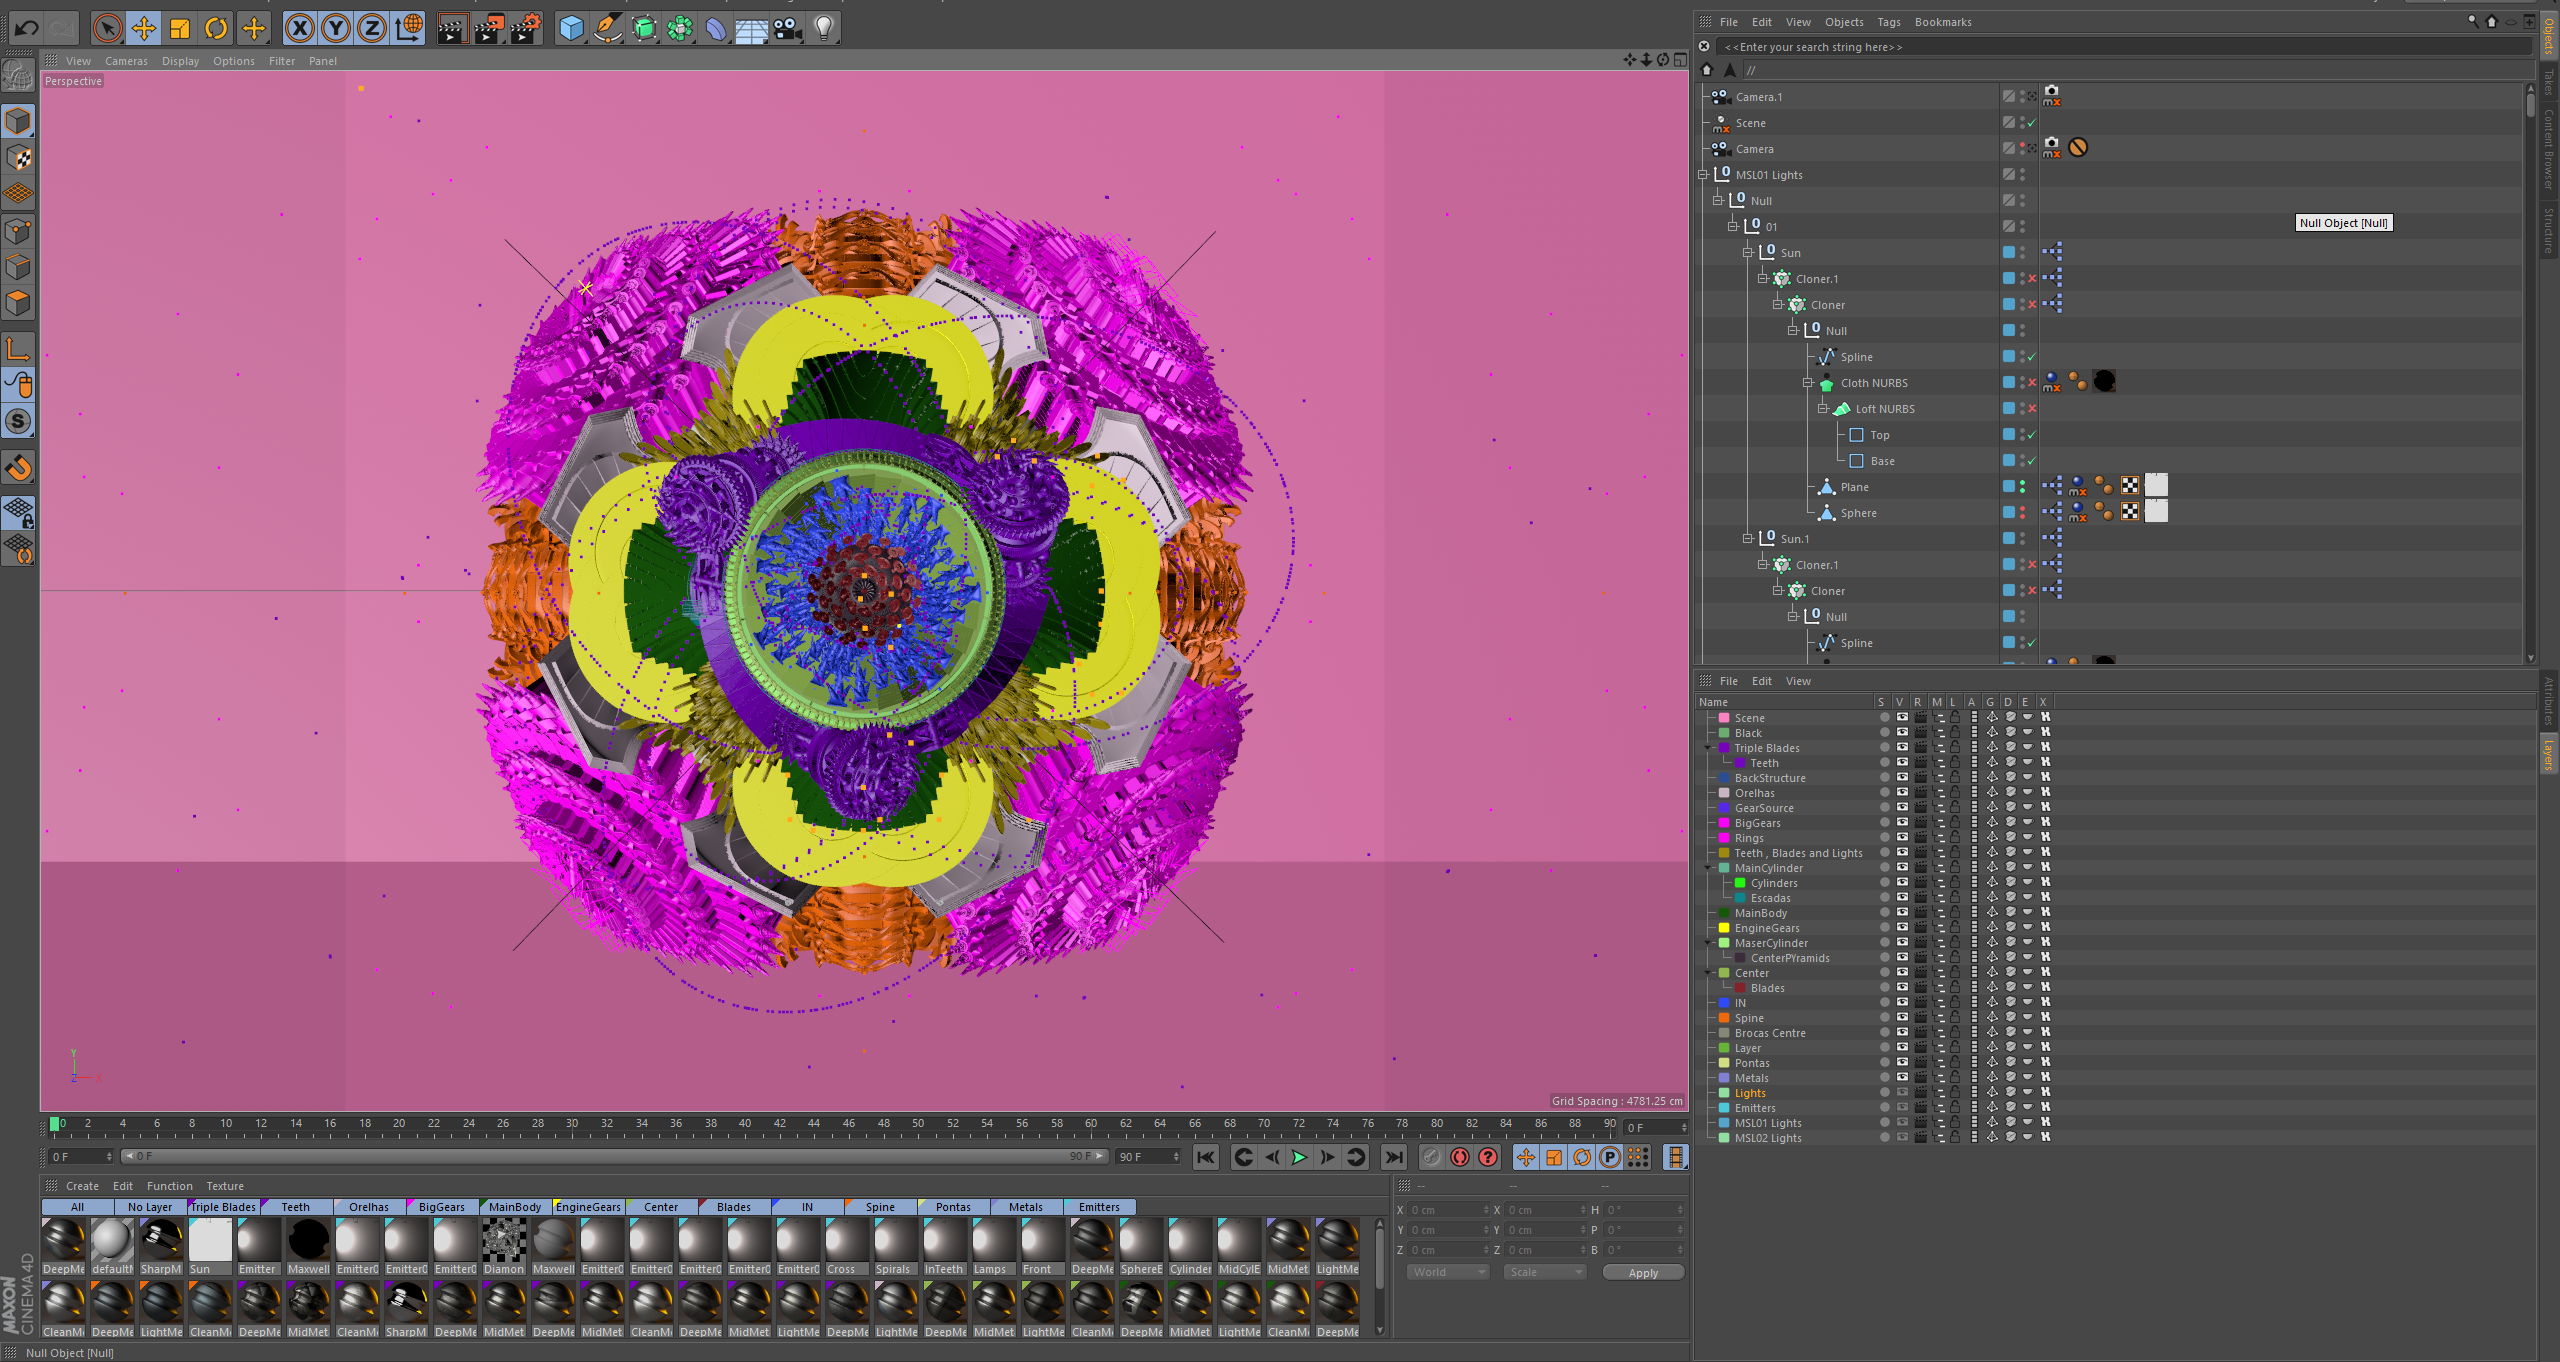
Multilight
Looking back, I can surely say that without Multilight this project would have never seen the light of day. The tremendous amount of data to be processed and the complexity of the lighting setup was just overwhelming to organize and explore. It literally brought another universe of possibilities for compositng and finding the mood of our scene and most of the time, I ended up discovering something about the process of compositng the Multilight results.
The way it allows you to explore the lights is extraordinarily organic, especially in a complex environment.
I like to tackle this by grouping by light temperature, intensity, size and position, so I usually isolate regions that are affected by lights and merge them to become one. If you ever do that, you will realize that the energy will be divided through the emitting geometries you merged, so there will be some adjustments there to equalize everything again. Think like this – if you have a light with an intensity of 1 and let’s say and you are merging 10 emitter objects, the same light material will be divided by 10 elements. Therefore to have the same power on each element as you had before, you need to multiply your emitter energy by 10. This is considering all elements are equal on every matter, but the rule changes with different element structures. Even though the strength would look wrong on the material and off reality, it will look right in the end.
Let’s sum up some of Michael’s valuable tips:
- Your lights must follow certain rules. Do not choose a light temperature that we only see with low intensity lights in real life on a strong light source.
- Use blockers, real object lights, real cones and elements to draw interesting shadows. Instead of cranking up your light strength when it’s all dark, bring another light source on the side, on top, etc.
- Scale, precision and order in your scene is the golden rule of realism.
- Use Multilight and group by light temperature, intensity, size and position.
- In terms of memory, preferably use Linux, as it is 35% more efficient.
Do not miss the chance to get more awesome tips and V3.2 feature presentations at next week´s FREE Webinar!
(Dec 1, 2015 at 16:00 CET)
Sign up here.