Hola!
It’s been a while but we’re back now with a fascinating and very original project focused on light, architecture and time. We proudly present to you Spanish artist Raúl Valverde and his case-study making-of! Muchas gracias, Raúl 🙂
The Artist
 I am a visual artist from Madrid and I create project-based artworks using diverse media, including installation, photography, social interventions and publications. I started with CGI in around 1993 (mostly 3D Studio and VistaPro). Render results were very different back then! I gradually focused less on technology and decided to collaborate with experts when required.
My more recent projects explore diverse themes such as the development of art institutions, the perception of time or my own political position as an artist. Since 2009, I have been based in New York City, where I teach contemporary art, digital media and video at the Fine Arts Department of The School of Visual Arts (SVA). Please visit my website www.valverderaul.com for more information.
The Museum project
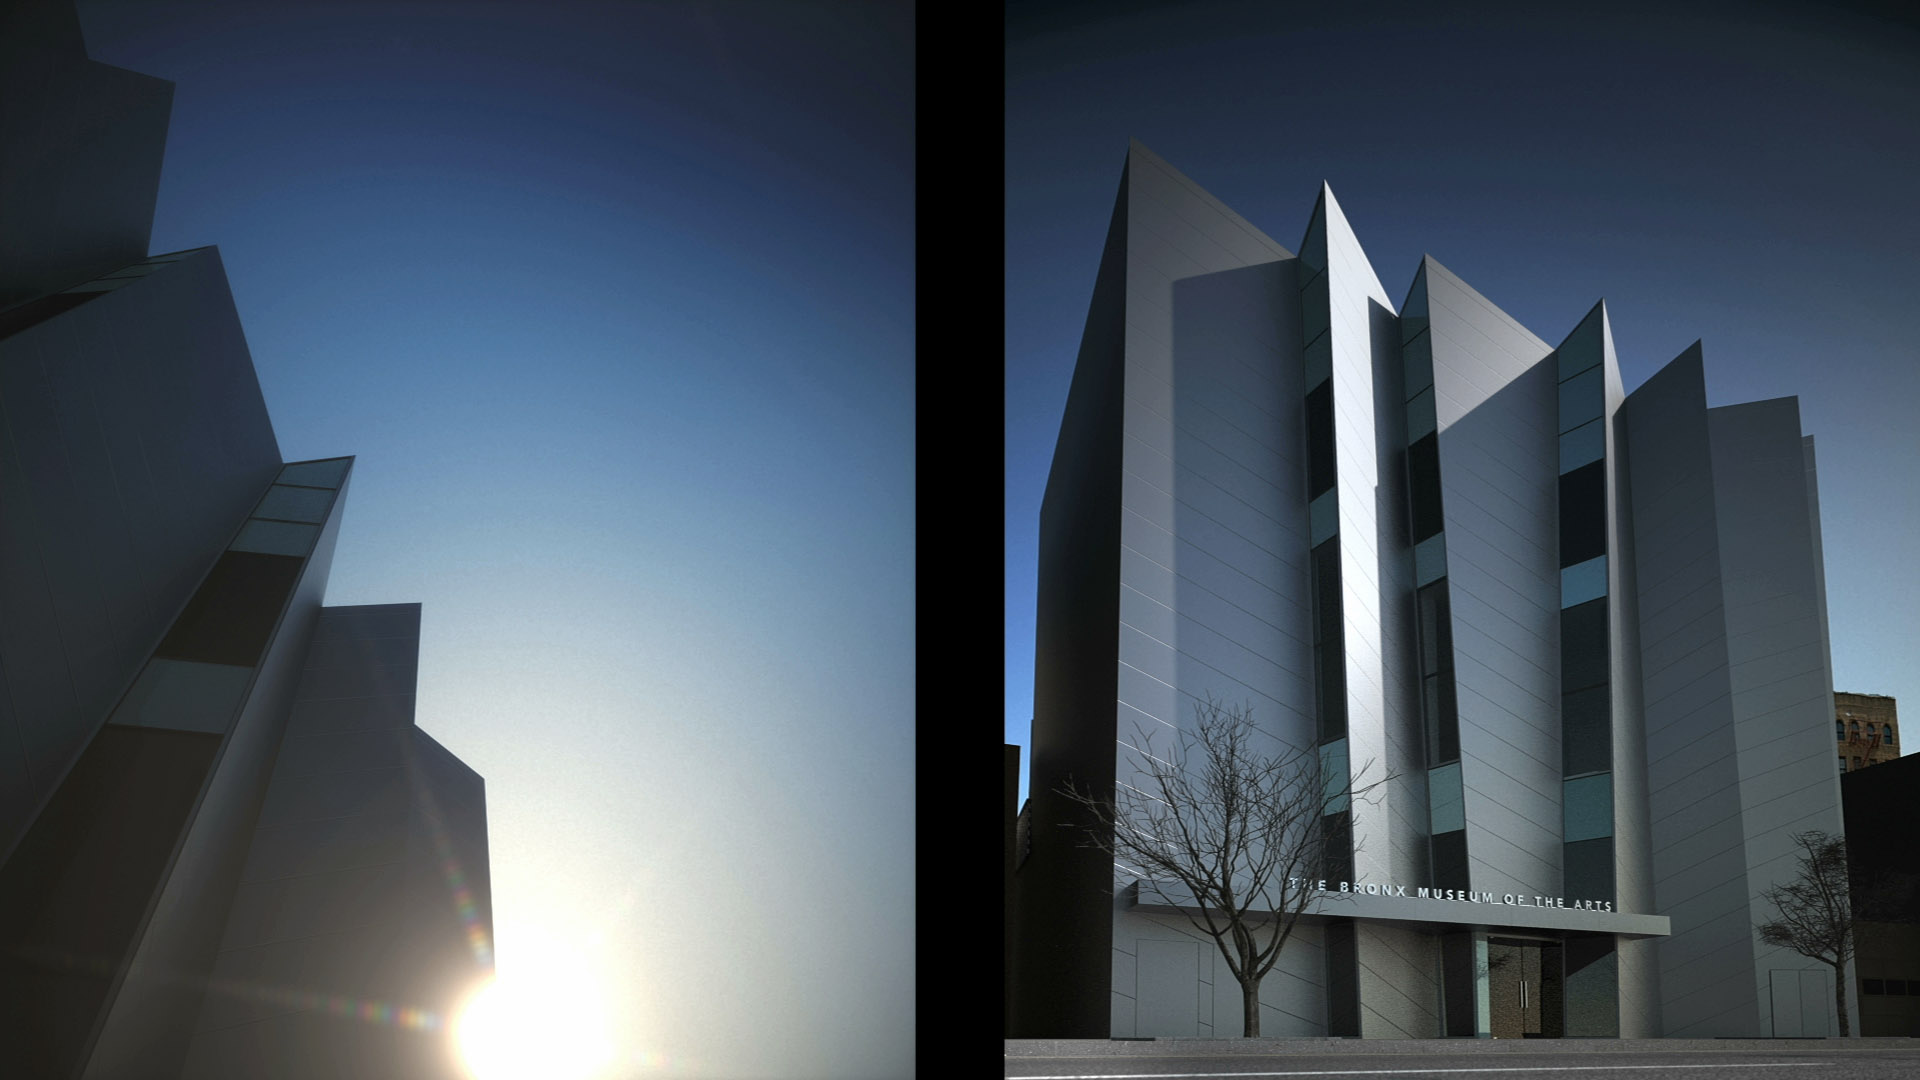
Sunlight entering the Bronx Museum on my 50th Birthday shows a time-lapse animation, from sunrise to sunset, of the sunlight entering The Bronx Museum of the Arts in New York on March 12, 2030.
The project is part of a series of video simulations I started when I turned 30 in 2010. At that time, I became interested in the day of my 50th birthday in connection with career projection and artistic maturity. I also think I will live for 100 years, so that will be the middle point in my life.
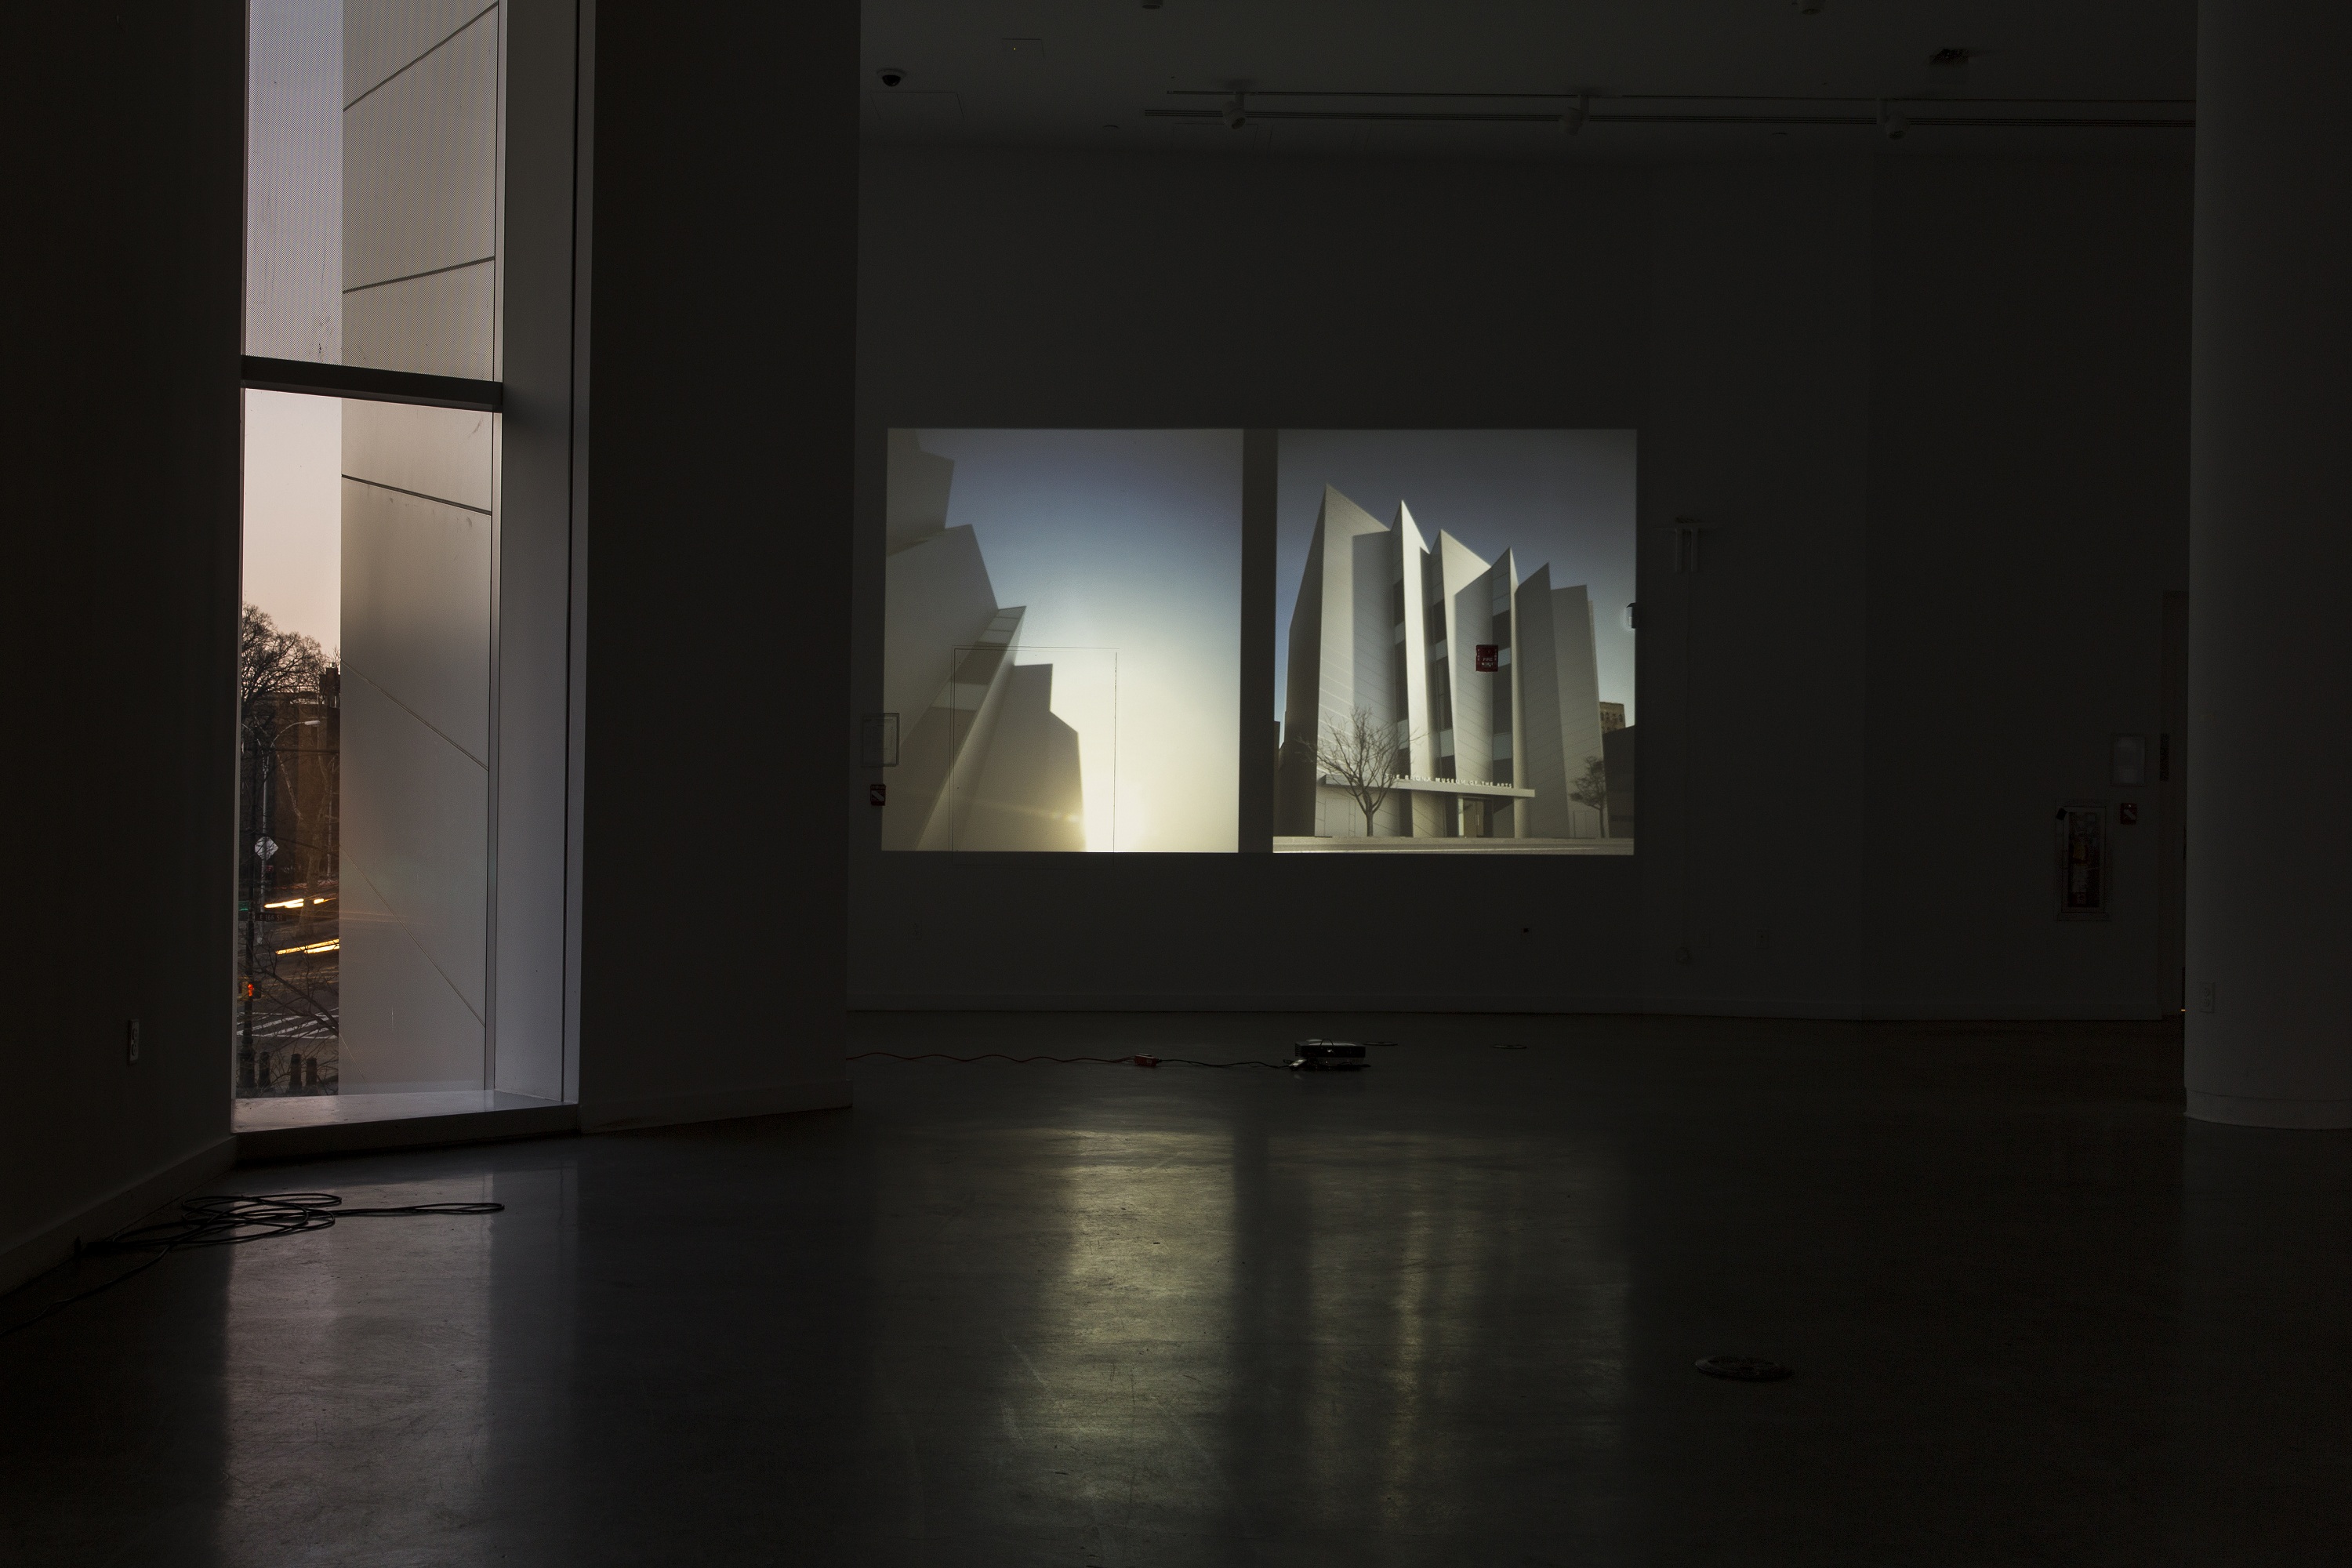
The project began as a way of anticipating realities, and at the same time shifting the perception of a particular space: the contemporary art museum. So far I have appropriated institutions that are personally relevant, including the former Museo Español de Arte Contemporáneo, the Pavilhão Ciccillo Matarazzo or The Museo Nacional Centro de Arte Reina Sofía (MNCARS). For each version, the video is presented as a large-scale projection inside the institution. In a way, visitors are located in the same space as the video, but perceive it in a future tense.
The objective was to construct an experience, based on the interaction between sunlight, architecture and time.
The work is somehow autobiographical, but viewers usually translate this specifically to their own circumstances. There are a number of artists and thinkers questioning the implications of simulations and computer-generated imagery in the context of visual studies and critical theory. In this case the project relates to the ability to visualize.
How is it different?
I am attracted to museum architecture as a category. Usually museums consider light in relation to their collections, and the visitor’s use of space.
Most likely they avoid direct sunlight entering into art galleries, but sometimes you find the gaps that make the whole structure visible. Most areas featured are transitional spaces or areas connected to the exterior of the building. In this particular video, there is one shot that includes the façade of the building, which is just part of a larger extension plan for the museum.
Why Maxwell Render?
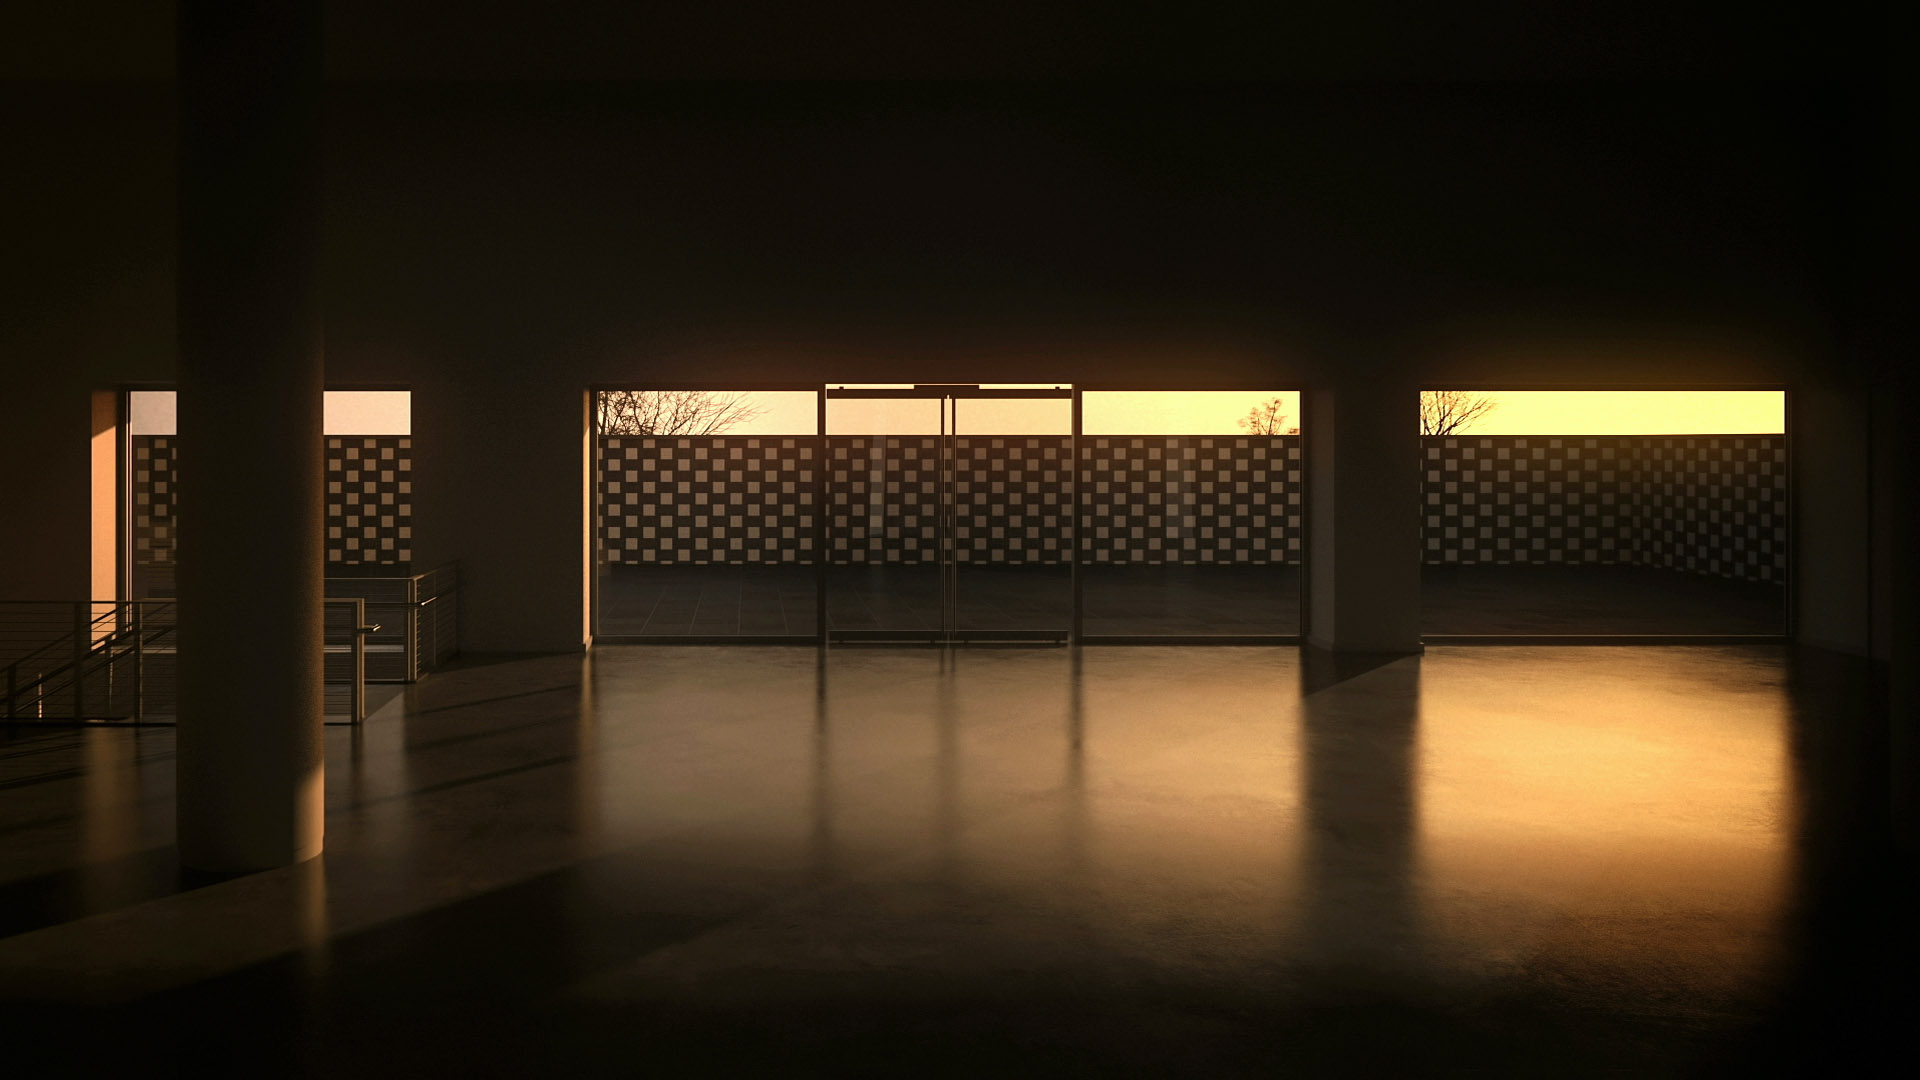
The use of Maxwell Render has been essential because I wanted to obtain an accurate image of an event that has not happened yet.
A video is usually about the past or the present, but CGI has already displaced that. For this video I collaborated with Javier Gonzalez, founder of the CGI company RenderPro based in Spain. We agreed on using Maxwell Render to design all materials, light environment and final render.
I started using Maxwell Render in around 2011 for another project from this series. For someone experienced in photography and video rather than CGI, Maxwell Render is very useful because it is based on real optical and physical parameters. In that sense it is pretty intuitive. Over the last few years I have met various developers of Maxwell Render. Everyone is so helpful and friendly! Especially Dario Lanza, and we have an ongoing conversation about how this technology is affecting camera-based photography!
Maxwell Render Physical Sky & Multilight
We used the Cinema 4D Maxwell Render plug-in linked to the Cinema 4D sun.
The standard Maxwell Physical Sky settings provide a very accurate result based on location and time. The pre-set works perfectly and is very easy to get the finishing look I was after.
Even when there is only one source of light – the Sun – Maxwell Render very cleverly divides the result in Sun and Physical Sky (atmosphere). We used Multilight to get two outputs and be able to control both parameters in post production.
Making-of
-
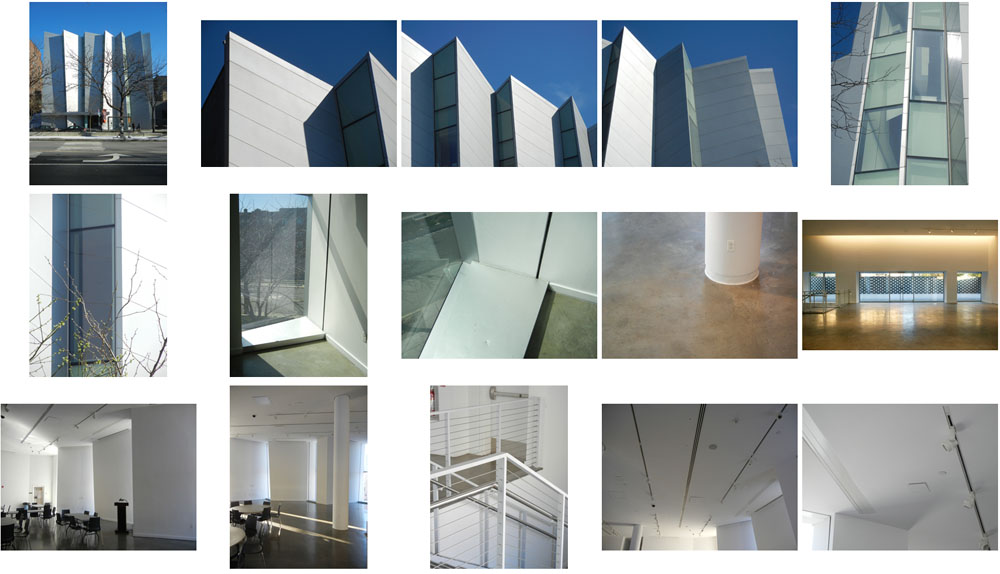
Photo documentation
Visiting the space multiple times helps you decide what areas and views are the most suitable for the video. I prefer to spend time walking and looking before photographing. Documentation of the space and materials is ideally done at different times during the day.
-
Light
 I use SunCalc for a preliminary study of geo-position and sunlight hours. I also took additional photos of the sun entering the museum as references for light and materials.
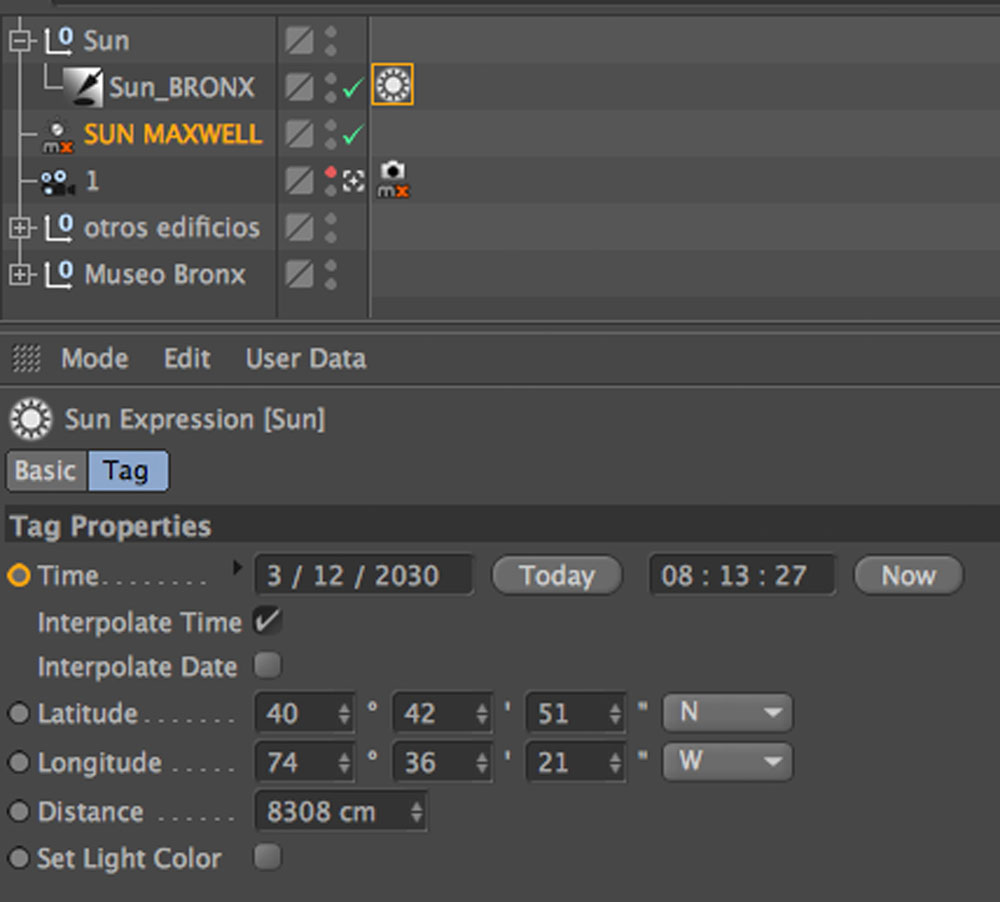
Render lighting is based on the Maxwell Render Physical Sky. For the time-lapse animation, we link a Cinema 4D Light Object with a Sun Expression Tag (inside a Null object) to the Maxwell Render Scene. Latitude and longitude is measured onsite or via google maps. The Sun Power is increased for some scenes.
It is important to match the rotation of the Maxwell Render Scene (or the geometry) with the real building orientation, otherwise the interaction between The Sun and the architecture will be wrong.
-
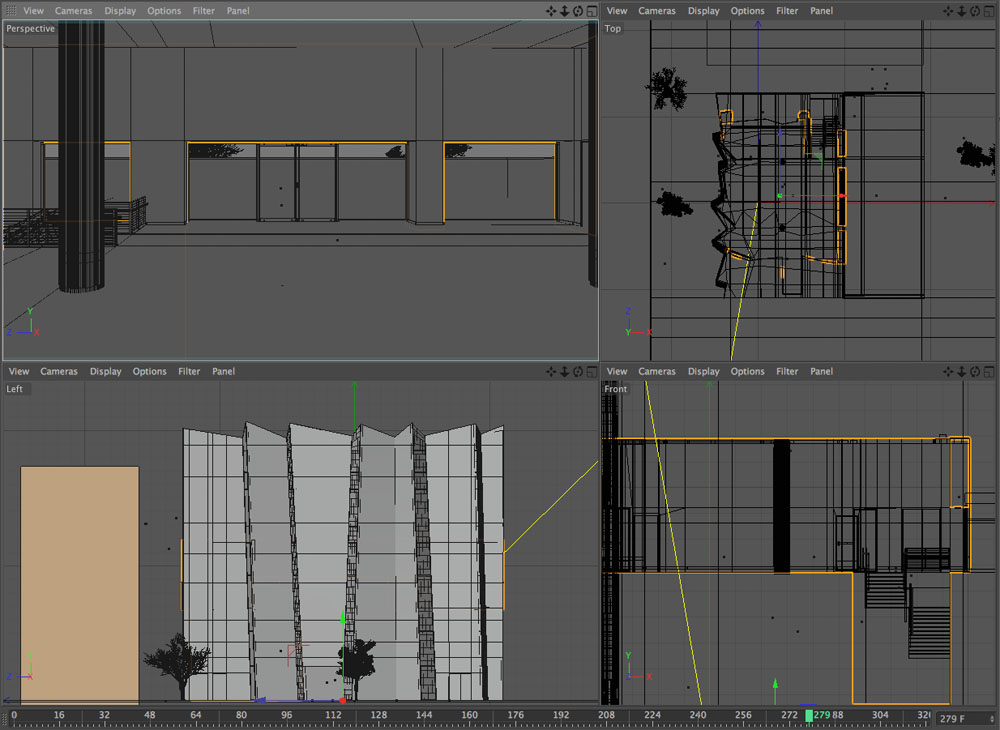
Architectural study and modeling
We had access to the floor plans but they did not correspond exactly to the constructed architecture (not uncommon). Photos plus additional tape-measuring becomes very handy to correct the 3D model.
-
Camera & Animation
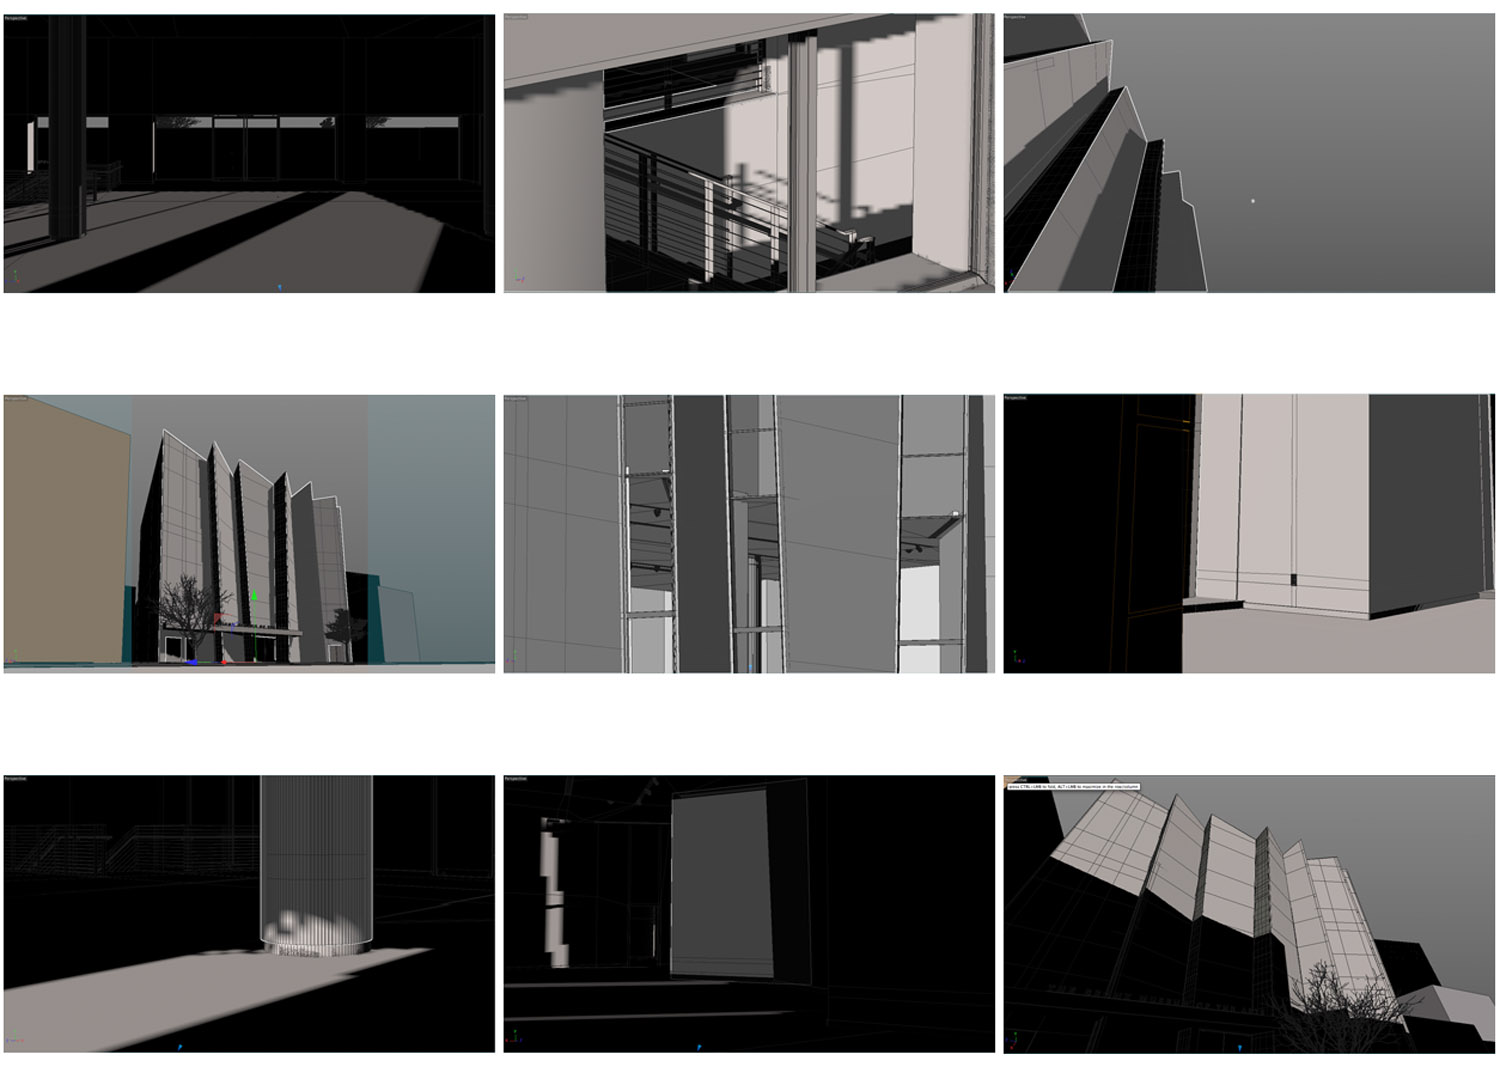
Since the idea of the video is to follow the light movement, the Sun path helps defining the range of available camera positions and angles. Before setting cameras, I sketch a basic storyboard to previsualize the general rhythm and visual contrast between shots. Later I make a rough animation with shadows to adjust the speed and duration for each shot.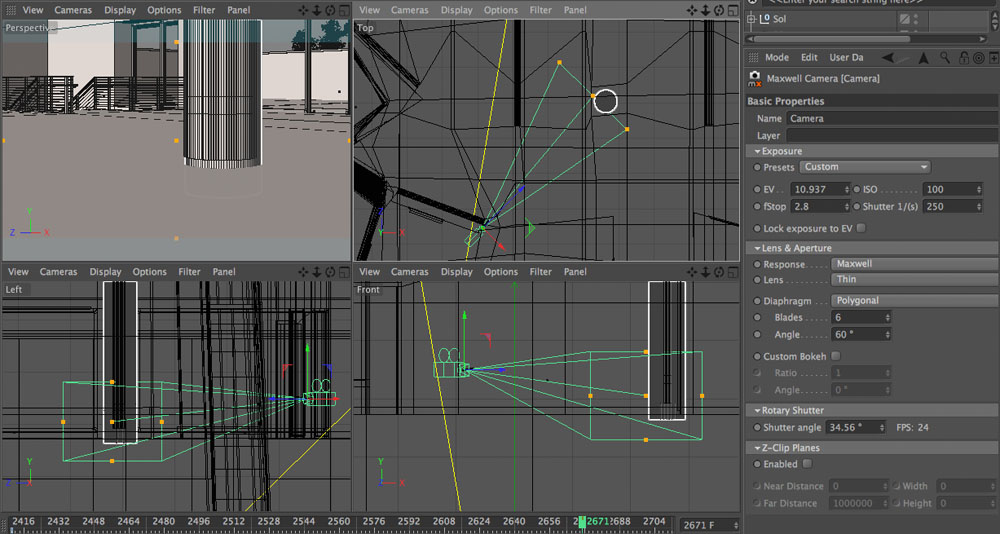
Once cameras were defined, the animation was divided by scenes. Geometry is reworked adding details to visible areas and hiding off-camera objects for each shot.
Maxwell Render Cameras are set up based on real camera and lens parameters (fStop 2.8 for a shallow depth of field in this shot).
Camera movements are also based on real slide, dolly and crane shots.
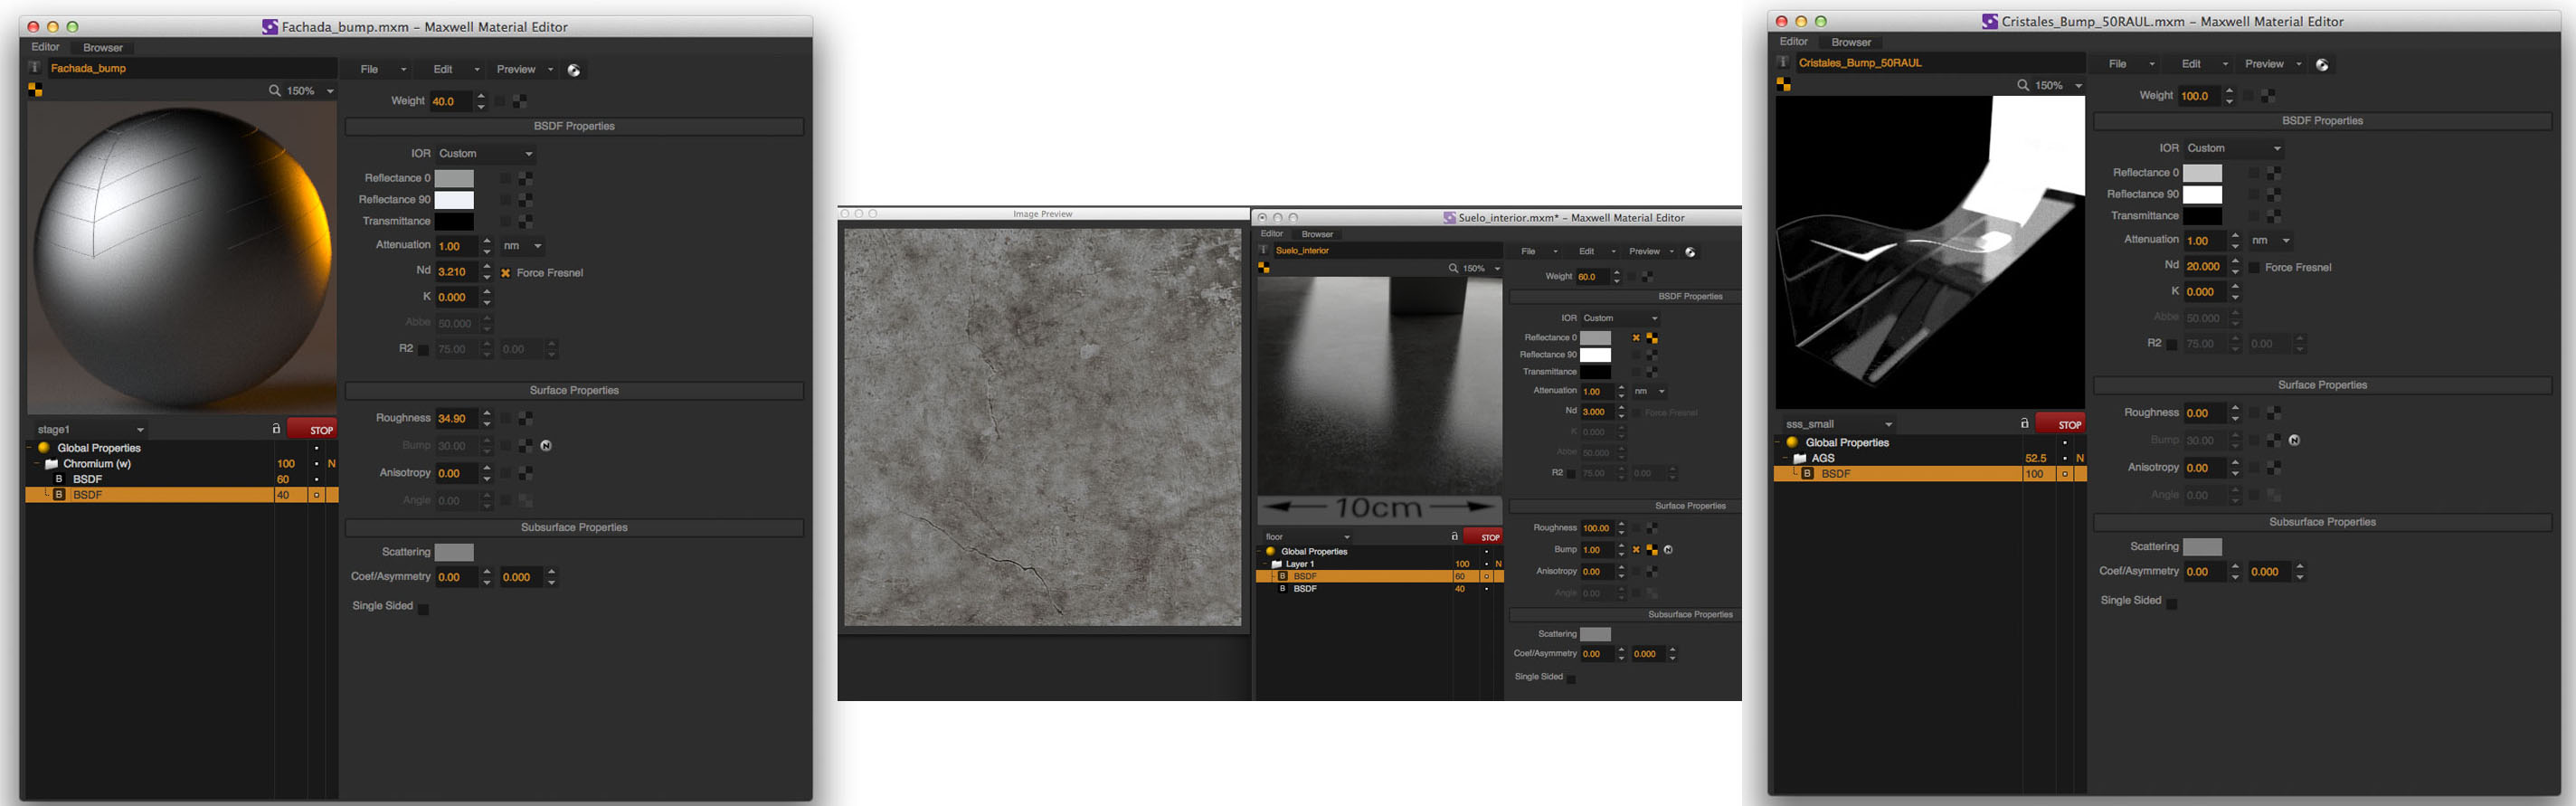
RenderPro created all the materials based on the real materials from the museum, in some cases using maps from Arroway Textures.
Today I would probably use the Maxwell Render Material Assistants to quickly generate all materials.
Going back and forth between geometry, cameras, animation and materials was essential to obtain the desired photorealistic effect.
-
Render set-up (resolution + hardware + network rendering/renderfarm)
We divided the video into scenes and used Network rendering to make the final 3674 frames at 1920×1080 pixels. The School of Visual Arts, RenderPro and Next Limit helped in the render process.
-
Post Production:
The video is made in the style of a 3D architectural render, but I also wanted to incorporate a cinematic look. All shots are edited in After Effects with Magic Bullet Suite. At the time, Maxwell Render didn’t include Camera Response. Otherwise, some of that process could have been done directly in Maxwell. The output PNG 16 bits sequences were combined in After Effects. For color grading I used Magic Bullet Looks, Denoiser and MisFire Vignette from the Red Giant Magic Bullet Suite.
- Software used: Cinema 4D, Maxwell Render, Magic Bullet Looks, After Effects.
- Hardware used: Misc
- Project credits:
Concept / Art Direction / Cinematography: Raul Valverde.
Model / Materials / Render Support: Javier Gonzalez.
Technical support: Dario Lanza.
Production support: The Bronx Museum of the Arts, Arquitectonica and the School of Visual Arts.
Installation photo credits: www.onwhitewall.com / Beatriz Meseguer.
Special Thanks: Lia Zaaloff