Hello everyone,
As many of you probably know, we at Next Limit are big fans of 3D competitions! We are always inspired by what Maxwell Render users achieve with our software, and we are constantly amazed at their talent. This year’s Car Render Challenge by Humster3D was packed with really awesome projects (we had a tough job as judges). One of these was Sylvain Klein’s entry, using Maya, Maxwell Render and Photoshop. Sylvain kindly agreed to do a breakdown of his project for our blog, so here it is! Don’t miss the video at the end. Hats off to you, Sylvain!

Artist profile
I’m a french CGI and Fine Artist and I’ve worked in many different fields including architecture, video games and product design for major fragrance brands. I’m currently working on my traditional skills like charcoal drawing and oil painting. I’m also available for any interesting freelance missions or full-time in-house jobs around the world.
Here is my web, so feel free to contact me! 🙂
Step 1: Modeling
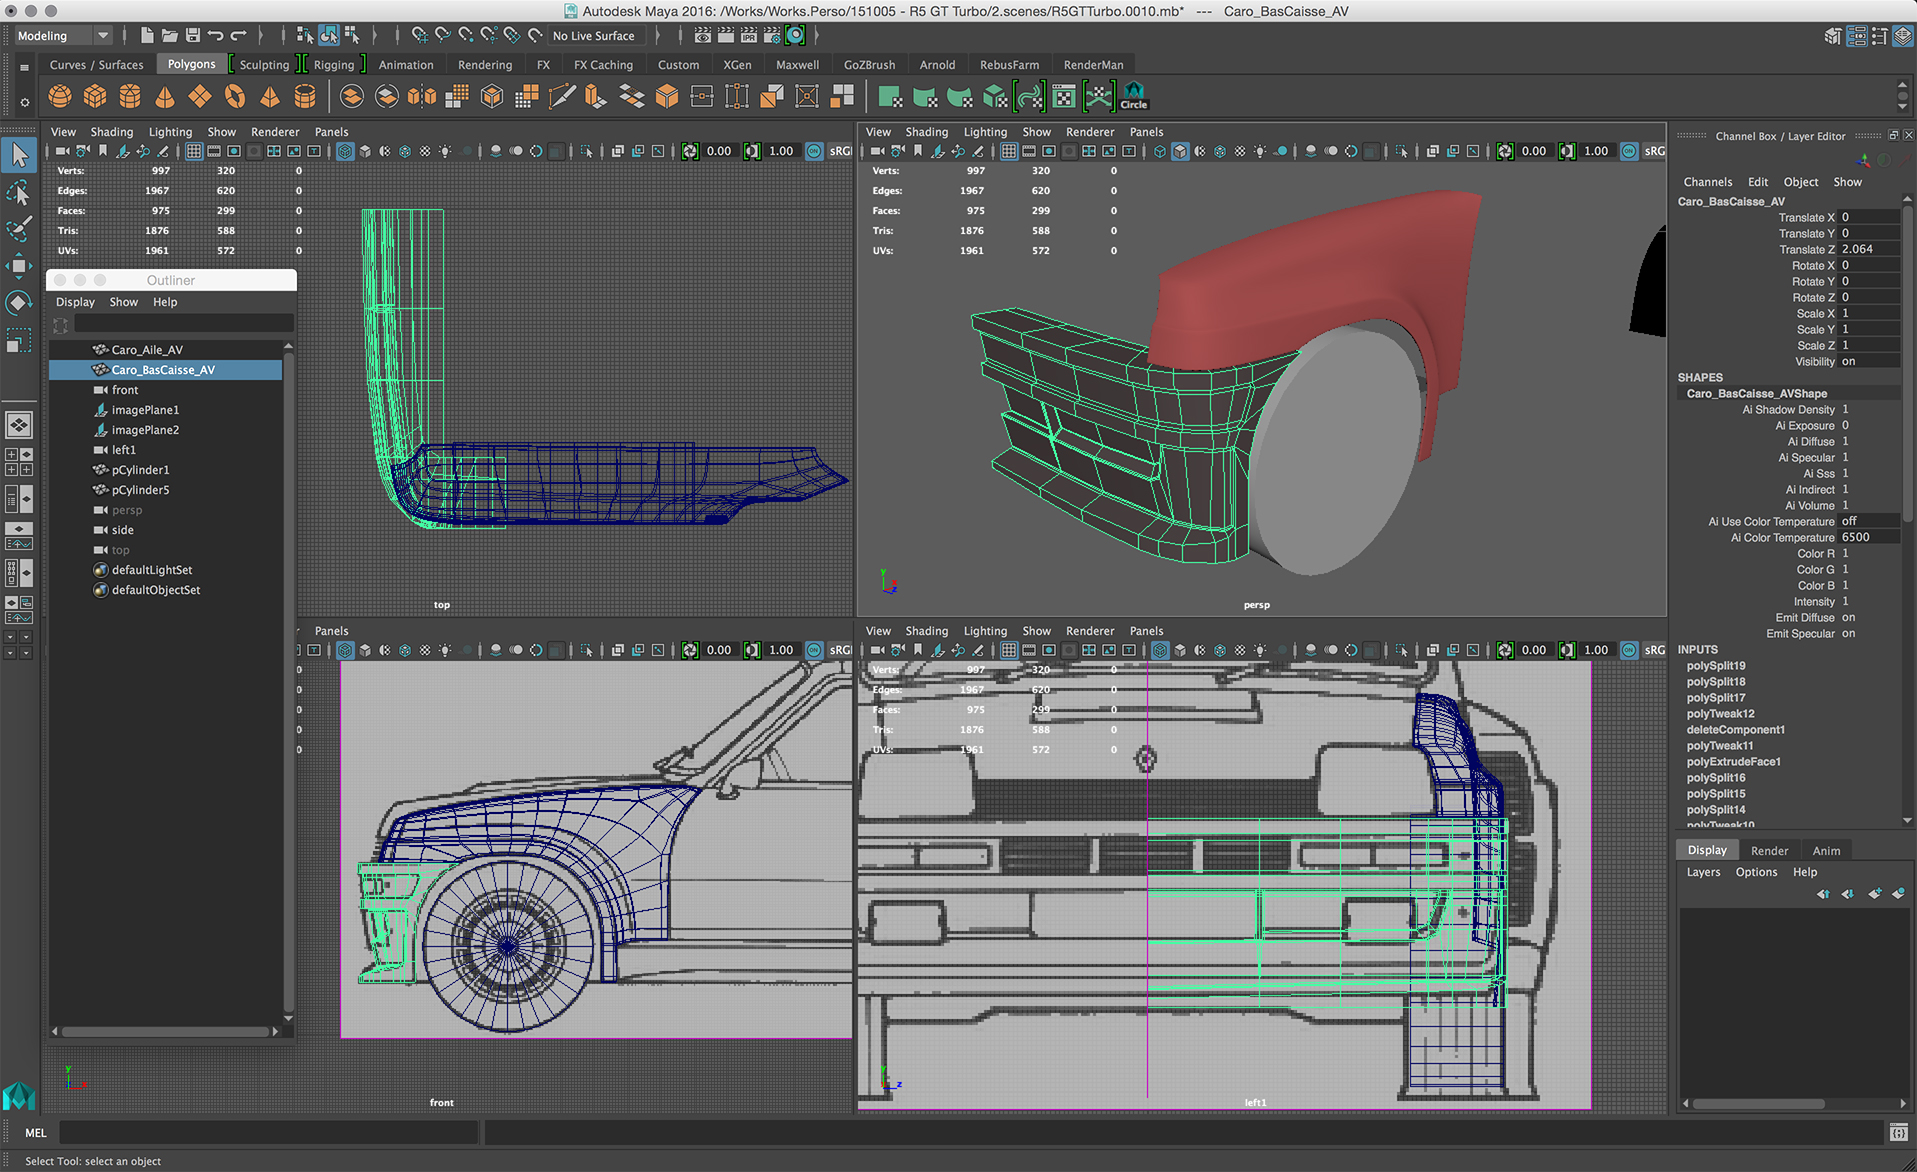
Having a really good-quality, detailed model is very important for a realistic final image.
The mindset I recommend for this is simply to model the parts as they are built in real life. This means you have to separate meshes when there are two separate pieces in real life and by the same token, when in real life it’s only one piece, you have to model it in one mesh.
I almost never put one mesh against another to make it look like one. If it’s one, I model it in one mesh. This way of modeling makes the steps more complicated but increases the level of realism significantly in the final model.

Step 2: Final Image Idea
In this particular case, I really wanted to put all my efforts into the car itself, so I was looking for a lot of back plate photos and reference pictures of real rally cars to find the right type of picture and scene I wanted. In the end I decided to make a very simple scene with almost no background, just dirty ground and a lot of dust.
Step 3: Lighting
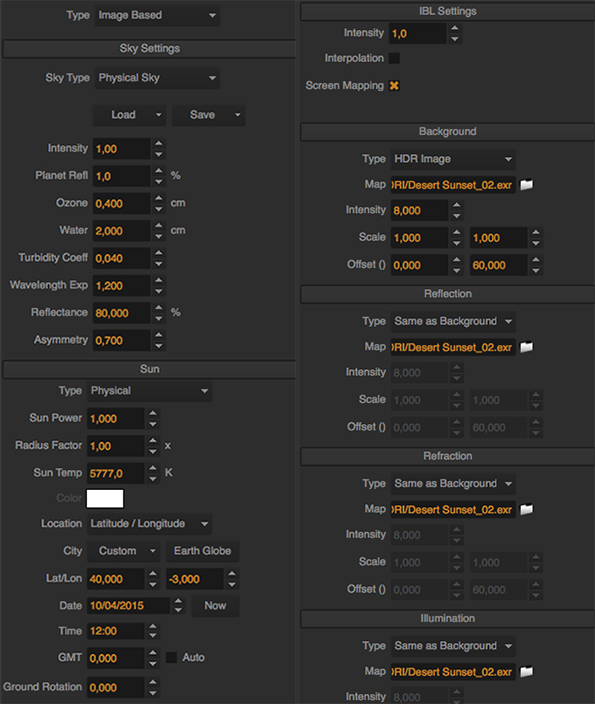
Because in this case I wanted to have a real outdoor natural look in my lighting, I used the Maxwell Render Sun as a lighting environment. I set up a real timezone and lighting that produced lighting close enough to the reference pictures I would use in post production. I also added a HDRI picture I had that matched close enough, to get some nice reflections on the car.
Step 4: Shading
This is THE reason I used Maxwell Render on this project. I really love the shader system in Maxwell. The layer system is so … real, it makes the shading creation much simpler. I just need to ask myself – what is this material like in real life?
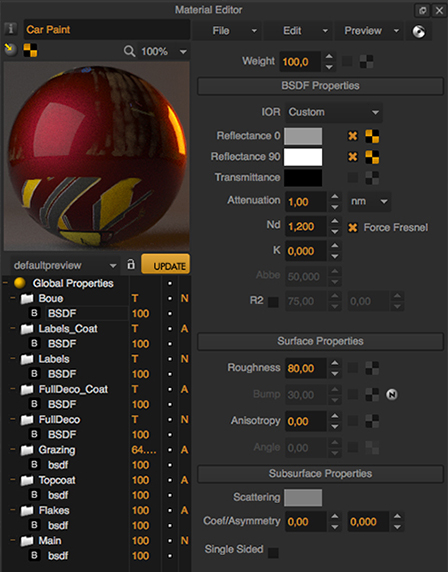 Is it coated or not for instance? A good example here are the stickers I put on the car. I started with an official car paint material (directly from Maxwell Render) and, after tweaking it to have the result I wanted, I added a layer for the decals. This first layer has about 90% roughness with a very low IOR index because it’s the ink print on the decals paper itself. On top of that I added a coat layer (using the same decal mask to select the right areas of course) to add some glossy effects on the decals, because in real life it’s a glossy sticker paper. After that, I added another layer for the dust, again, with a mask, etc…
Just ask yourself how this material is made, and follow the same steps in Maxwell Render. Works fine for me 🙂
Step 5: Rendering
Because it’s Maxwell Render, you don’t have to set up a lot of parameters to make a good render 🙂 In fact you only need to set up the max SL passes or render time you want, and the camera.
In my case, I set up the max SL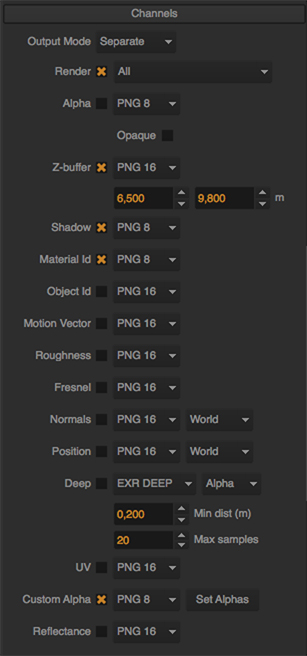 passes to 18. For the camera I didn’t use any specific settings, just played with the ISO and other parameters using the Maxwell FIRE preview. But I voluntarily set up the focus point to have an infinity depth of field because I like to play with it in post prod and not directly in the render itself. Speaking of depth of field, I also used the Maxwell Render passes. Here again, it’s very simple. You just need to check the box of the pass you want. In my case I used the shadow pass, the material ID pass, a custom one and the depth of field pass. For the
  shadow pass (allows you to have a black and white image of the shadows) you need to check the « shadow » option on the global parameter of the shader you want to catch shadow for this pass. Here it was the ground plane I have in my scene. My custom pass was a simple alpha channel to easily separate the car itself from the ground and background. The material ID pass gives you a clown pass with a flat color for every different material you have (you can set up the color in the shader global parameter).

Step 6: Post Production
For this part I of course used Photoshop and totally reconstructed the background and the final image I wanted. Using different reference photos for ground, dust, background, sand, smoke, etc… it’s best described by this little breakdown video I made 🙂