ACMCV & Maria Chiara Virgili
Maria Chiara started her career path in the world of digital graphics about 10 years ago, and she has been using Maxwell Render since it’s first release. In 2013 she founded her own company, ACMCV Studio , where currently she works as Senior Architect, 3D Artist + Visualizer and Authorized Trainer for Rhinoceros. In addition to providing on-site training courses, she regularly gives lectures at Italian universities, and is also Professor at the Quasar Design University of Rome, where she teaches 2D and 3D graphics courses.
Maria specializes in Advanced 3D modeling, Texture Mapping, Night and day Lighting, Photography and Composition, Creating Materials, Interiors and Exteriors Architectural Rendering, Animations, Photoshop Post Production, Maxwell Studio and Plugins for Rhinoceros and 3d Studio.
Check out her Xpert Trainer profile! We are very happy to welcome the first lady to our talented group 🙂
And here is a detailed Case Study & Making-of of one of the ACMCV latest projects. Enjoy!
The Project
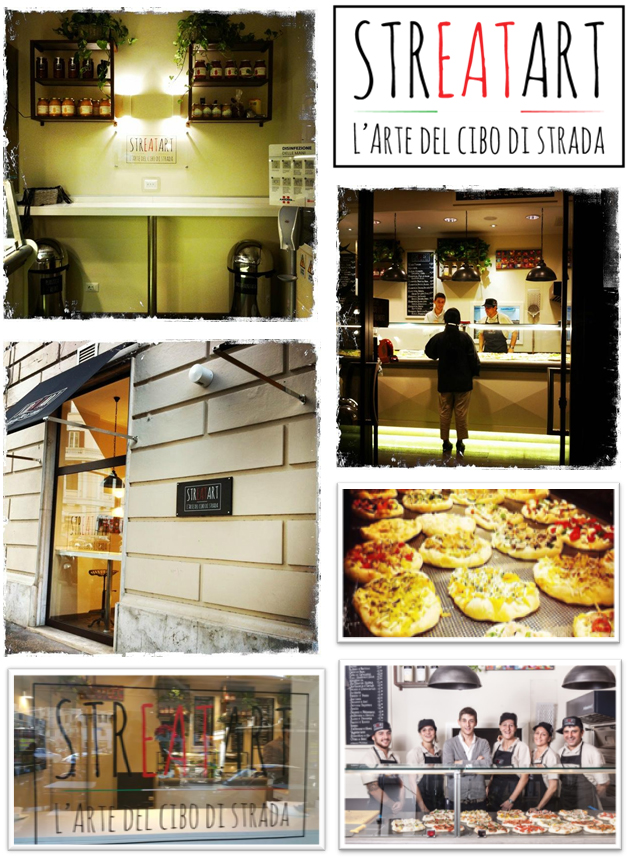
The client was a company of entrepreneurs who have launched a chain of pizzerias in Italy. Their were looking to expand the brand overseas and to take advantage of a graphical presentation that would show their customers the features of furniture and the architectural appearance of their franchise.
Maxwell Render
Photorealistic rendering with Maxwell made the presentation possible, and compared to a banal photo shoot (that would not be as precise and “clean”), has even allowed the creation of axonometric sectional views, useful for understanding the interior spaces and the “family feeling” concept of the premises.
Maxwell is the most realistic render machine I’ve ever used, the organization is simple and I don’t have to waste too much time guessing values – it is all very self-explanatory. It’s not difficult to create a material from scratch or specific textures, and the same goes for the lights, which are truly exceptional. Environmental parameters, timing and yield are easy to set, and the result is always pretty good even when we’re drafting a scene. The management of the camera is also based on photography fundamentals, which was a big plus given that I am passionate about photography!
Using Maxwell with a powerful computer never compromises our workflow. You may continue to work while it calculates the image. In general we have had no problems incorporating it in our routine or pipeline. If I happen to have trouble because of busy workstations I can always arrange to leave the computers on at night working to do the rendering. A render farm could also always be a good solution to save time.
The customers love to see projects in the most realistic, virtual way as with Maxwell, frequently confusing them with real photo shots. It is amazing to see their surprise when they discover that these are not photo shots!! That is how I know that Maxwell is the best.
How to improve Maxwell
Probably the calculation time of a rendering could be a bit optimized and speeded, trying to simplify the tradeoff between SL and minutes, sometimes not easy to catch. But I always know that other rendering engines long set-up times – all the parameters and values before the rendering can even start, even though they may then “cook” the image in just a few minutes, so it seems to be the same. But I insist that the real difference is in the fact that I SEE very little difference between Maxwell and a real photo!! About future implementations, I would say that probably the animation’s side can be expanded to the movement not only of the lights but also of the objects, in particular of cameras. Being a program which runs also as a stnadalone, it could be a trump card. But in any case there is still the plugin for 3ds Max and other platforms!
MAKING OF
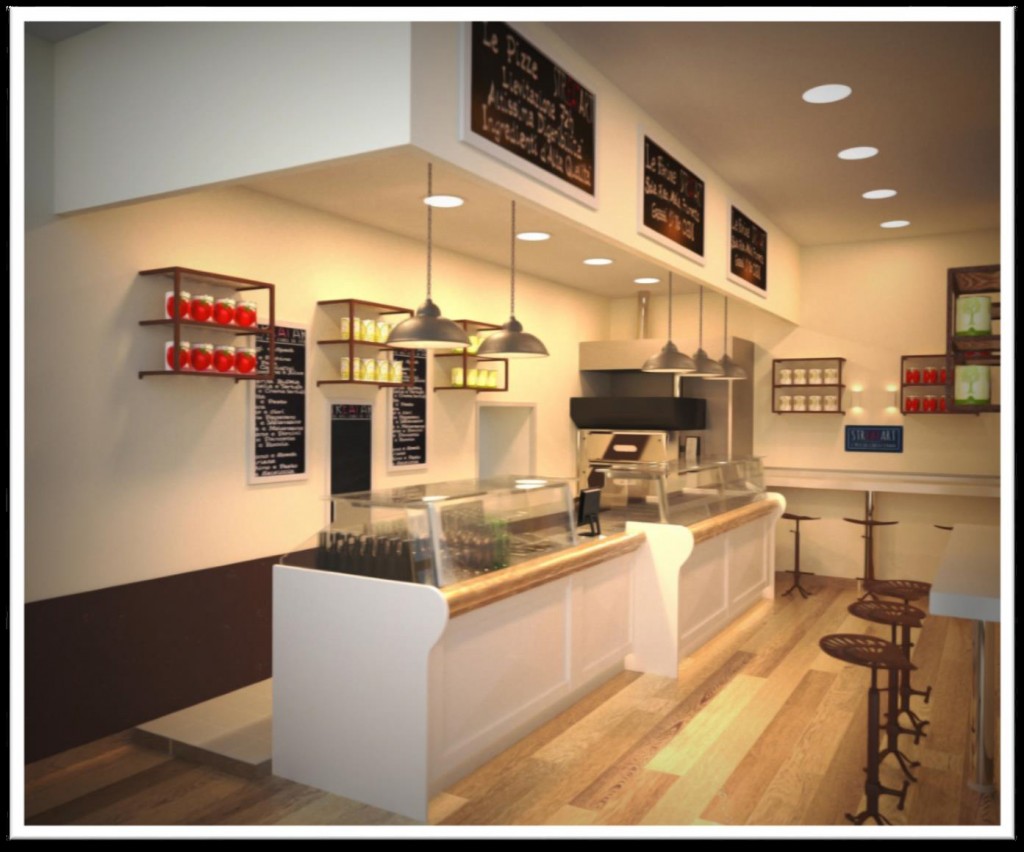
Concept and objective
The goal was to provide a photorealistic rendering view to show the typical environment of the Streat Art’s chain of pizzerias, in order to expand abroad.
Relief and photography
We made a visit to take pictures (for textures and details) and measurements in order to return the architectural relief, previously, into a 2D cad drawing. 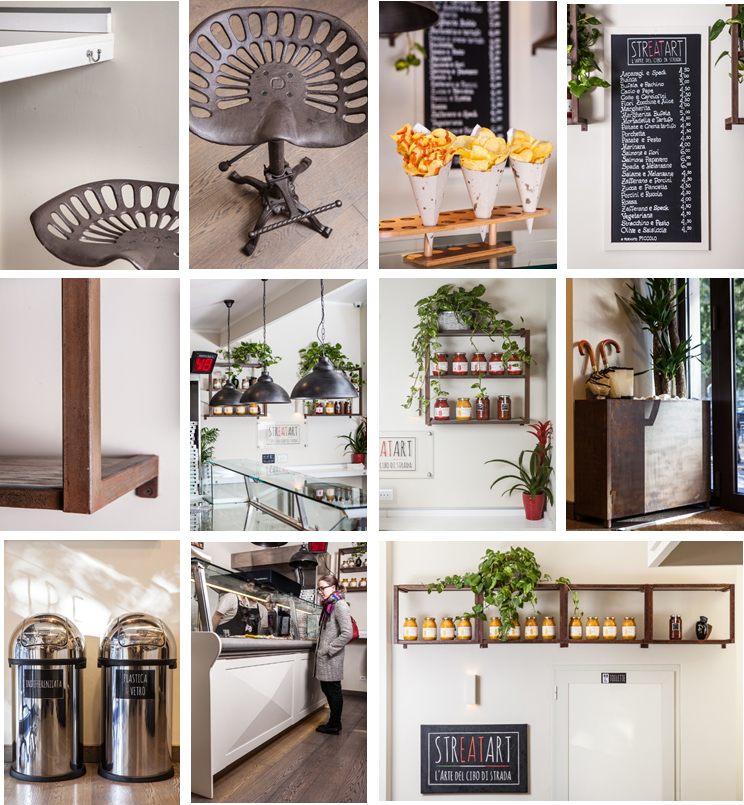
CAD Restitution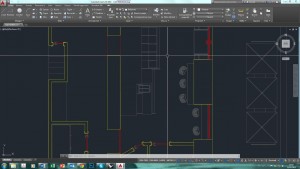
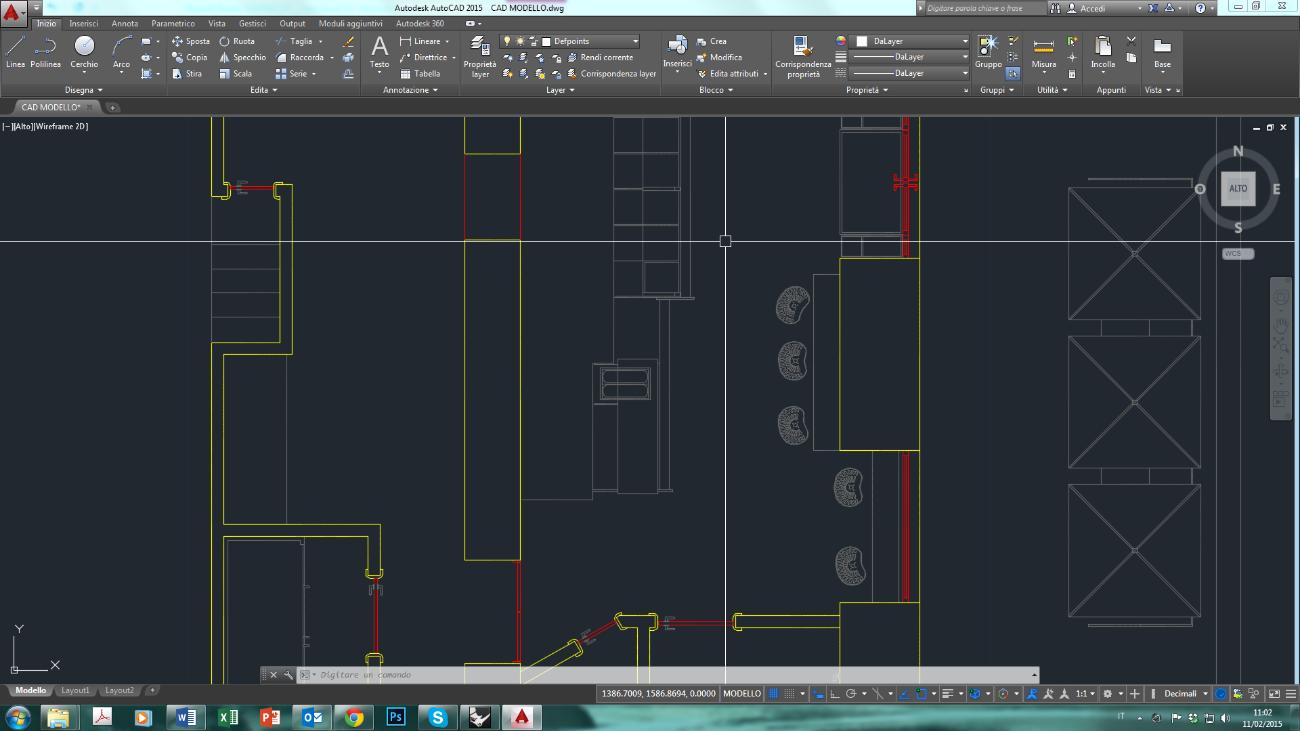
Measurements were used to draw a simple floor plan view, used as a base for the 3D modeling in Rhinoceros. It’s also possible to draw directly in Rhino but it is useful for us to preserve a .dwg file for technical tables that are usually requested by clients, or are necessary for other paper-works and purposes. That’s because we use AutoCAD.
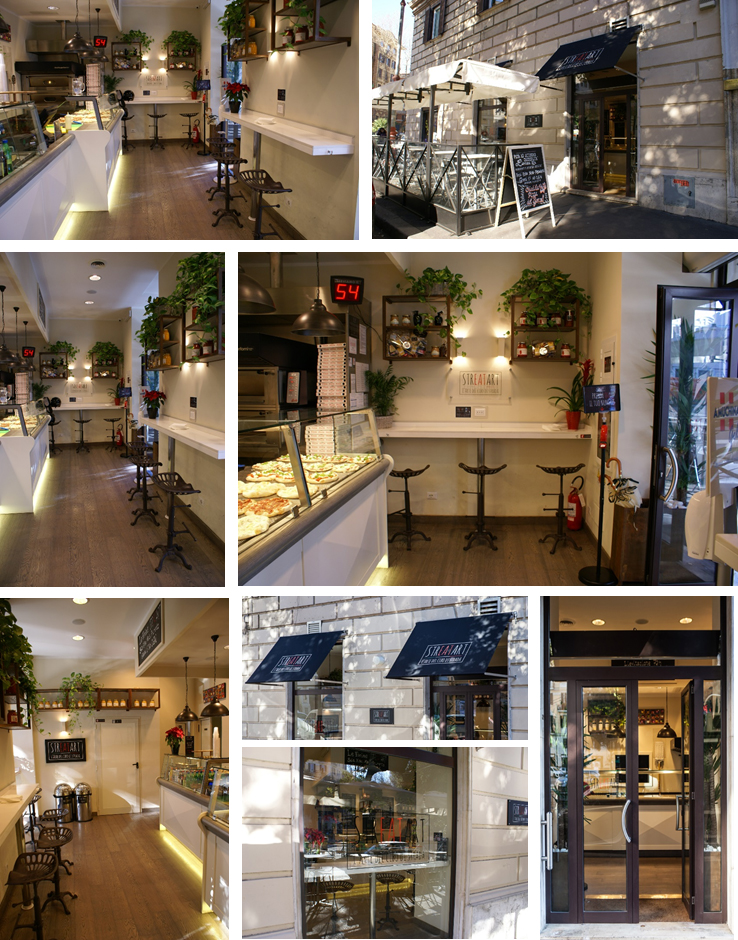
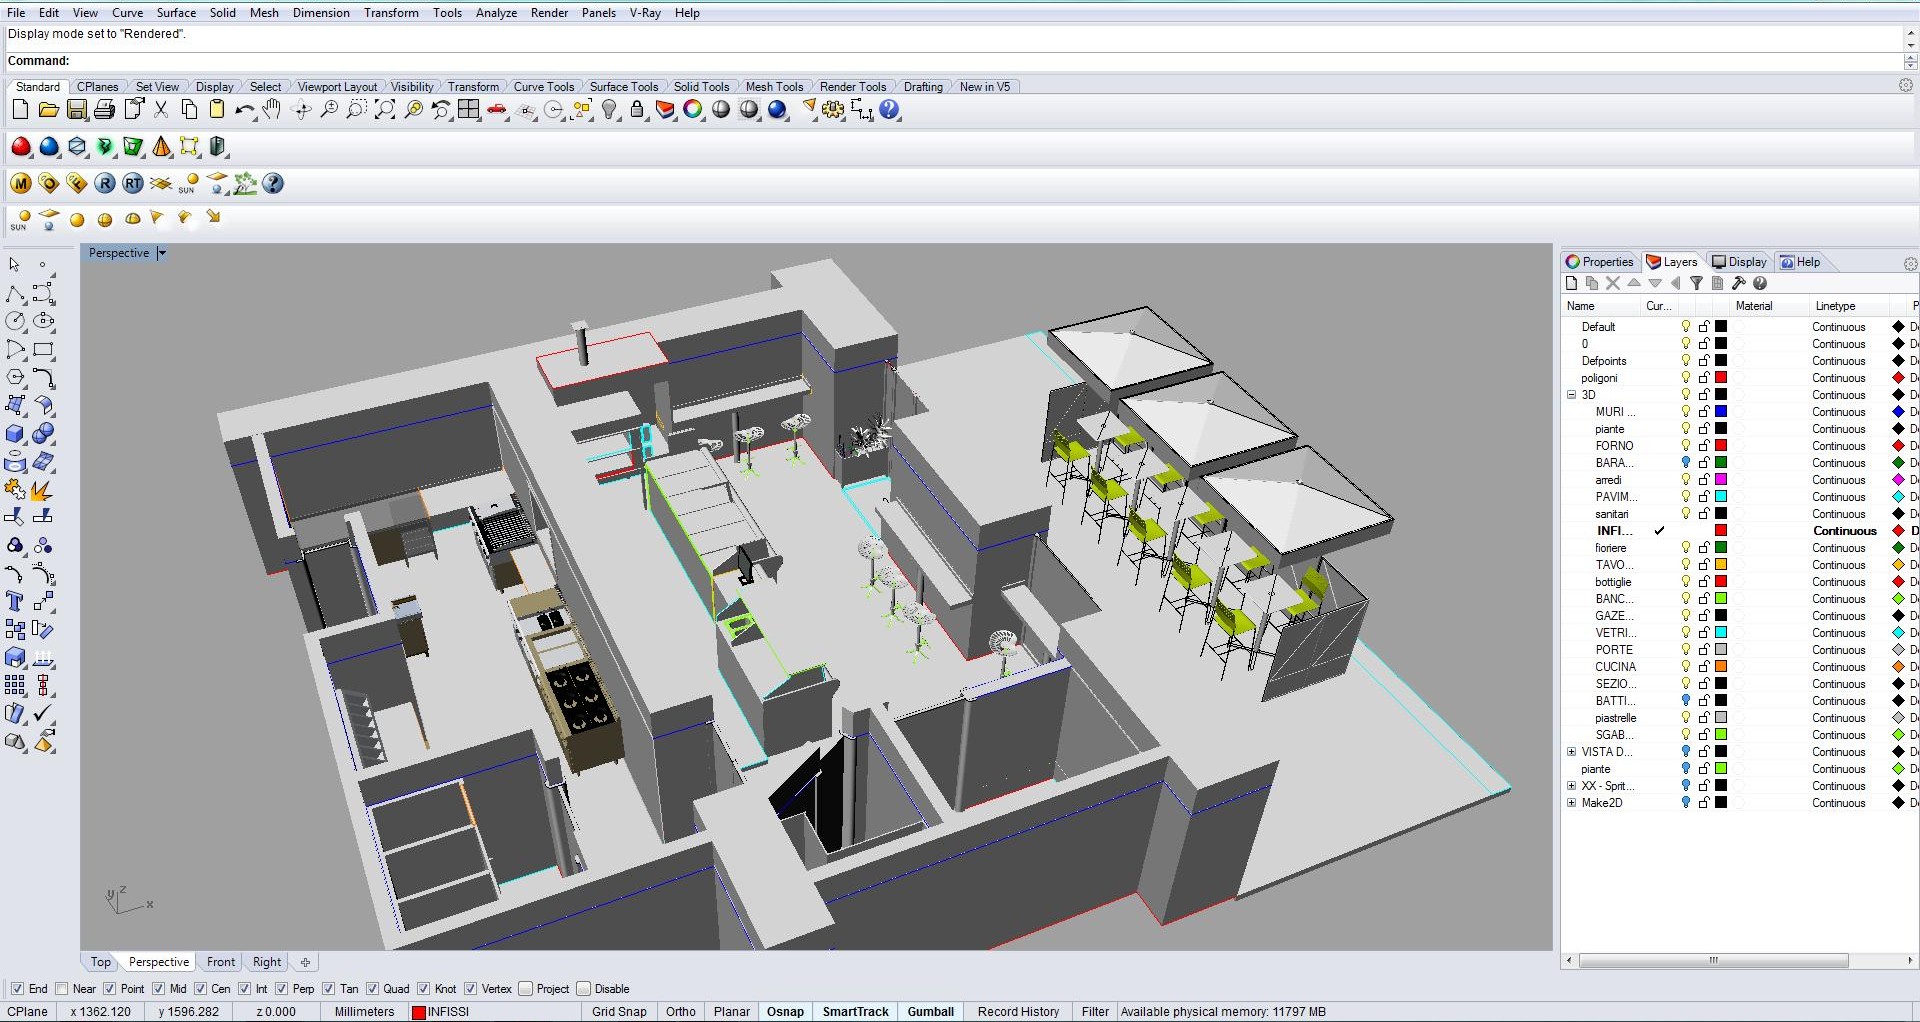
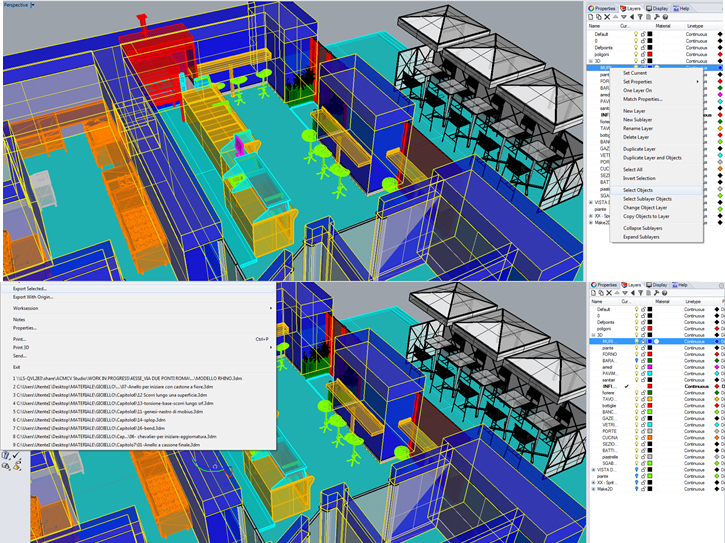
3D Modeling
The 3D model was created using Rhinoceros v5 (from the previous dwg plan view imported in), and then creating the main architecture, furniture and details as the pictures show. We prefer to use Rhinoceros because there are elements in this particular case (stools for example), the modeling of which is a bit complicated. We have therefore preferred to use Rhino instead of other software. Generally, as a matter of habit and preferences, we will use Rhino.
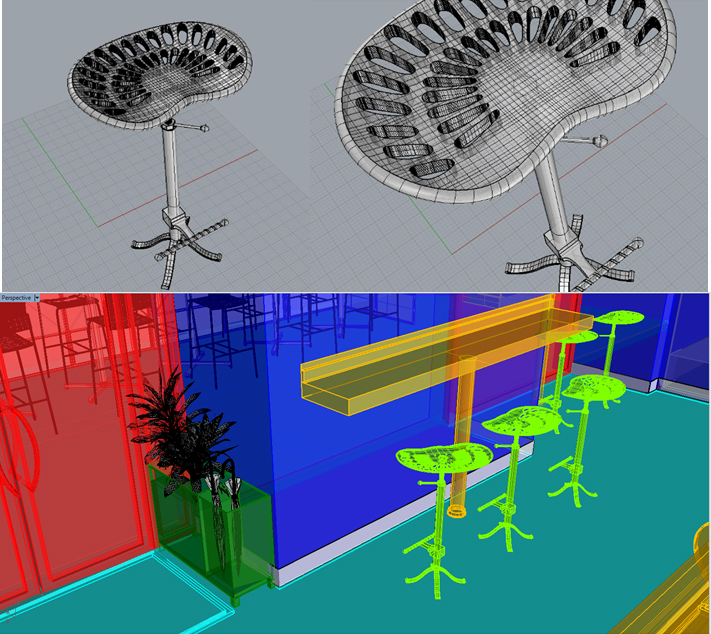
Rhino Export
To import into Maxwell we need to select families of objects and convert them into another format such as .3ds or .obj, instead of exporting the whole 3D. It may seem like a long process but it works because we can compose the scene and create/set materials step by step, getting a well-organized scene and a good hierarchy for objects. Obviously, when using the Maxwell plugin for Rhino, this step would not be necessary, but we prefer to use the Maxwell Studio workflow rather than the plugin.
Maxwell Import
Once all the elements are imported in groups, they are simultaneously also created into families. To maximize the productivity, we usually maintain the neutral default material (except for glass) and quickly start to set shot pleasing, as well as doing some FIRE or render tests in low resolution with materials and lights, to assess what might be the proper setting of the scene.

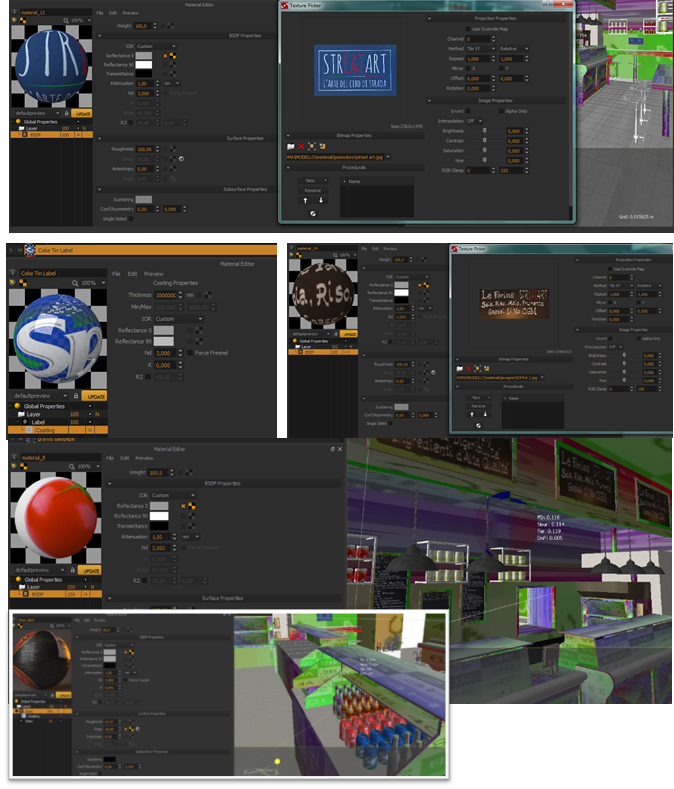
Materials/Textures
There are many families of objects and different materials to create and apply, in this case more than 50. All textures and labels were photographed on site before being replicated in individual materials!! On average, no more than two levels per material were created.
Attempting a typological summary … the best categories of materials are:
- Textures > 1 Layer BSDF materials with a reflectance texture map applied on (in some cases also with coating properties and mapped reflectance): for blackboards with chalked menus, product and can labels, signboards and plates, ceramic tiles, parquet.
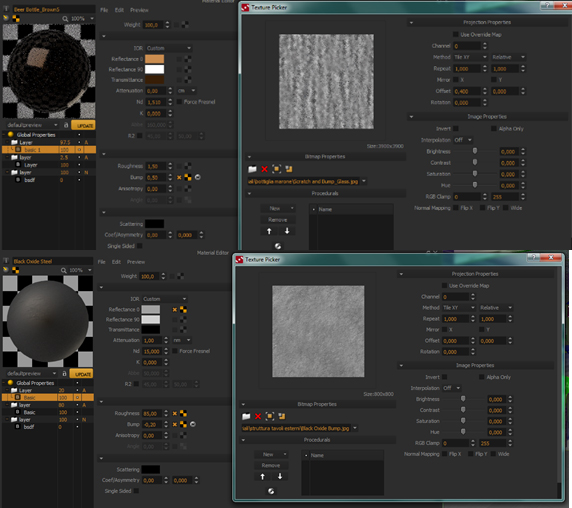
- Metals > 1 or more BSDF Layers materials with a reflectance texture map applied (also for roughness and/or bump): for stools, lamp holders, grids and steel/iron furniture in general.
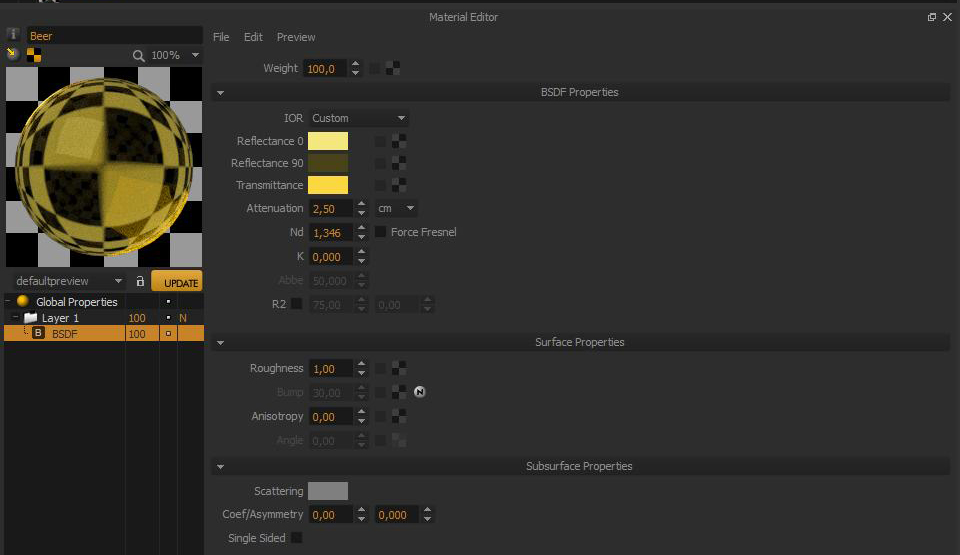
- Colored Glass > 1 or more BSDF Layer with colored reflectance and trasmittance (in some cases also with mapped bump): for bottles (for example beer and water).
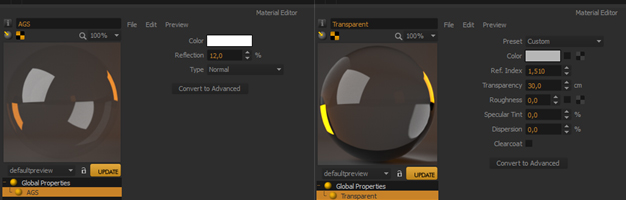
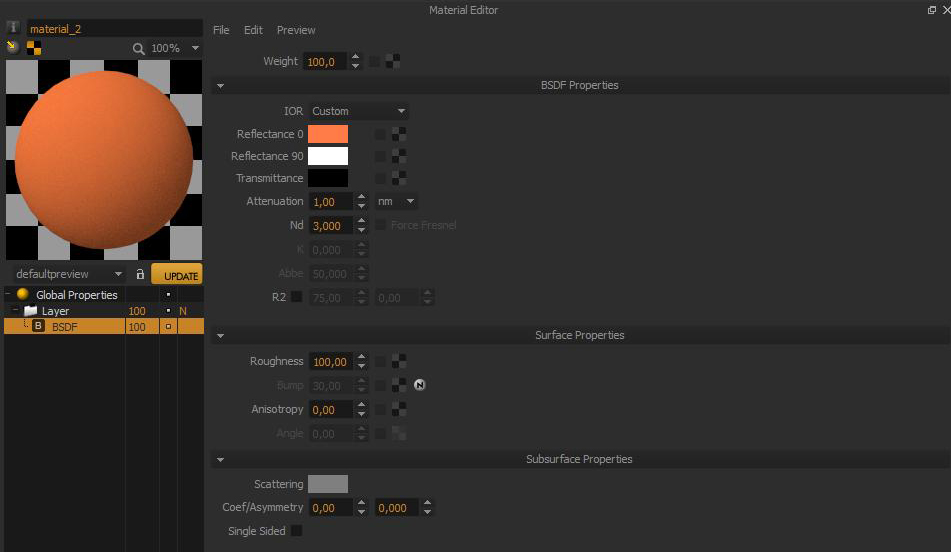
- Custom > 1 BSDF Layer with colored reflectance: for walls and small surfaces
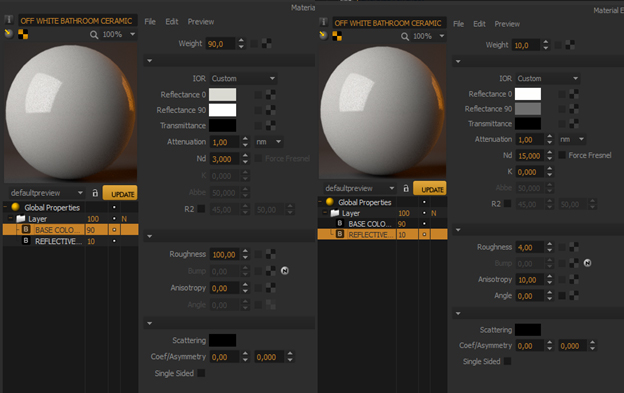
- Glossy > 2 BSDF Layers, Materials with high /low roughness and nd, but also white/colored reflectance each other: For ceramic, plates and various surfaces.
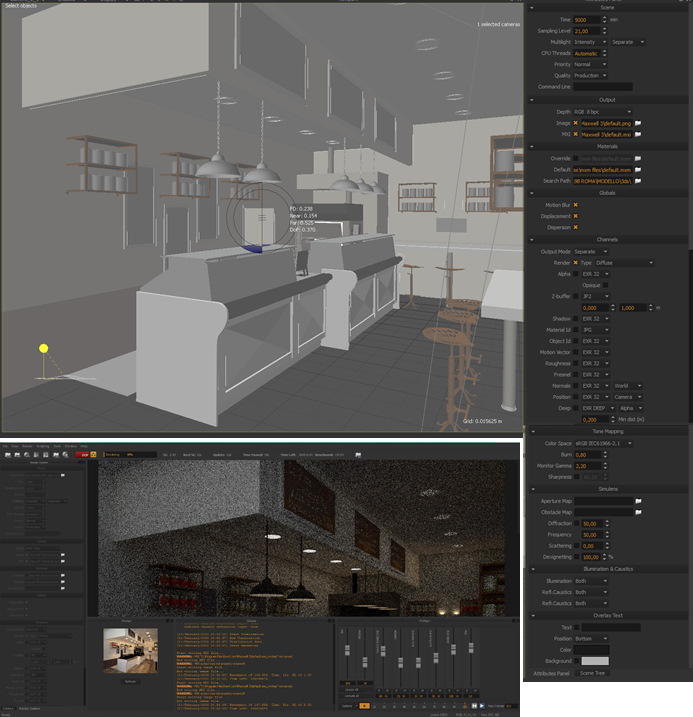
Environment
In the attributes panel the physical sky was set by default and sun was disabled, to avoid an excessive illuminance.

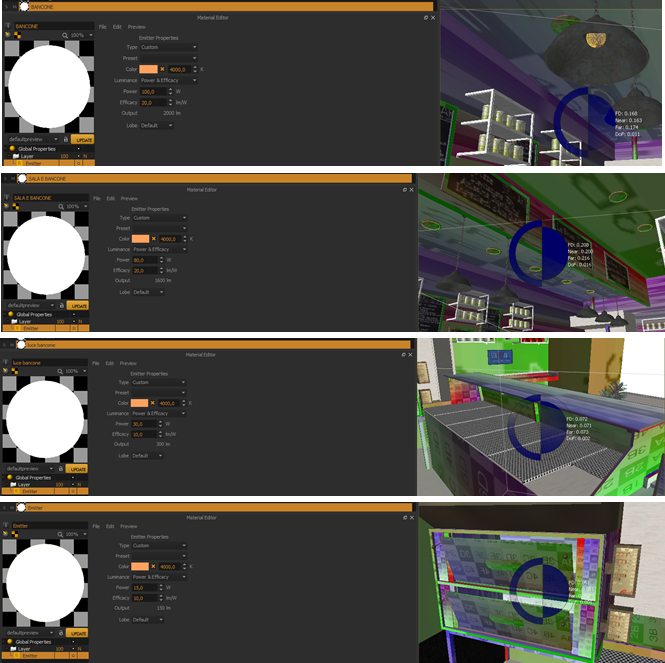
Lighting / Emitters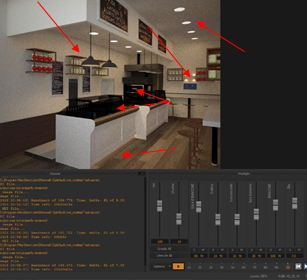
The idea is to create a scene with a prevailing warm light (4000 k – 80 > 100 W for main lights and 15 > 30 W for secondary lights), using low-poligon emitting surfaces or objects not intersecting other geometries.
- Hanging Lamps (Main Lights)
- Spotlights and appliques (Main Lights)
- Pizza Showcase and Counter (Secondary Lights)
- Oven (Secondary Lights)
Camera

Focal length 35 | Shutter speed 10 |f stop 100
Resolution 1500 * 1240 px
FIRE Test

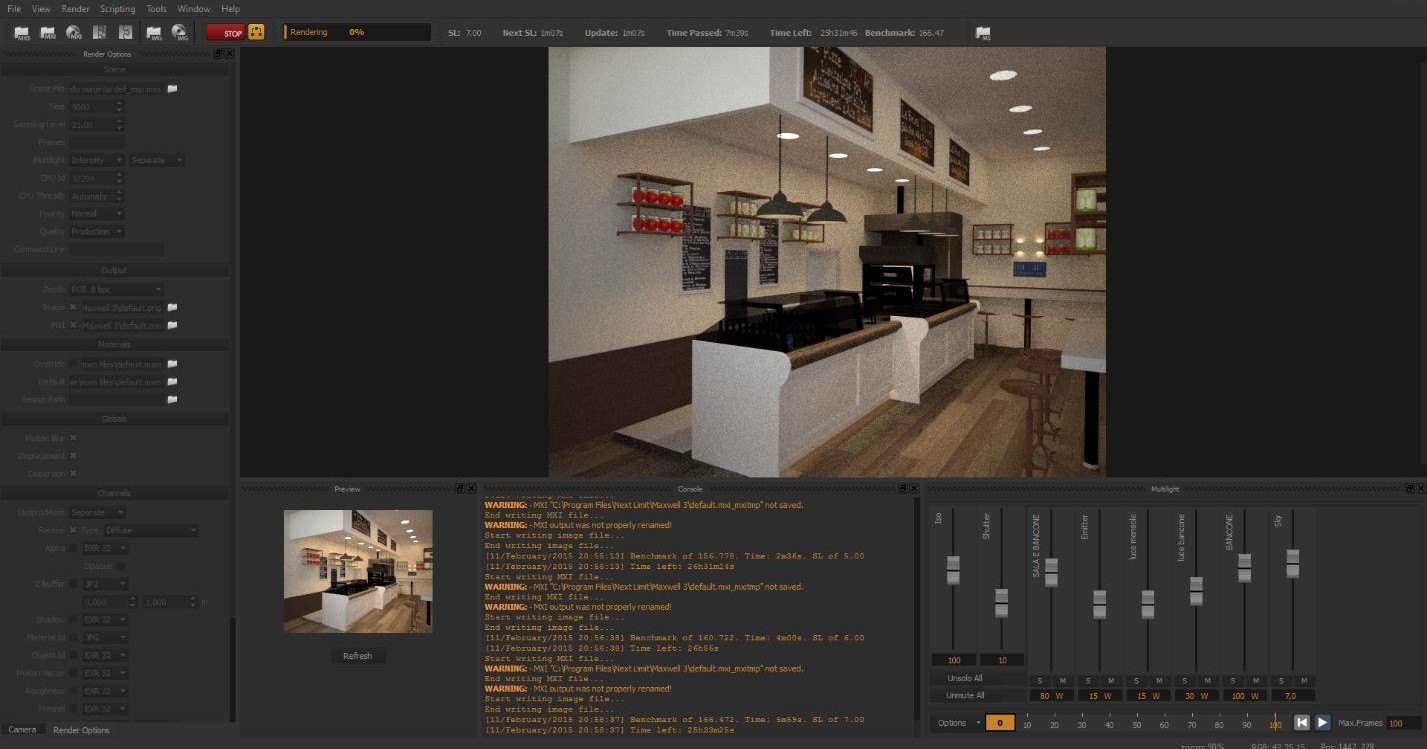
Render Set / Render Options
The rendering was completed without the help of a network/render farm, the parameters are reported in the image above, but are generally: 5000 min * 21 SL. I actually set SL 21 and then stopped the render before that SL was reached. Normally the render is sufficiently clean before it reaches this SL, usually somewhere around SL 18.
- Multilight on Intensity (separate)
- Normal Priority
- CPU Automatic
- Production Quality
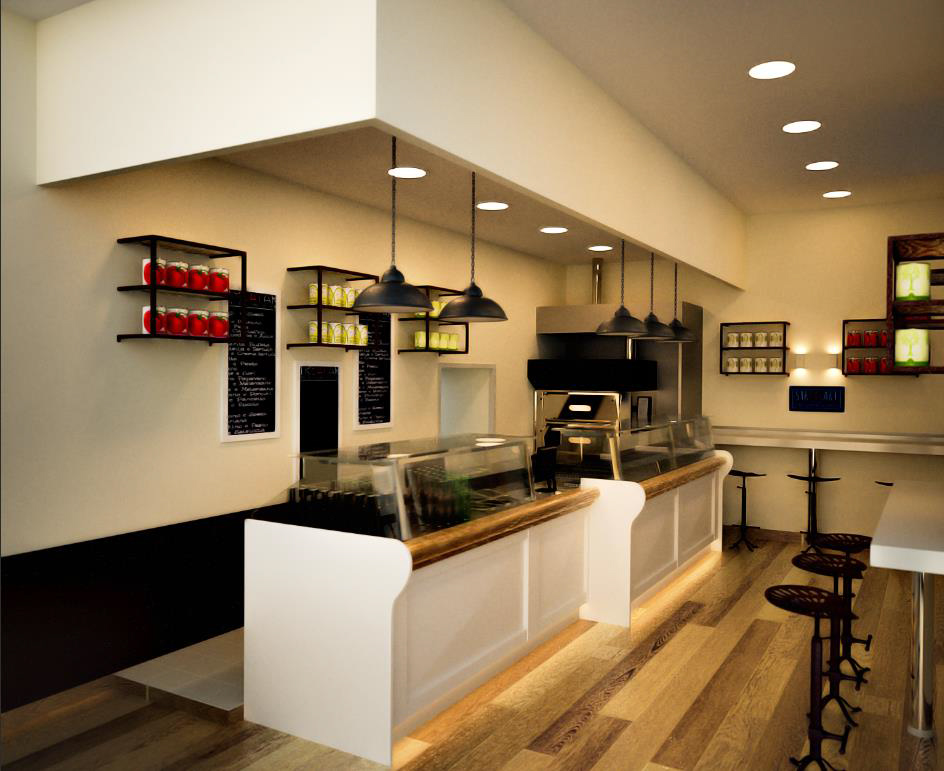
Multilight Regulations and Final Rendering
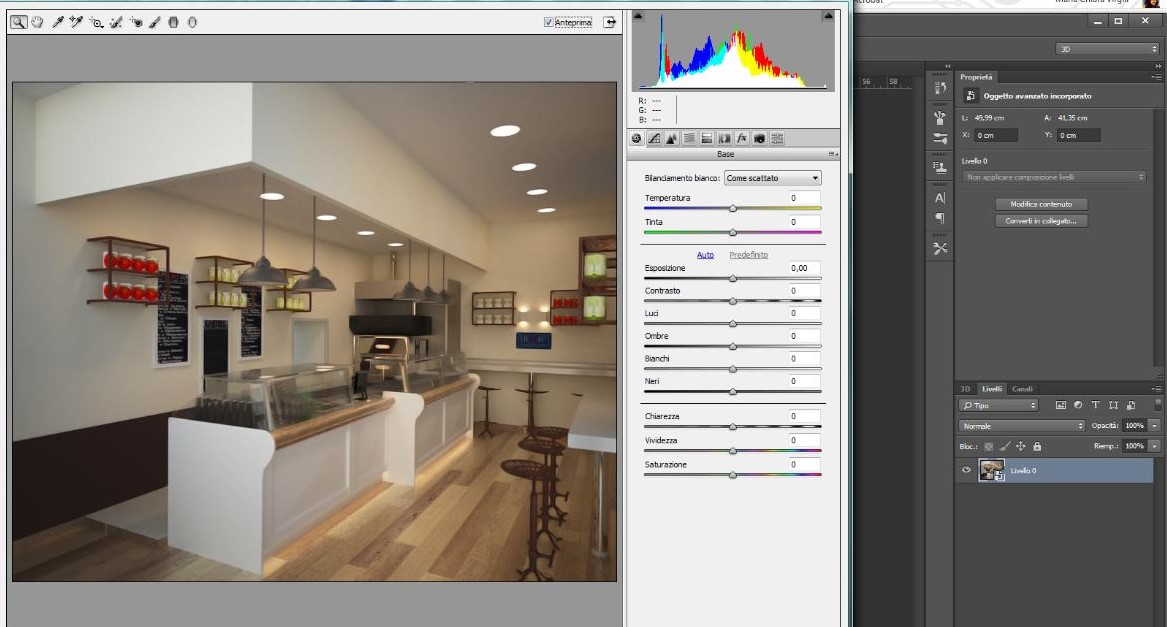
Post Production Part 1 | Image Look
With the Camera Raw Filter in Photoshop CC, it is possible to set the temperature, white balance, contrast and lights.

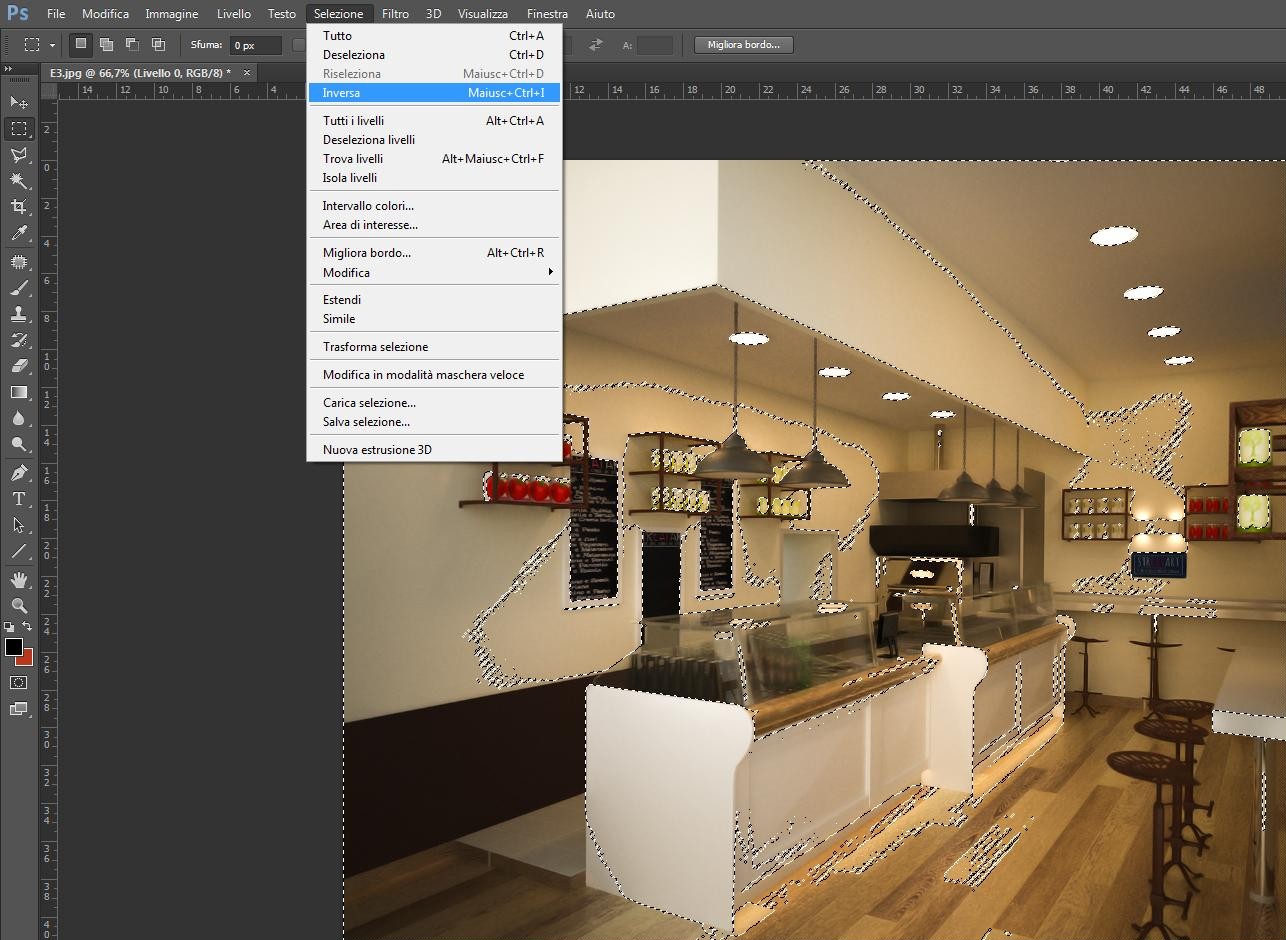
The second step of our post-production is the “protected” unsharp mask.
Selecting the RGB channel of the image and then inverting the selection, is possible to apply that filter (big radius, medium intensity amount) and to protect details ate the same time.
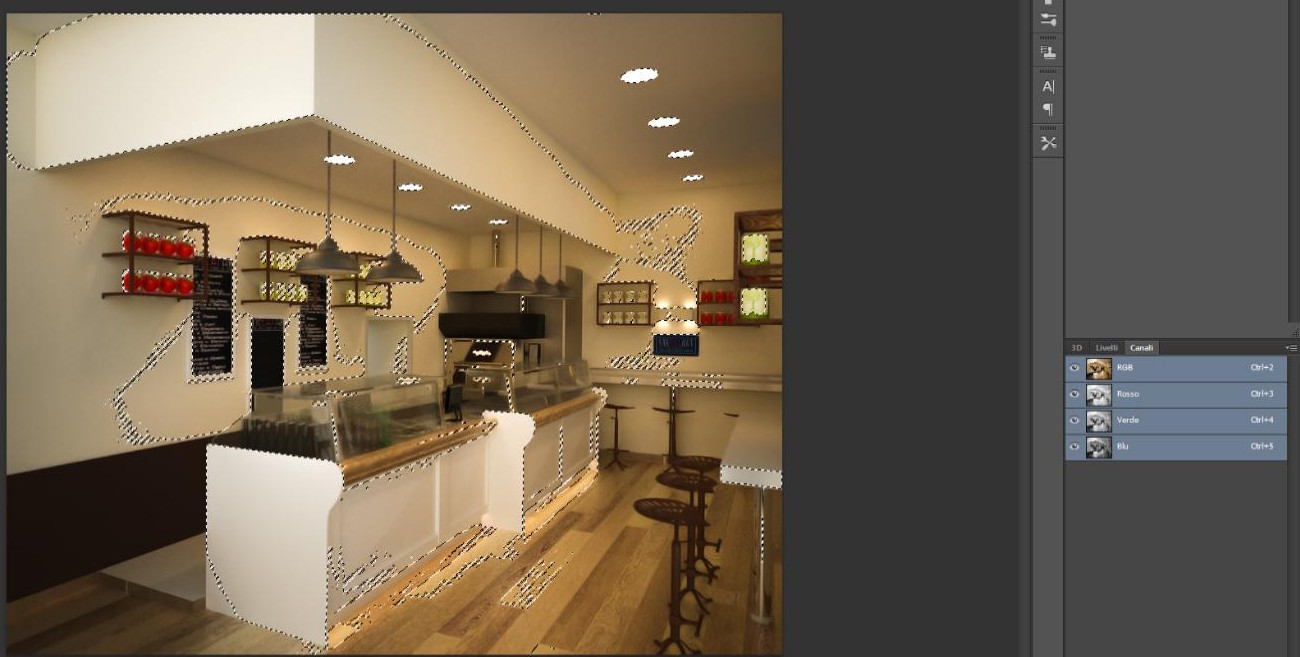


Unsharp Mask strong effect and calibrated one.
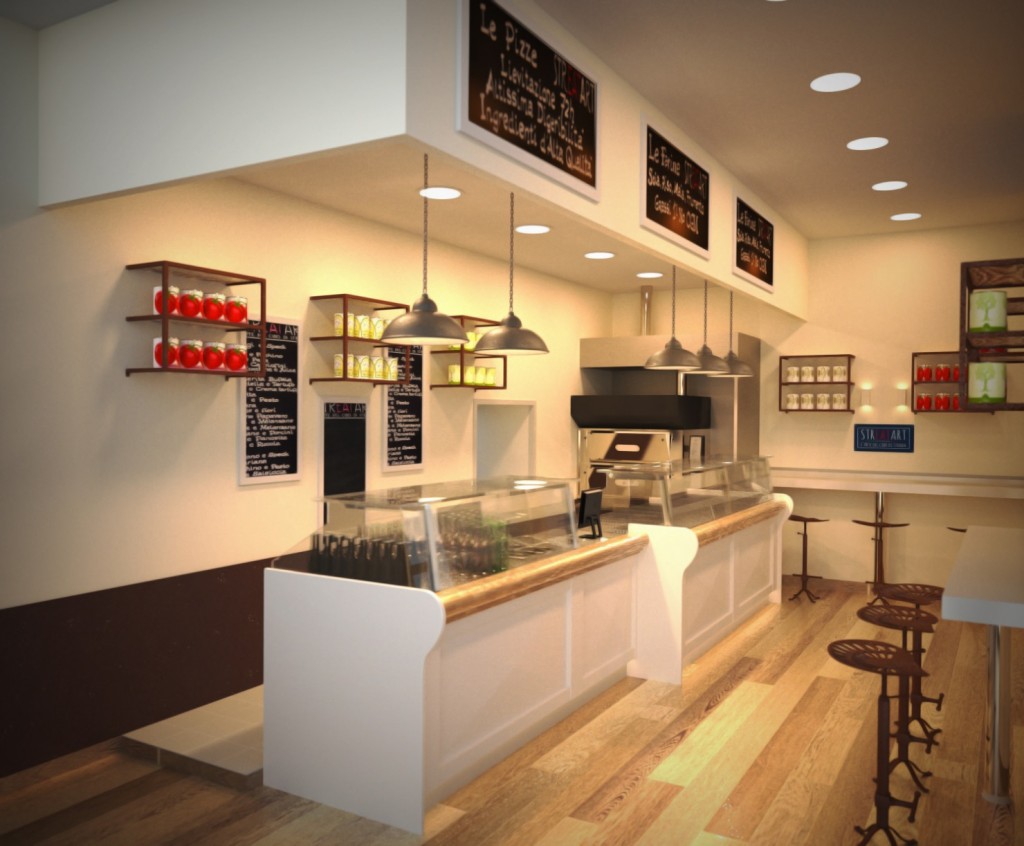
Vignetting effect, third post production touch. A black multiply layer on the image is erased in part by a blur selection. Setting a correct percentage of opacity, the vignetting effect looks fine.

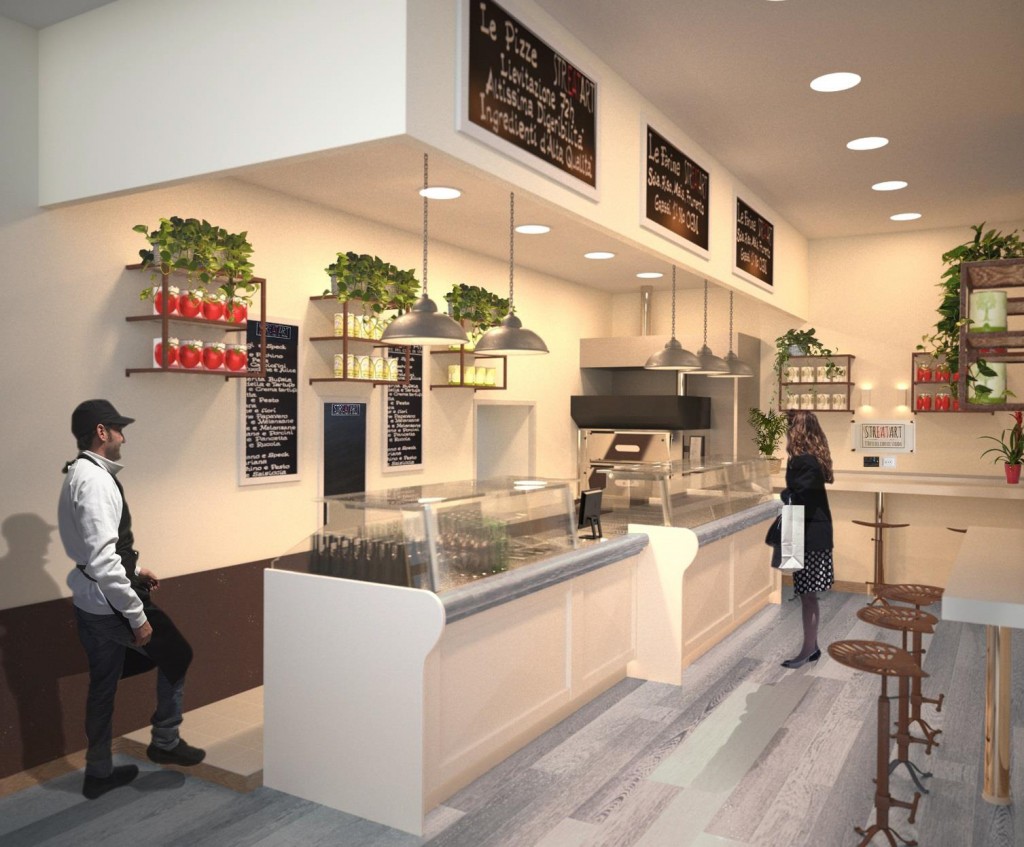
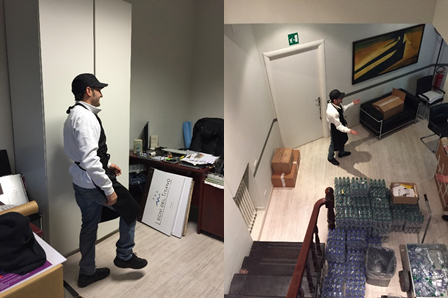
Post Production Part 2 | Population of the scene
To populate the scene, took pictures of the StreatArt staff and inserted them in the final “populated” image. In this case the rendering base is different, this is a second version of that work, and with different kind of optimizations in Photoshop … lights are a bit colder.
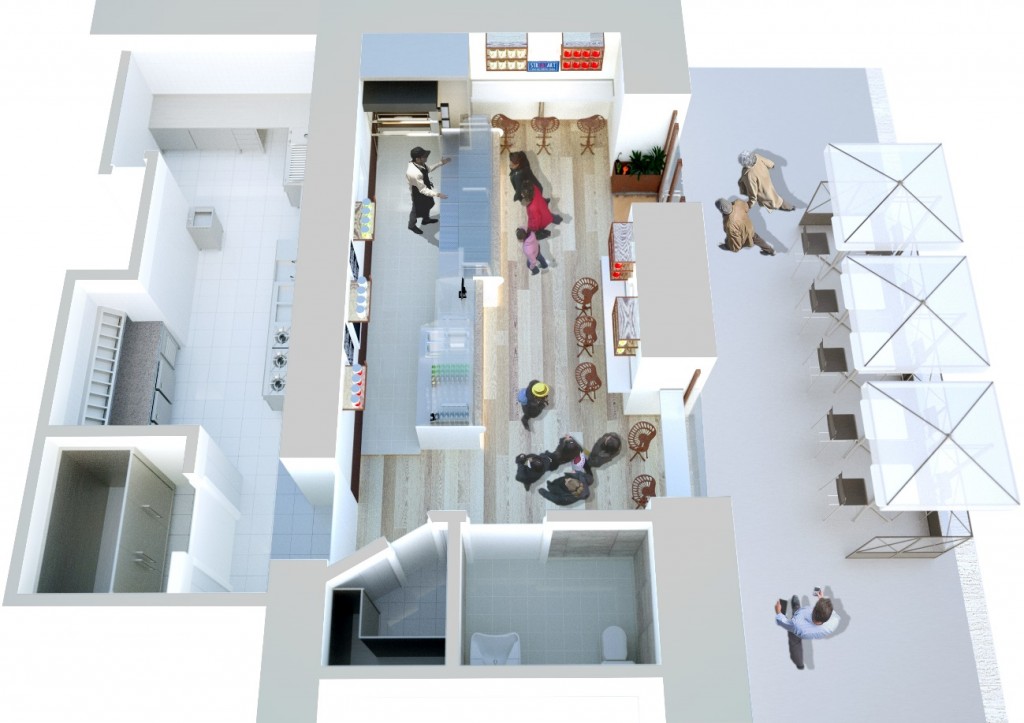
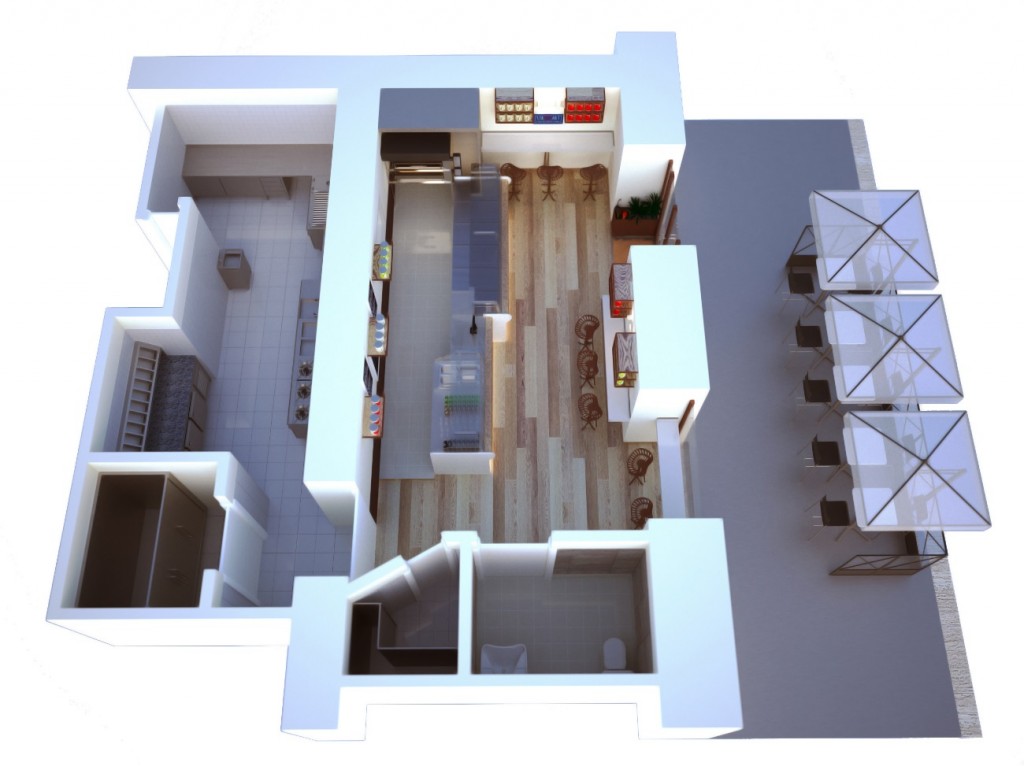
Additional shots
The same file was used for another rendering scene in an axonometric sectional view.
Software used:
Rhinoceros 5 for 3d modeling
Maxwell Render V.3 for rendering
Photoshop CC for Post Production
Hardware used:
Assembled Intel Desktop PC with Windows 7 Home Premium 64 bit – Intel Core i7 – 4790 CPU @ 3.60 GHz (8 CPUs) – 16GB RAM – 6,7 Windows performance index – SSD Crucial
Project credits:
ACMCV Studio Team: Maria Chiara Virgili e Andrea Collesi Architects
Streat Art Staff