The Artist
Joseph Francis began his career in 1985 in the fledgling computer animation department of Manhattan’s R/Greenberg Associates (now RGA Digital Studios) under such CG luminaries as Joshua Pines and Ken “Perlin Noise” Perlin. There he rose to become a designer, CG Department lead and director before moving in 1993 to become VFX Creative Supervisor for the company’s west coast office, RGA/LA (now Imaginary Forces). He left RGA/LA in 1995 to supervise the computer animation for Independence Day (ID4), after which he worked on a freelance basis for various former RGA designers including Bruce Schluter (Greenberg/Schluter), Kyle Cooper (Imaginary Forces, Prologue), and Garson Yu (yU+Co). He has also supervised CG for Pacific Title & Art and Post Logic. Joseph graduated from Duke University with degrees in Computer Science and Studio Art. He lives in Los Angeles with his wife, (video game company Naughty Dog designer) Charlotte Francis, and their daughter, Rowan.
This week, Joseph is our blog guest and will present a gorgeous photo composite project he made with photographer Matthew J. Cherry. Great job Joseph!
The Project
I have been using Maxwell as my primary renderer for visual effects and photo compositing work since it first impressed me its realism a decade ago.
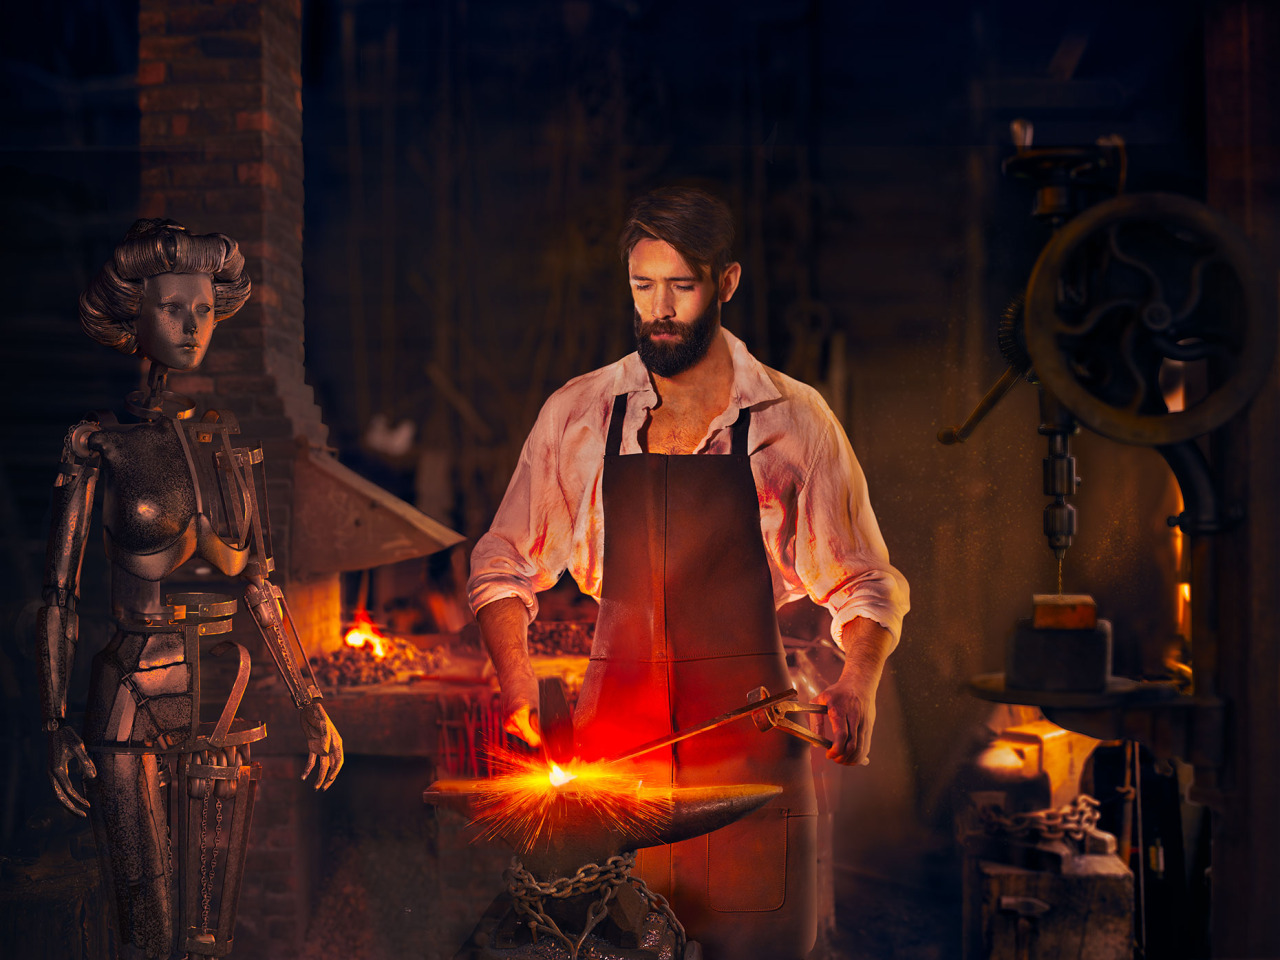
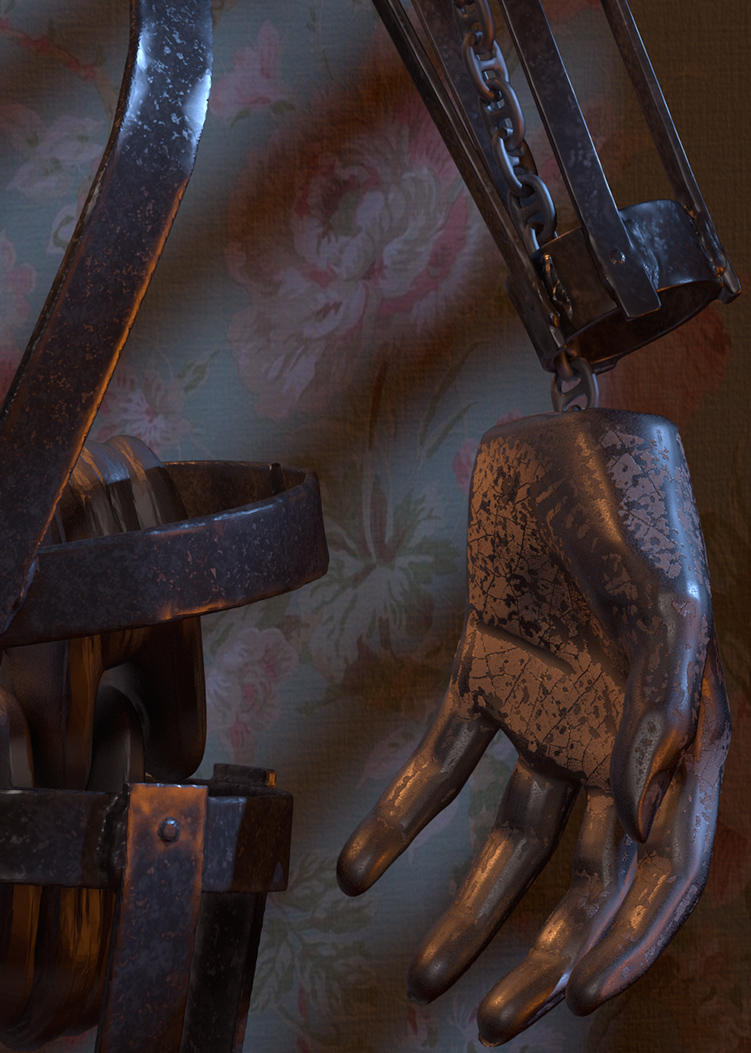
A friend of mine, photographer Matthew J. Cherry, who creates photographs and photocomposites with a narrative quality, has been exploring the increased use of realistic looking virtual elements in his work. He approached me last year to commission a prop for an image he was working on entitled ‘Galatea,’ which was a retelling of the Greek myth in which Pygmalion of Cyprus falls in love with a statue he creates. In an updated twist, Matthew wanted to retell the story with something more like a 19th century blacksmith might create.
DESIGN
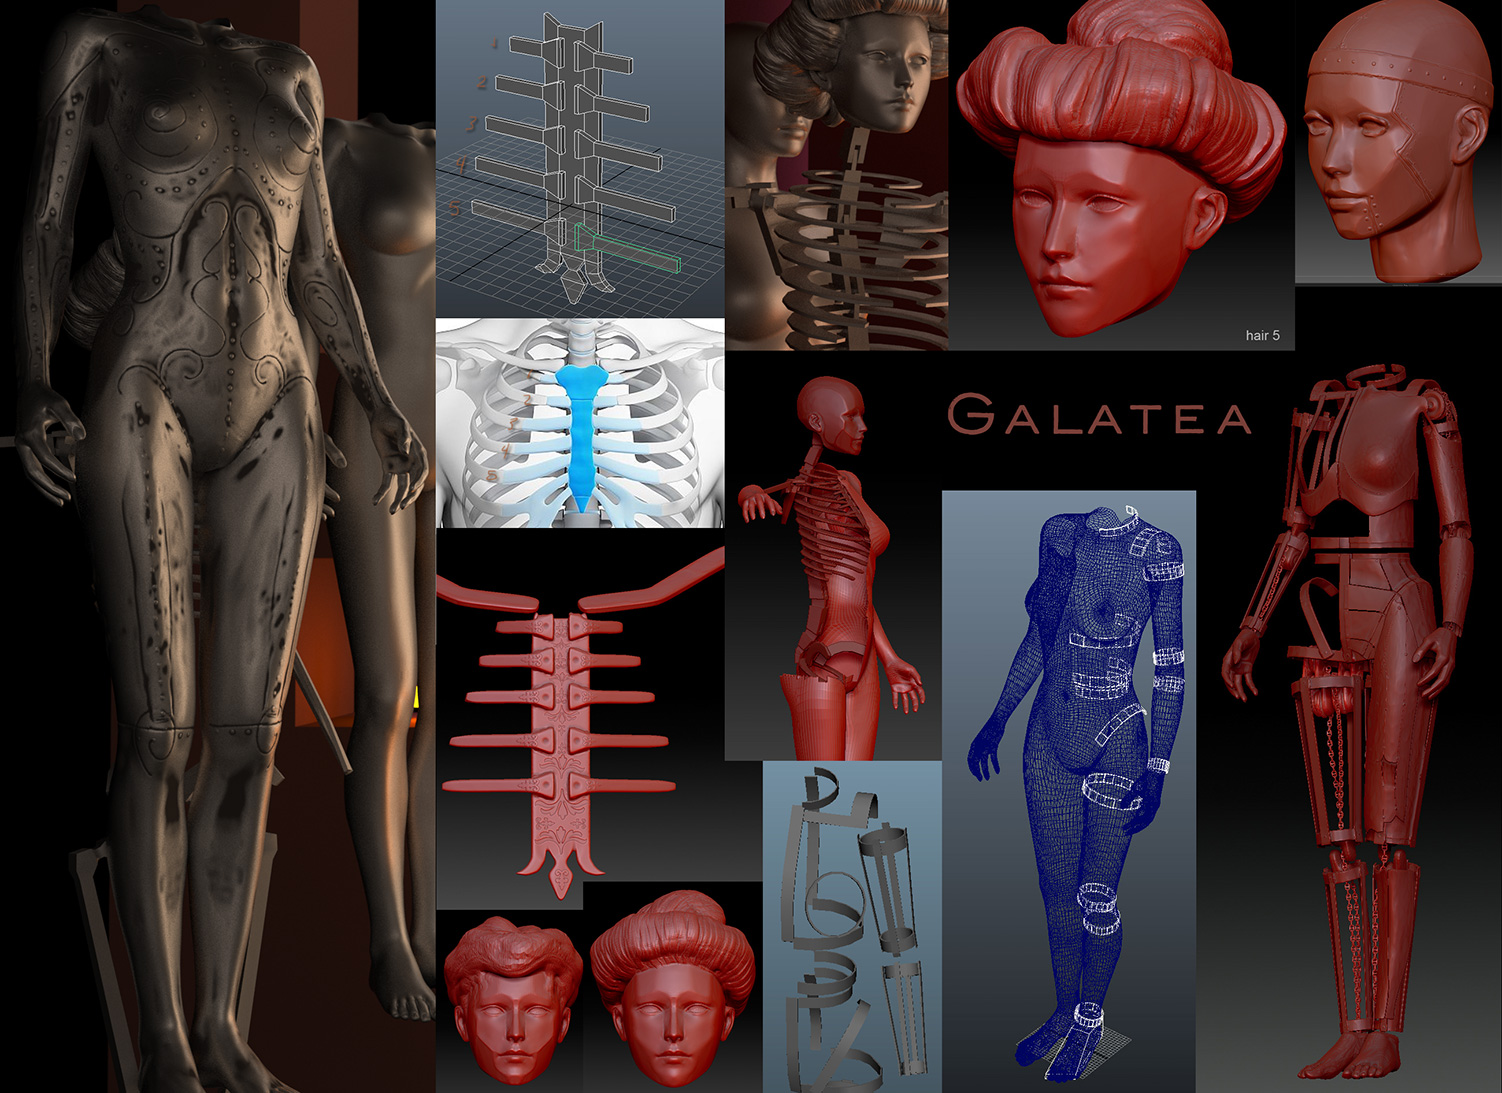
I initially envisioned a figure with an ornate but continuous metal skin, and I pulled together some proposals by using ZBrush to indicate decorative elements on a stock CG figure which I posed in DAZ Studio. My friend Matthew liked the approach, but wanted to see some additional ideas.
In the next design stage I created some internal skeletal elements. I’m something of a student of anatomy, so I modeled the bone structures to approximate the behavior of human bones, but I held back a bit on the accuracy of the imitation since in Matthew’s story a 19th century blacksmith is the purported creator of the Galatea figure, and so his knowledge of human anatomy might be a little more ‘naive.’ We liked this concept of simplification and decided to push it further.
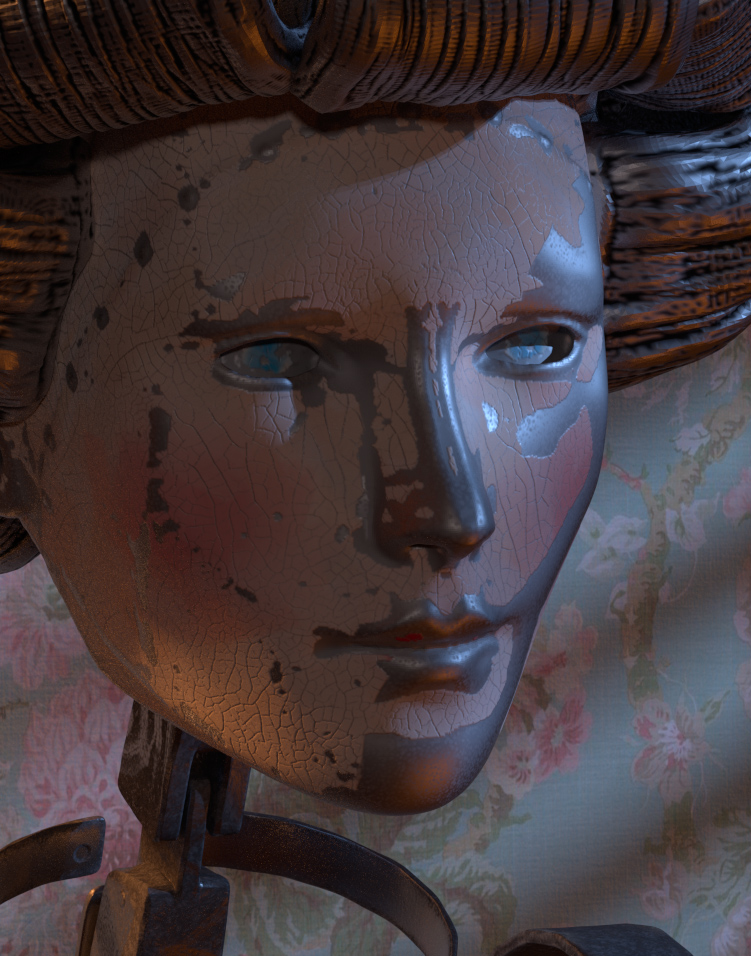
Finally we arrived at the idea of an automaton of the kind that was popular in the 18th and 19th centuries. If you saw the movie ‘Hugo’ you have an idea of what we were going for. These figures usually had cage-like exoskeletons which were often concealed by fabric clothing, so they often lacked a skin except in those places where they extended beyond their garments: the face, the hands and maybe the feet. We decided to add some metal skin to the concept anyway, but the final figure is presented as if only partially constructed, so some parts remain more ‘Hugo’-like while other parts don’t.
MODELS
When I model for my own work, especially when I model for stills, I like to build in a lot of the imperfections at the polygon level. For ‘Galatea,’ I modeled the parts in Maya using simple forms, and then I took them into ZBrush where I dynameshed them, UV mapped them, distressed the surfaces and edges, and created model-based masks to later control cavity dirt and edge shininess in Maxwell.
Masks are extremely useful in Maxwell Render for adding nuance and detail to materials. The technique is simple and it feels something like using Photoshop.
Finally I decimated the polygons into lighter weight triangular meshes. Again, this is perhaps not an ideal modeling method for animation but I like it for my still work. I developed cracked paint displacement maps from scanned panels covered in actual crackle paste. I keep these crackle images in a flickr library and I make them available for others to use under a Creative Commons license. You can find them here.
I often have a bunch of ‘science experiments’ around the house intended to create useful textures for my CG work. I prefer to use displacement maps over normal or bump maps. They may require more system resources but I think the look is worth it. I’ve been slow to adopt ZBush for basic modeling tasks, but I’m impressed with ZBrush 4R7’s new modeling workflow and plan to devote myself to its use much more in future.
MATERIALS
Maxwell doesn’t have a ton of different shaders. It basically has one whose parameters you set in different ways. That may sound inadequately simple but in practice Maxwell materials take into account the important ways in which light is reflected, refracted and scattered by surfaces in the real world, so that while the materials are simple, they are also powerful and represent the real world well.
To make material creation even faster and more artist-friendly, Maxwell has a recommendation system for suggesting settings for any material one might want, and I usually use the materials exactly as the ‘wizard’ (Material Assistants) suggests, because they look great.
But here’s the thing: they don’t look fully great enough ‘right out of the box,’ and shouldn’t be used that way, because real surfaces are not perfectly all one thing of a certain reflectivity or color or transparency. In the real world, objects vary across their surface in material composition, reflectivity, roughness – things like that. This is why any setting in Maxwell that can be specified by a single, simple number can also be specified by a parameter map – and it probably should be. That’s one of the main keys to photorealism. In the animated gif above you can see the difference between a cube dented in ZBrush carrying a basic Maxwell ‘wizard’ recommendation for rough iron, and the same object with an additional Maxwell material layer of dark, diffuse ‘soot’ added to it.
LIGHTING
Maxwell’s light is created to behave like real world light. That’s one of the main reasons Maxwell exists.
If you are a photographer you’ll find all your skills still apply in Maxwell. One of the things my client was particularly struck by was the 32-bit Multilight feature, which allows the artist to change exposures, and even colors, on a light-by-light basis, during or even after the rendering process.
And with 32 bits there are no blown highlights; everything is recoverable. You can even make the adjustments in Photoshop after downloading a free plugin. My client does his own compositing, so I gave him the ‘Galatea’ figure in Photoshop, separated on a per-light basis into lighting contribution layers, and he was able to dial each layer up or down as he liked in his own compositing process. He was even able to attach Photoshop layer masks to the exposure adjustments so as to ‘dodge and burn’ them to his liking in places up and down the figure.
By the time we were done working together he had become a Maxwell Render customer himself, and while he usually works as a practical photographer who doesn’t come from a CG background, he’s made rapid strides as a Maxwell user.
So now when he chooses to add CG to his work he now does all his own material and lighting design and rendering work. He´s an expert himself and I basically I talked myself out of a client! Just kidding 🙂 I have very much enjoyed seeing a friend become another member of the Maxwell community with whom to share new ideas and creative work.